15 Christmas Ornament Craft Ideas for Holiday Fun
Create magical Christmas ornaments with 15 fun DIY craft ideas! Perfect for families, kids, and anyone who loves festive holiday decorating.

Can you smell that? It's the scent of pine needles, hot cocoa, and creative possibilities floating through the air as the holiday season approaches. There's something absolutely magical about handmade Christmas ornaments, isn't there? They transform your tree from simply decorated to deeply personal, telling stories that store-bought baubles never could. Remember those wonky paper snowflakes you made as a kid that your mom treasured forever? That's the power of homemade ornaments. They carry memories, laughter, and love in every glittery fingerprint and crooked ribbon. Whether you're a crafting novice who can barely cut a straight line or a DIY enthusiast with a glue gun permanently attached to your hand, these ornament ideas will spark your creativity and fill your home with handmade holiday cheer. Crafting Christmas ornaments brings families together, creates lasting traditions, and provides therapeutic stress relief during the hectic holiday rush. Plus, they make incredibly thoughtful gifts that recipients will treasure for years, unlike generic store-bought presents that get forgotten by February. This guide walks you through fifteen delightful ornament projects ranging from simple five-minute crafts perfect for toddlers to more elaborate creations that challenge your artistic skills. Let's dive into this festive crafting adventure together and create ornaments that will become cherished family heirlooms.
1. Why Handmade Ornaments Matter
Handmade Christmas ornaments carry emotional weight that mass-produced decorations simply cannot replicate, creating connections across generations and time. Each ornament tells a story about who made it, when, and why, transforming your Christmas tree into a visual family history book. Children develop fine motor skills, creativity, and patience through crafting activities that feel like play rather than structured learning exercises. The process of creating together strengthens family bonds through shared experiences, laughter over glue mishaps, and collaborative problem-solving when projects don't go exactly as planned. Homemade ornaments also represent sustainable decorating choices that reduce consumption while producing unique pieces no money can buy anywhere. You'll save substantial amounts compared to purchasing designer ornaments while creating items infinitely more meaningful to your household. These crafts provide therapeutic benefits during stressful holiday seasons, offering mindful moments focused on creation rather than consumption or obligation. Most importantly, handmade ornaments become treasured keepsakes that children take to their own homes, carrying family traditions forward through generations.
2. Cinnamon Stick Stars
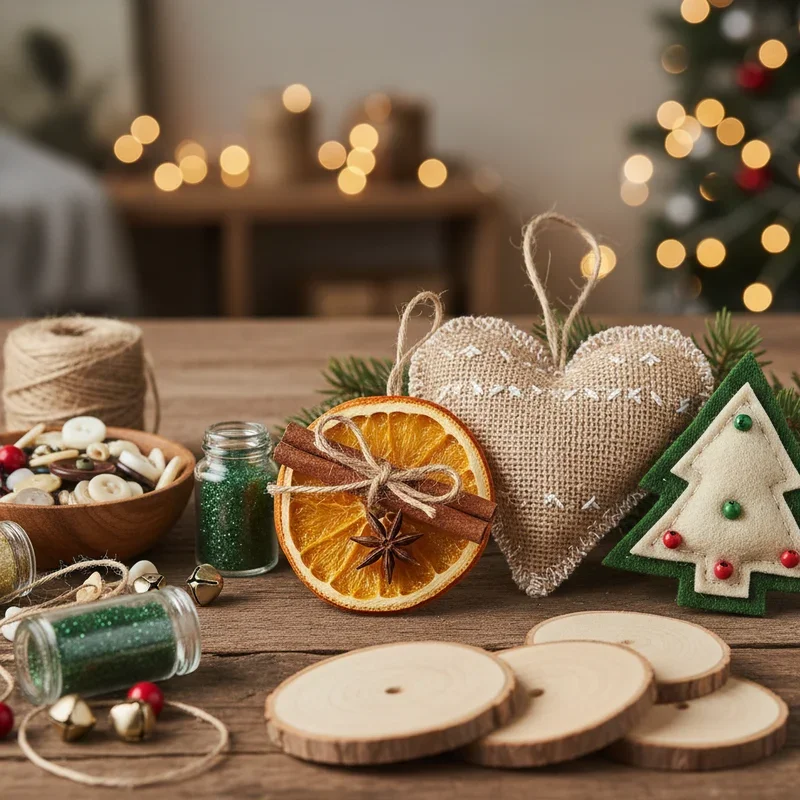
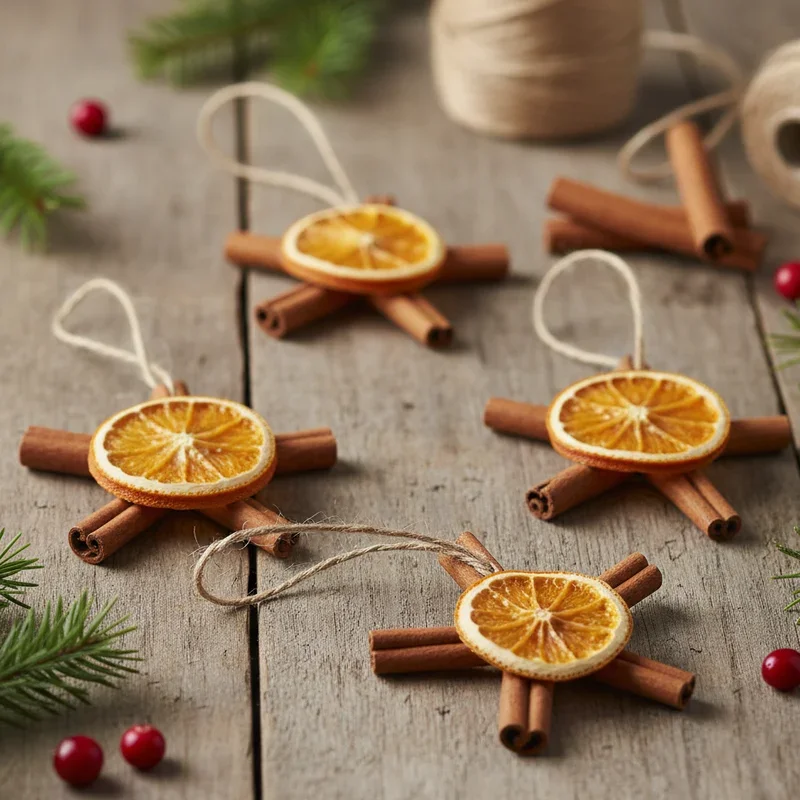
Cinnamon stick stars fill your home with warm, spicy fragrance while adding rustic charm to your Christmas tree or wreaths beautifully. Gather five cinnamon sticks of equal length and arrange them in a star shape, overlapping the ends at five connection points. Use hot glue to secure each intersection, working carefully to create sturdy bonds that will last through many holiday seasons. Tie twine or ribbon around each connection point both for extra security and decorative appeal that enhances the natural aesthetic. Add small embellishments like miniature pinecones, dried berries, or tiny bells at the star's center for personalized touches reflecting your style. The natural brown tones complement any color scheme while the cinnamon scent provides aromatherapy benefits throughout December and beyond. These ornaments work equally well on trees, as package toppers, or strung together as garland for mantels and doorways. Kids can help with arranging sticks while adults handle the hot glue, making this a perfect collaborative family project.
3. Photo Transfer Ornaments
Photo transfer ornaments preserve precious memories directly onto wooden or ceramic surfaces, creating personalized keepsakes that celebrate loved ones and special moments. Purchase unfinished wooden disc ornaments from craft stores or slice branches into rounds for rustic backdrops that showcase your favorite photographs. Print photos onto special transfer paper following manufacturer instructions, then apply them to your ornament surfaces using techniques appropriate for your chosen material. Seal completed transfers with clear acrylic sealer or Mod Podge to protect images from moisture, fingerprints, and the wear of repeated handling. These ornaments make incredibly thoughtful gifts for grandparents showcasing their grandchildren, or commemorate milestone events like weddings, births, or adoptions. You can create themed collections displaying vacation photos, pet portraits, or documenting a child's growth throughout the years on different ornaments. The personalization transforms generic decorations into conversation starters that guests admire and ask about during holiday gatherings. Consider adding dates or names using permanent markers or paint pens to provide context for future generations discovering these treasures.

4. Salt Dough Creations
Salt dough ornaments represent classic Christmas crafting that requires only three pantry ingredients: flour, salt, and water mixed into moldable magic. Combine two cups flour with one cup salt and add water gradually until you achieve play-dough consistency that's neither sticky nor crumbly. Roll dough to quarter-inch thickness and cut shapes using cookie cutters, creating stars, trees, angels, or anything your imagination desires. Remember to poke hanging holes before baking these creations at low temperature until completely hardened and dry throughout. Once cooled, decorate with acrylic paints, glitter, sequins, ribbons, or whatever materials spark your creativity and match your aesthetic preferences. Kids absolutely love this hands-on activity that feels like making cookies but results in lasting decorations rather than eaten treats. The flour and salt mixture costs pennies per batch, making this the most budget-friendly ornament option for large families or classroom projects. Seal finished ornaments with clear varnish to protect decorations and extend their lifespan for years of enjoyment.

5. Fabric Scrap Ball Ornaments
Fabric scrap ball ornaments transform leftover quilting materials or old clothing into colorful spherical decorations that add texture and warmth. Purchase plain Styrofoam balls in various sizes from craft stores as your base structure, then gather fabric scraps in coordinating or contrasting colors. Cut fabric into small squares, approximately two inches each, though exact sizing matters less than having sufficient quantity for complete coverage. Push fabric centers into the foam ball using a butter knife or similar tool, creating gathered, dimensional effects across the entire surface. Continue adding fabric pieces in patterns or random arrangements until no white foam shows through your colorful fabric covering. This forgiving technique allows even young children to participate successfully since there's no wrong way to arrange the fabric pieces. The finished ornaments showcase your family's favorite fabrics, perhaps incorporating pieces from baby blankets, wedding dresses, or beloved worn-out shirts. These lightweight decorations won't weigh down tree branches and create visual interest through their unique texture and handmade appearance.

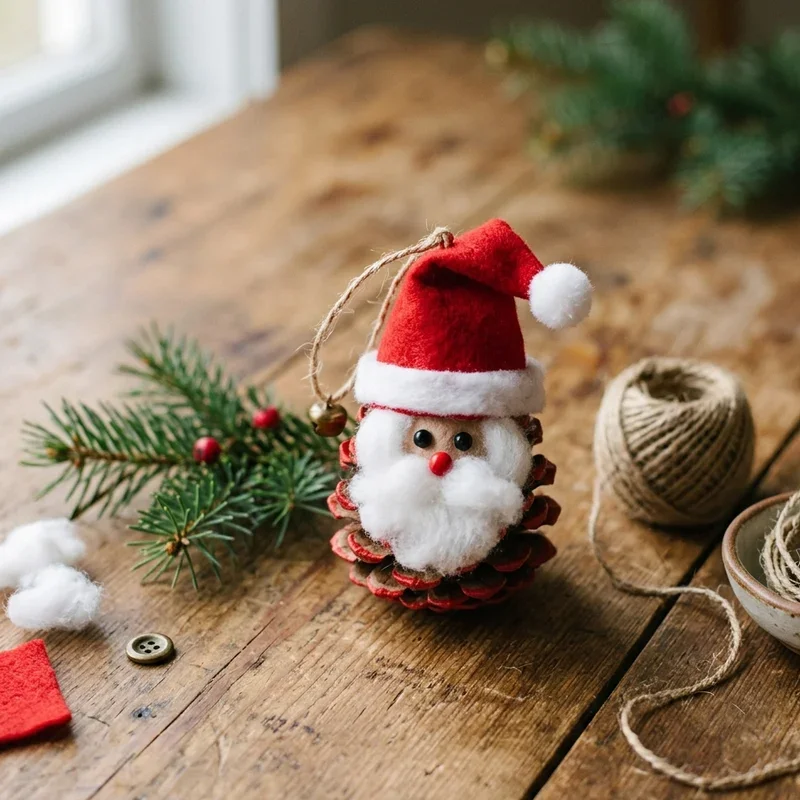
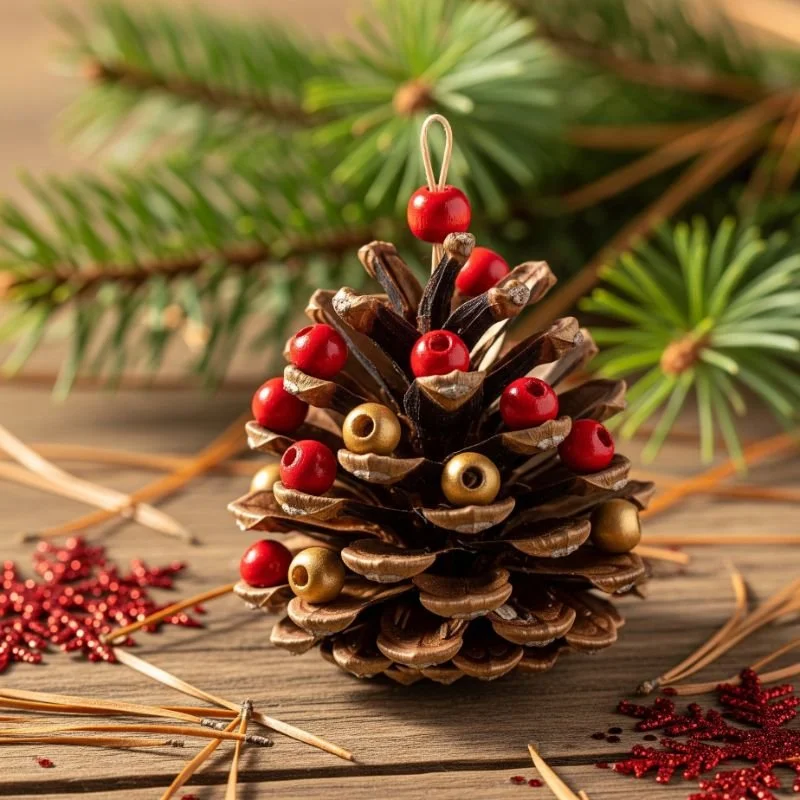
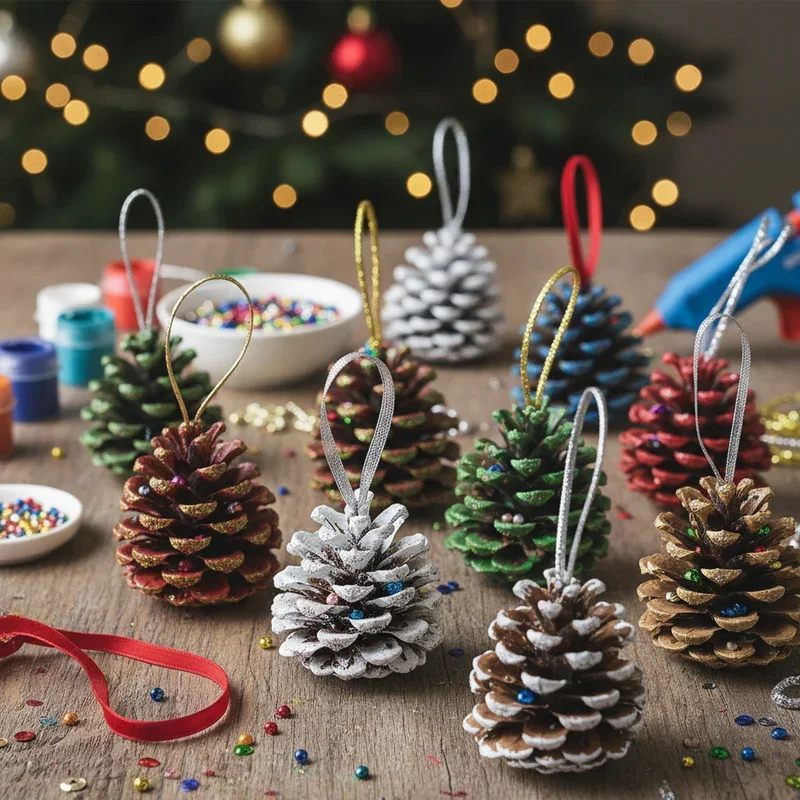
6. Painted Pinecone Decorations
Painted pinecones bring nature indoors while providing blank canvases for creative expression that costs absolutely nothing except paint and imagination. Collect pinecones during autumn walks, choosing fully opened specimens in various sizes for diverse ornament options throughout your tree. Clean pinecones by baking them on low heat to kill any insects and remove sap, ensuring they're completely cooled before crafting. Paint pinecones in traditional holiday colors like red and green, or choose unconventional palettes featuring metallics, pastels, or ombre effects. Add glitter while paint remains wet for sparkly finishes, or let paint dry completely before adding detail work with contrasting colors. Attach hanging ribbons by wrapping wire around top scales or using hot glue for more permanent connections that withstand active households. You can leave pinecone tips unpainted for natural contrast or dust them with white paint simulating snow-covered branches. These rustic ornaments complement farmhouse, woodland, or traditional Christmas decorating styles while introducing organic shapes among manufactured decorations.
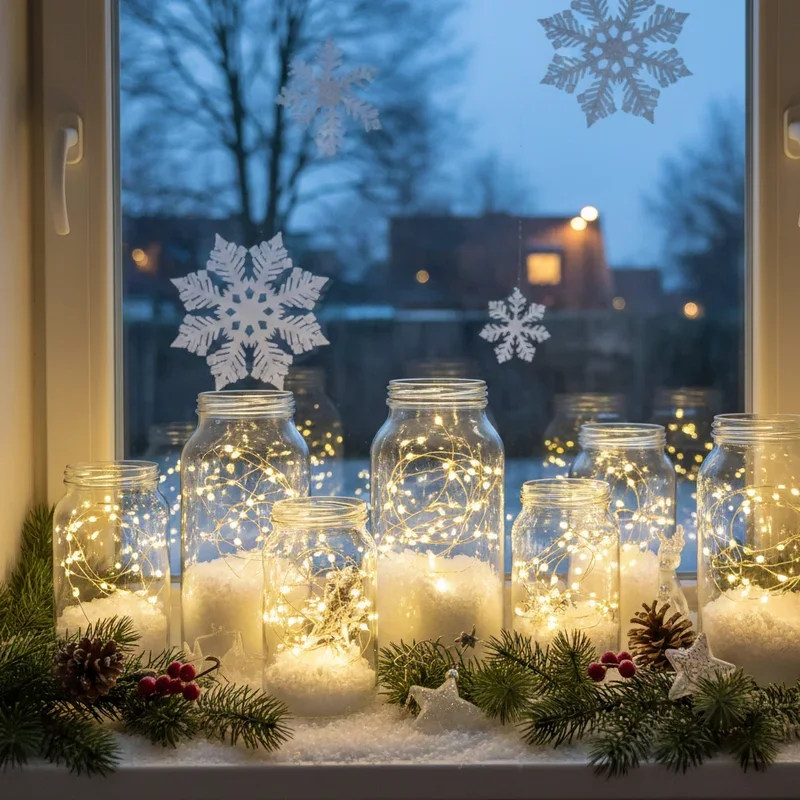
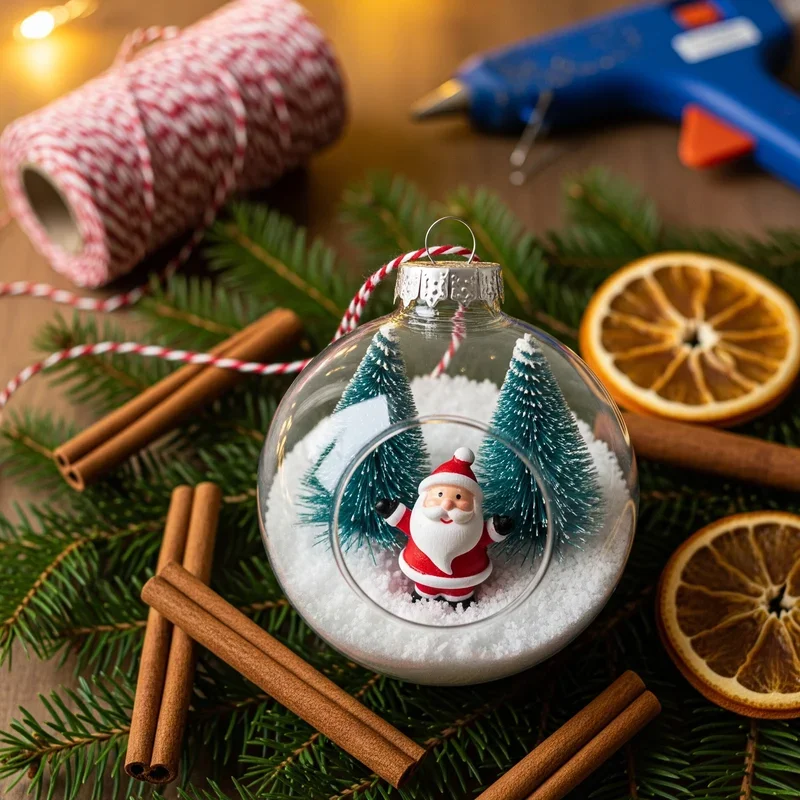
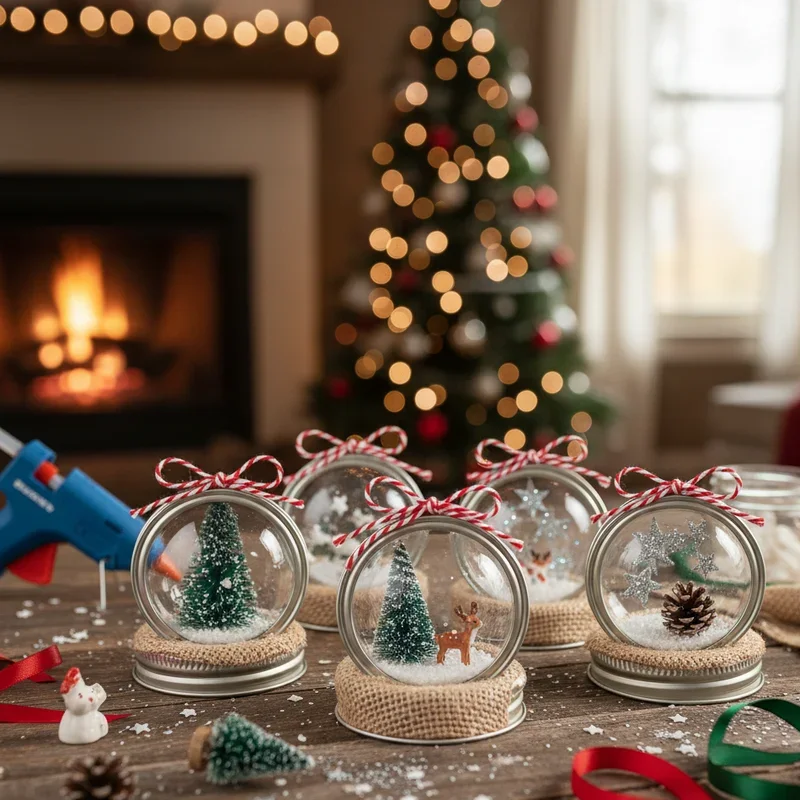
7. Mason Jar Lid Snow Globes
Mason jar lid snow globes combine vintage charm with whimsical winter scenes contained in perfectly portable, unbreakable ornaments ideal for families with children. Remove the flat lid insert from standard or wide-mouth mason jar rings, which become the frame holding your miniature world. Glue small bottle brush trees, plastic animals, or miniature figurines to the inside of the flat lid using waterproof adhesive. Fill the ring portion with fake snow, glitter, or tiny white beads, then carefully seal the lid piece back into the ring. Add ribbon or twine around the ring's outside edge for hanging loops and decorative elements that enhance the rustic aesthetic. These charming ornaments capture classic snow globe magic in forms specifically designed for tree hanging rather than shelf display. Children can choose their own figurines and color schemes, creating personalized winter worlds that reflect their interests and imagination. The clear center allows light to pass through while displaying the scene, creating subtle illumination effects when placed near tree lights. Seal edges with additional glue if you're concerned about glitter escape, though the tight fit usually contains materials effectively.
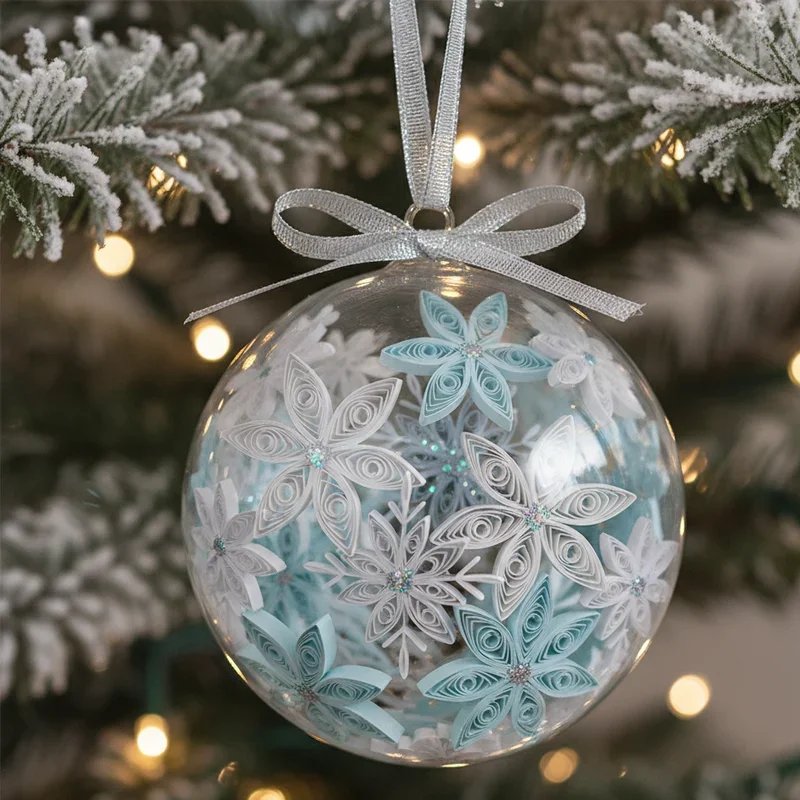
8. Paper Quilled Snowflakes
Paper quilled snowflakes showcase delicate artistry that looks incredibly impressive yet requires only paper strips, glue, and a quilling tool or toothpick. Purchase pre-cut quilling paper strips in white, silver, or icy blue colors, or cut your own from lightweight paper using a paper trimmer. Learn basic quilling shapes like tight circles, loose scrolls, and teardrop forms that combine to create intricate snowflake patterns and designs. Arrange quilled shapes in symmetrical patterns on wax paper, gluing connection points to build outward from a central circle. These lightweight ornaments appear fragile but surprisingly durable when constructed properly and coated with a protective sealant after assembly completes. The paper medium allows endless design possibilities ranging from simple geometric patterns to elaborate, multi-layered snowflakes worthy of museum display. Quilling provides meditative, stress-relieving benefits through its repetitive motions while producing stunning results that impress everyone who sees them. Frame finished snowflakes between two pieces of clear contact paper or laminating sheets for added durability and moisture protection.
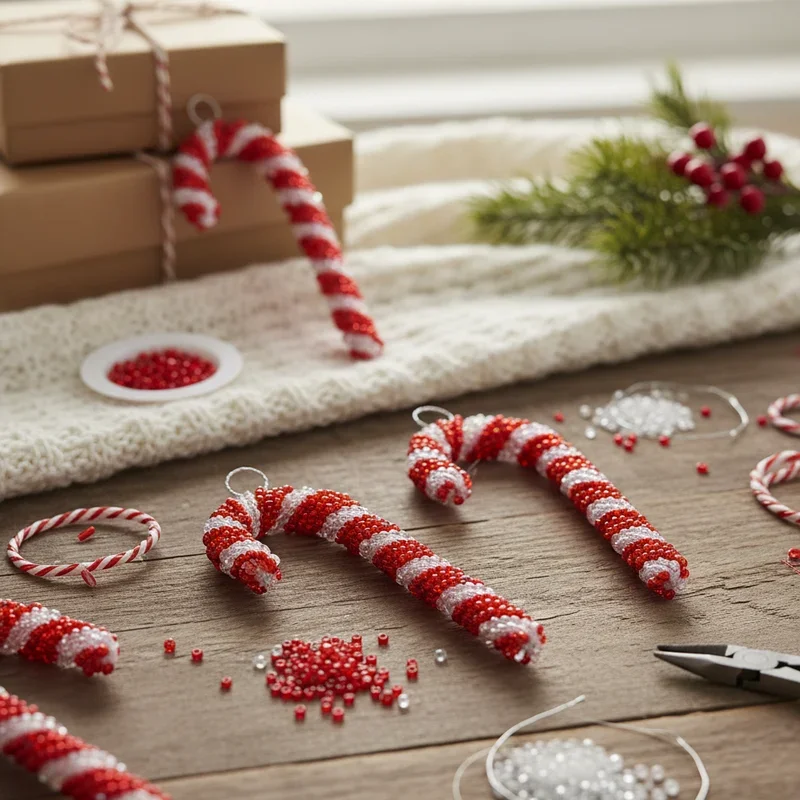
9. Beaded Candy Canes
Beaded candy canes combine jewelry-making techniques with Christmas iconography, resulting in sparkly decorations that catch and reflect tree lights beautifully. Purchase red and white pony beads along with pipe cleaners in coordinating colors to form the structural base for these simple ornaments. String beads onto pipe cleaners in alternating color patterns that mimic traditional candy cane stripes, leaving two inches unbeaded at each end. Bend the beaded pipe cleaner into the classic candy cane hook shape, twisting the unbeaded ends together to secure the curved form. Add a ribbon loop at the top for hanging, or create elaborate multi-strand candy canes by twisting several beaded pipe cleaners together. These kid-friendly ornaments require minimal supervision and allow children to practice patterns, counting, and fine motor skills through engaging play. Experiment with different bead sizes, colors, or patterns to create unique variations on the classic red-and-white theme everyone recognizes. The finished ornaments weigh very little and won't damage delicate tree branches, making them perfect for every tree type.
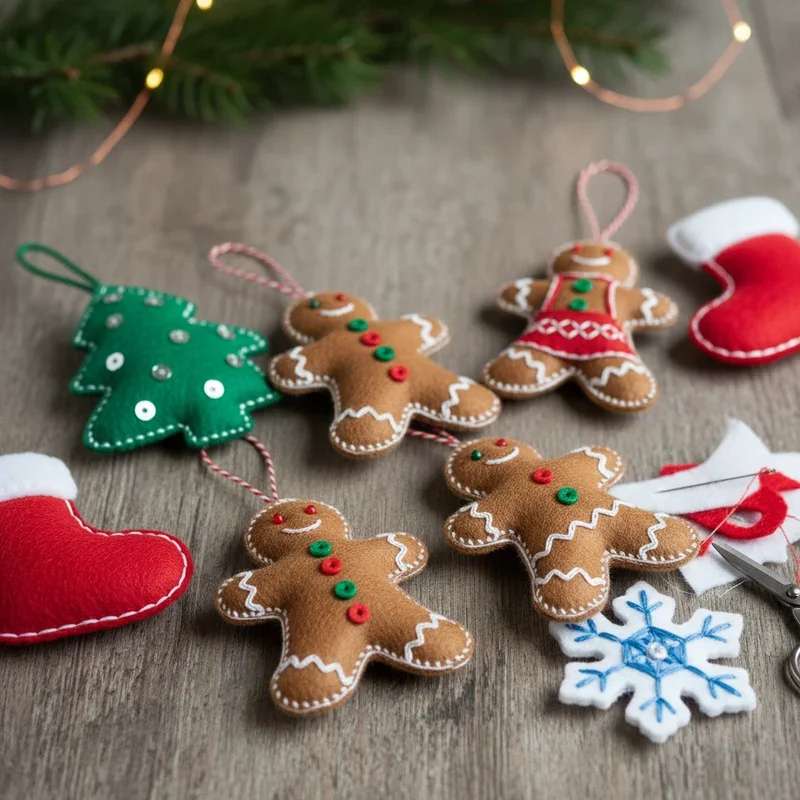
10. Felt Gingerbread People
Felt gingerbread people bring the cookie-decorating experience to your tree without the calories, creating adorable ornaments that never crumble or disappear mysteriously. Cut gingerbread person shapes from brown felt using templates found online or created freehand for charmingly imperfect, handmade character. Decorate felt bodies with dimensional fabric paint, tiny buttons, rickrack trim, or embroidered details that mimic frosting decorations on actual cookies. Add googly eyes and pom-pom buttons for three-dimensional effects that give each gingerbread person distinct personality and charm. Sew or glue two felt pieces together with stuffing between them for dimensional ornaments, or keep them flat for simpler, faster production. Create entire felt gingerbread families with different sizes representing parents, children, and even family pets for personalized tree decorations. These soft ornaments are virtually indestructible, making them perfect for households with toddlers, curious cats, or clumsy adults who knock things over. Personalize each figure with family member names using fabric markers or embroidery, creating keepsakes that document who belonged to your household.
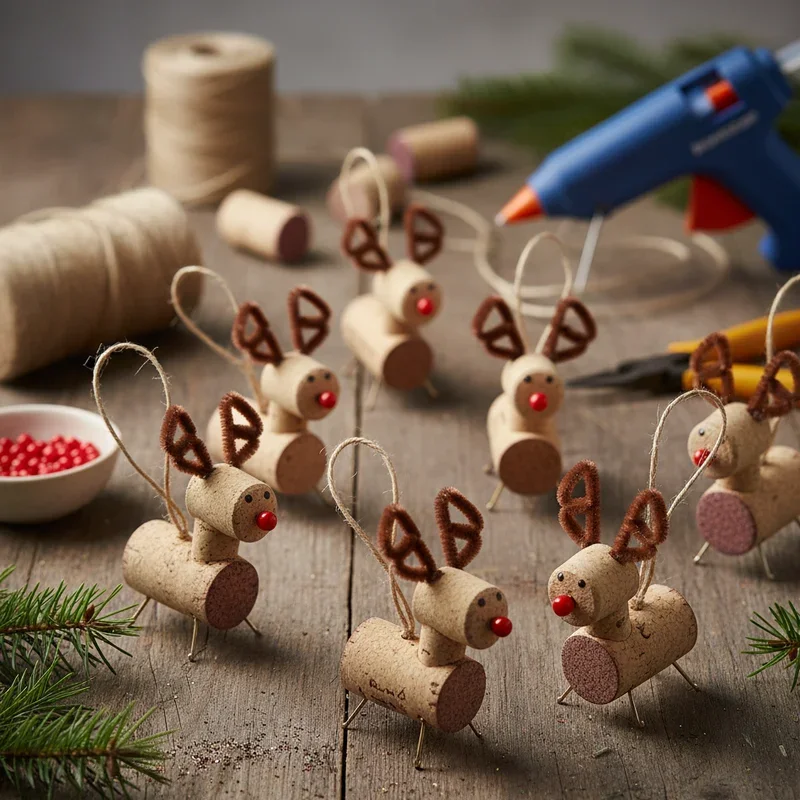
11. Wine Cork Reindeer
Wine cork reindeer recycle beverage remnants into adorable rustic decorations that add whimsy while showcasing your wine consumption proudly or embarrassingly. Gather corks from personal collection or ask restaurants and bars to save them, accumulating enough for your desired number of reindeer ornaments. Use one cork as the body positioned horizontally and cut another cork in half for legs attached with hot glue at perpendicular angles. Attach small twigs, pipe cleaner pieces, or bent wire as antlers, gluing them securely into small holes drilled into the cork top. Add googly eyes and a red pom-pom nose to complete the Rudolph look, or use brown pom-poms for the other eight reindeer. Tie ribbon around the reindeer neck both for decoration and to create the hanging loop for tree placement and display. These lightweight ornaments showcase creativity in material repurposing while maintaining a cohesive natural aesthetic throughout your holiday decorating scheme. Kids can help with assembly while adults handle cutting, drilling, and hot glue application for safety.
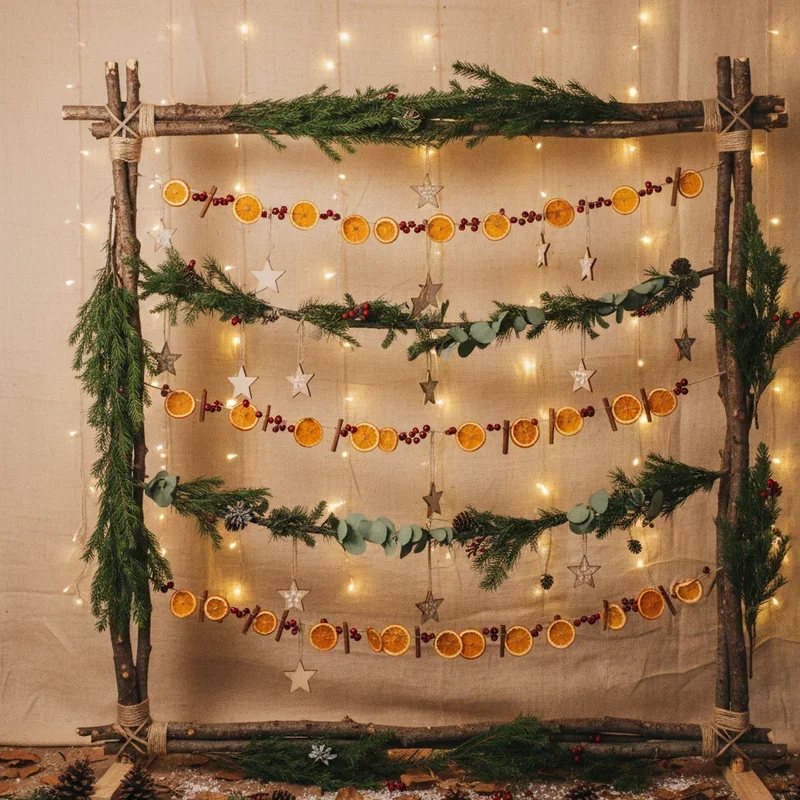
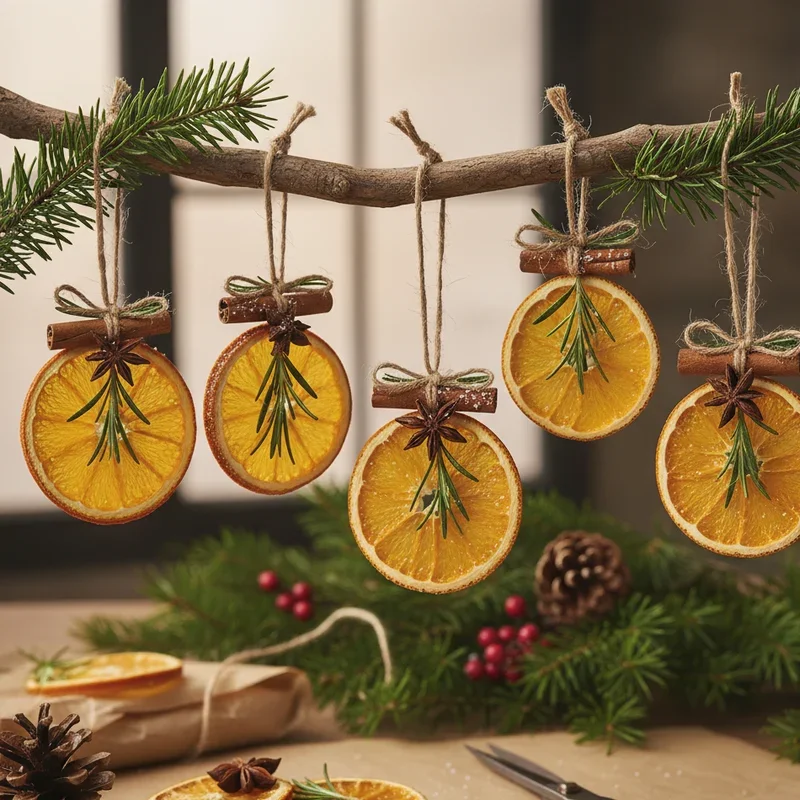
12. Dried Orange Slice Ornaments
Dried orange slice ornaments infuse your home with natural citrus fragrance while adding beautiful translucent circles that glow when backlit by tree lights. Slice oranges, lemons, or grapefruits into quarter-inch rounds, removing any seeds and patting slices dry with paper towels before processing. Dry citrus slices in a low-temperature oven for several hours, flipping periodically until completely dehydrated but not burned or browned. Thread ribbon, twine, or wire through the dried slices for hanging, or incorporate them into larger ornament designs featuring cinnamon sticks and evergreen sprigs. The natural preservation process maintains bright colors while creating lightweight decorations that last multiple seasons when stored properly in dry conditions. These organic ornaments complement farmhouse, Scandinavian, or natural Christmas decorating styles while adding wonderful scent that synthetic air fresheners cannot replicate. Spray dried slices with clear acrylic sealer to extend their life and prevent breakage, though some people prefer the unfinished natural appearance. Combine different citrus varieties for colorful variety, creating ornament collections showcasing the full spectrum from pale yellow to deep orange hues.
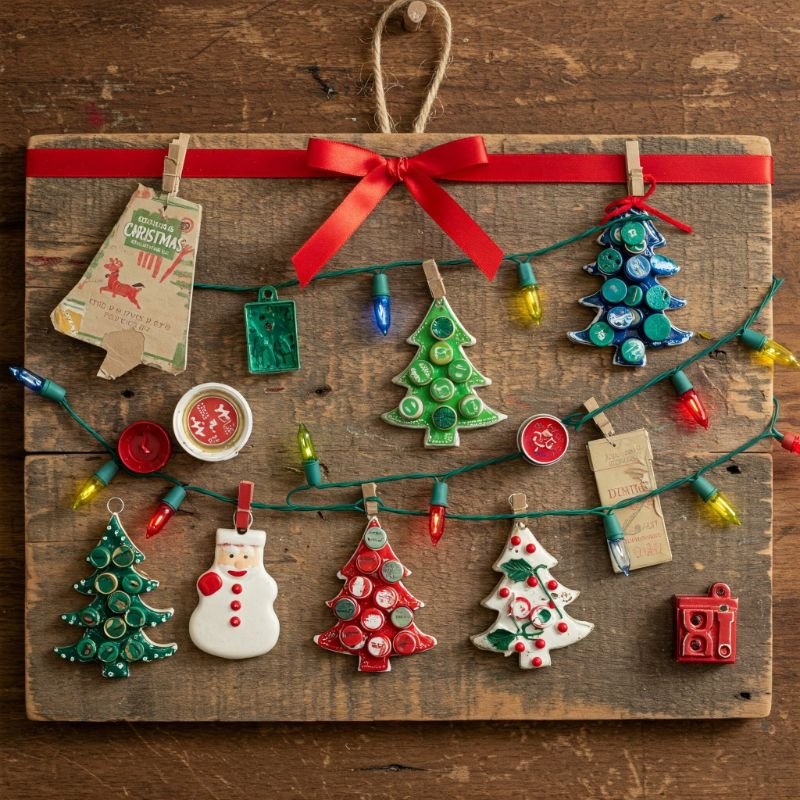
13. Button Tree Ornaments
Button tree ornaments transform humble notions into cheerful decorations that showcase your button collection or provide purpose for those random extras accumulating mysteriously. Stack buttons in graduated sizes from largest at bottom to smallest at top, threading them onto wire, strong thread, or thin dowels. Secure the button stack with glue between layers, creating stable tree shapes that won't shift or separate during handling and hanging. Top your button tree with a star-shaped button, small bead, or tiny bow for the finishing touch that completes the Christmas tree silhouette. Use all one color for elegant monochromatic trees or embrace rainbow chaos with every color mixed together in joyful celebration. These simple ornaments work wonderfully as last-minute crafts when unexpected guests arrive or you need additional decorations quickly without store trips. Attach hanging loops to the top button or smallest bead, using strong thread or wire that can support the combined weight. Kids can help select and arrange buttons while adults handle the threading and gluing for younger crafters needing supervision.

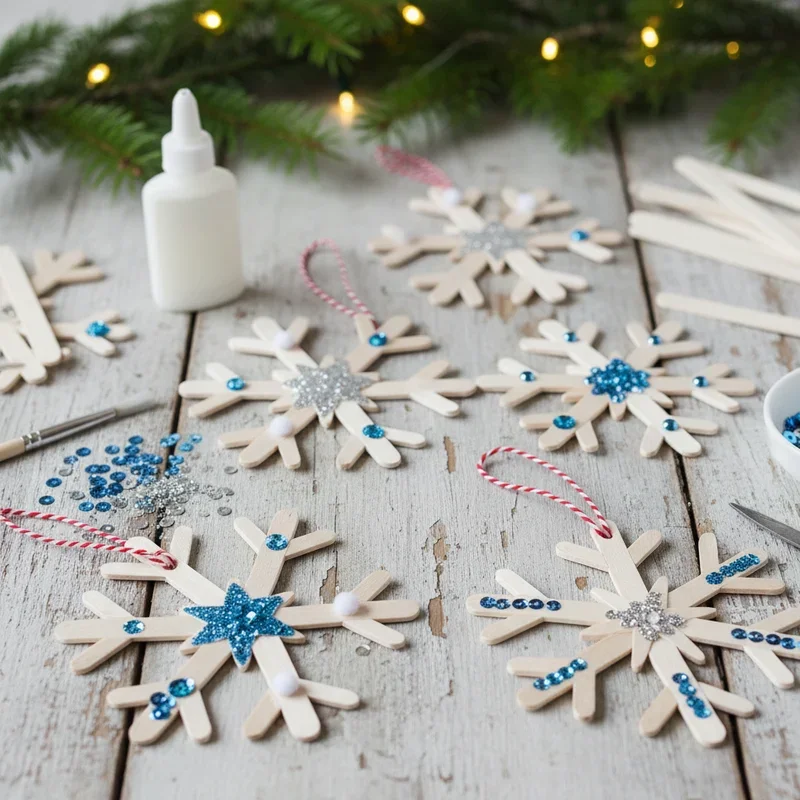
14. Popsicle Stick Snowflakes
Popsicle stick snowflakes offer endless design possibilities using inexpensive materials available at any craft store or saved from summer treats consumed months ago. Arrange craft sticks in snowflake patterns featuring six arms radiating from a central point, gluing intersections securely with hot glue or craft glue. Paint snowflakes white, icy blue, or silver before decorating with glitter, sequins, tiny beads, or other embellishments reflecting your personal style. Layer different sized sticks or add additional sticks between main arms for more elaborate, dimensional snowflakes featuring complex geometric patterns. These sturdy ornaments withstand rough handling from children and pets, making them practical choices for active households where delicate decorations wouldn't survive. Experiment with different glue application points to create unique snowflake designs, since no two natural snowflakes match and neither should yours. Add ribbon or twine loops for hanging, or glue magnets on backs to create refrigerator decorations that transition between display locations. The neutral wood tone works with any color scheme, or paint provides opportunities for vibrant, non-traditional holiday color palettes.
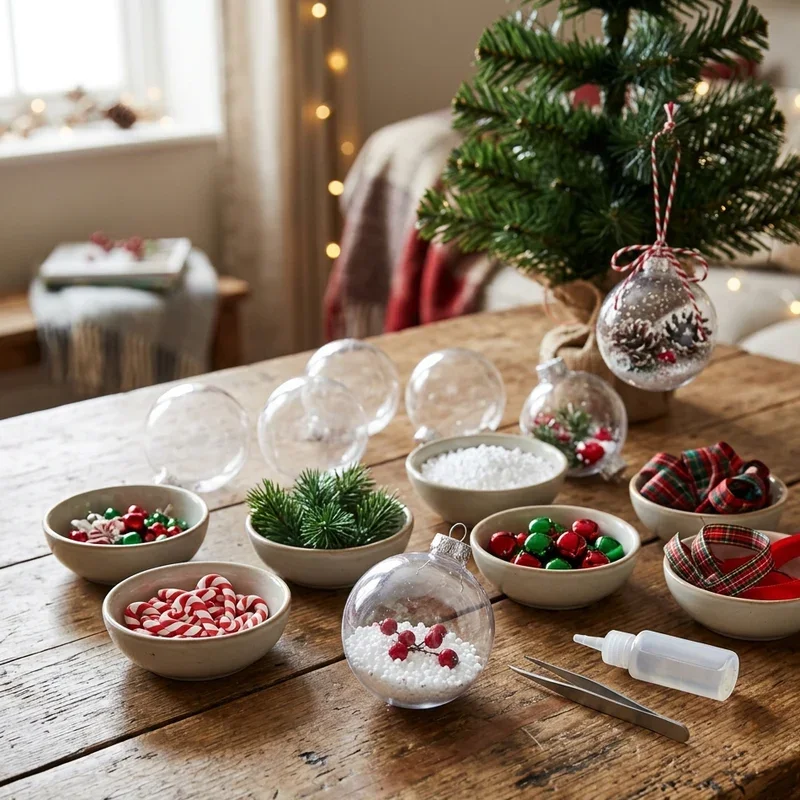
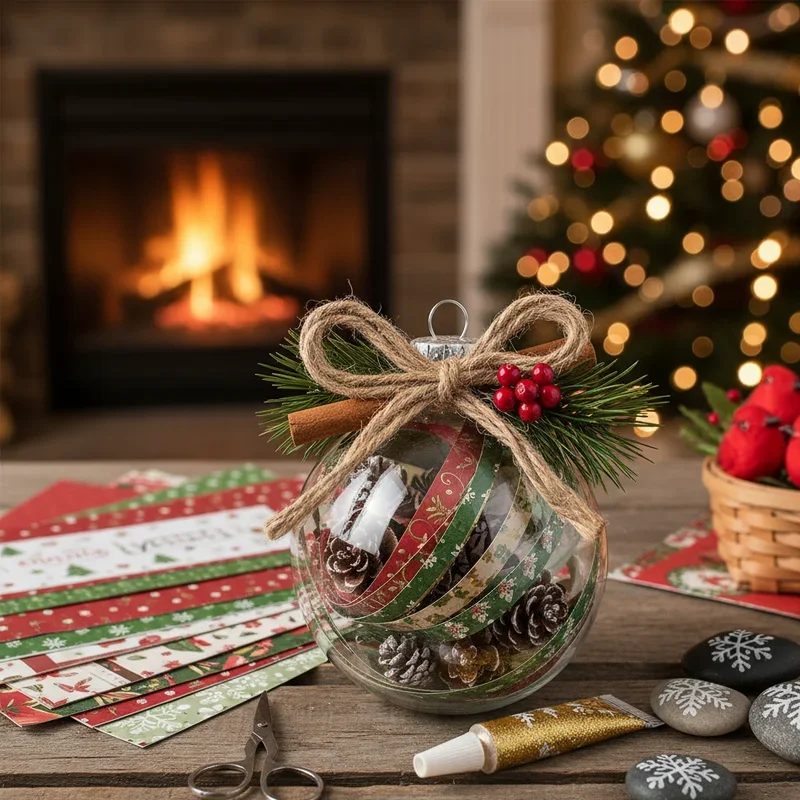
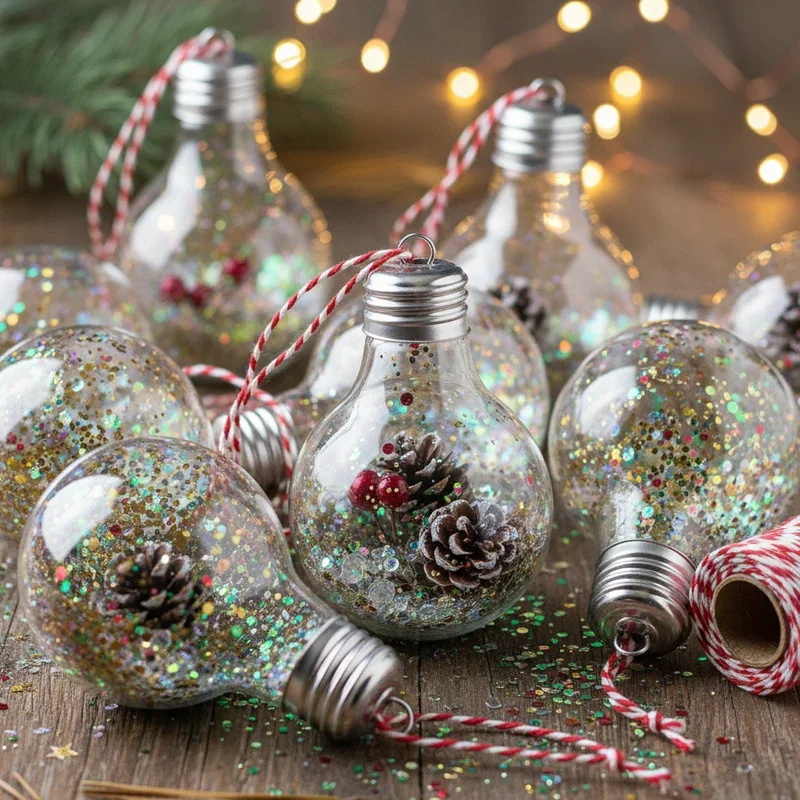
15. Glitter-Filled Clear Bulbs
Glitter-filled clear bulbs create sparkly, personalized ornaments that catch light magnificently while allowing easy customization matching any color scheme you envision. Purchase clear plastic or glass ornaments with removable tops from craft stores, choosing various sizes for dimensional variety throughout your tree. Pour liquid floor wax or clear glue into the bulb interior, swirling to coat all surfaces before adding your chosen glitter colors. Shake glitter inside the coated bulb, rotating to ensure even coverage across the entire interior surface without bald patches remaining. Pour excess glitter back into its container, then set the ornament opening-down on paper towels while glue dries completely overnight. Replace the ornament top securely, adding ribbon or decorative wire for hanging and additional visual interest at the ornament crown. Combine multiple glitter colors for ombre effects, striped patterns, or confetti-like mixtures that create dynamic visual interest and dimension. These nearly indestructible ornaments survive drops that would shatter traditional glass decorations, making them perfect for homes with children or pets. Personalize bulbs further by adding names, dates, or small objects like bells before sealing for completely unique family treasures.
Conclusion
Creating handmade Christmas ornaments transforms holiday decorating from obligation into joyful tradition that strengthens family bonds and creates lasting memories. These fifteen craft ideas offer options for every skill level, age group, and available time commitment during busy December schedules. Start with simple projects that build confidence, then graduate to more complex creations as your enthusiasm and abilities grow naturally. Your handmade ornaments will become cherished family heirlooms that future generations treasure, telling stories about who you were and what mattered most.
Read next: 15 Craft Ideas for Christmas to Make Your Holidays Special
Frequently Asked Questions
Q1: What's the easiest Christmas ornament craft for young children?
Salt dough ornaments and painted pinecones work perfectly since they're forgiving, tactile, and produce successful results.
Q2: How can I preserve handmade ornaments for many years?
Seal ornaments with clear acrylic spray or varnish, store in protective containers, and handle gently annually.
Q3: What materials do I need to start ornament crafting?
Basic supplies include glue gun, scissors, ribbons, paint, glitter, and chosen project-specific materials like felt or beads.
Q4: Can I make ornaments without spending much money?
Absolutely! Use natural materials like pinecones, dried oranges, and repurposed items like wine corks or buttons.
Q5: When should I start making Christmas ornaments?
Begin crafting in October or November to avoid December stress, creating a relaxed, enjoyable creative experience.
Stay up to date with our latest ideas!