15 Craft Fair Table Set Up Ideas to Attract Buyers
Transform your craft fair booth with 15 proven table setup ideas that attract buyers and boost sales. Expert tips inside!

Picture this: you've poured your heart into creating beautiful handmade products, loaded up your car at dawn, and arrived at the craft fair buzzing with excitement. But then reality hits like a ton of mismatched tablecloths. Your neighbor's booth looks like it belongs in a magazine, while yours resembles a garage sale aftermath. Sound familiar? Here's the truth: your craft fair table setup can make or break your entire day, turning casual browsers into eager buyers or sending them scurrying to the next booth. Think of your display as a silent salesperson, working tirelessly to tell your brand story while you're busy charming customers. Whether you're a craft fair rookie still figuring out which end of the tablecloth goes up, or a seasoned vendor looking to refresh your setup, these ideas will transform your table from wallflower to showstopper. Ready to create a display that practically sells itself?
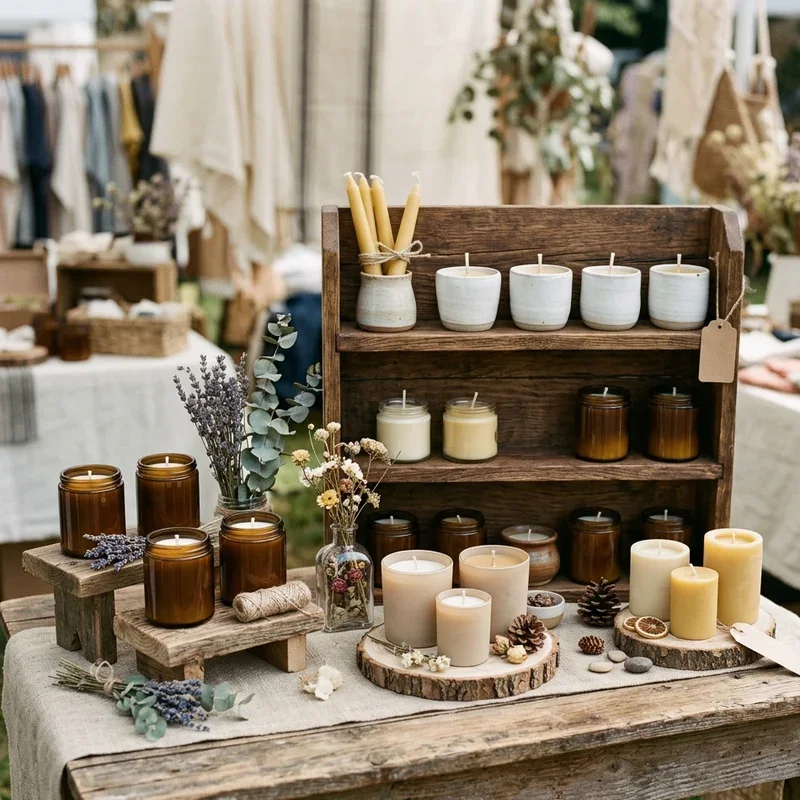
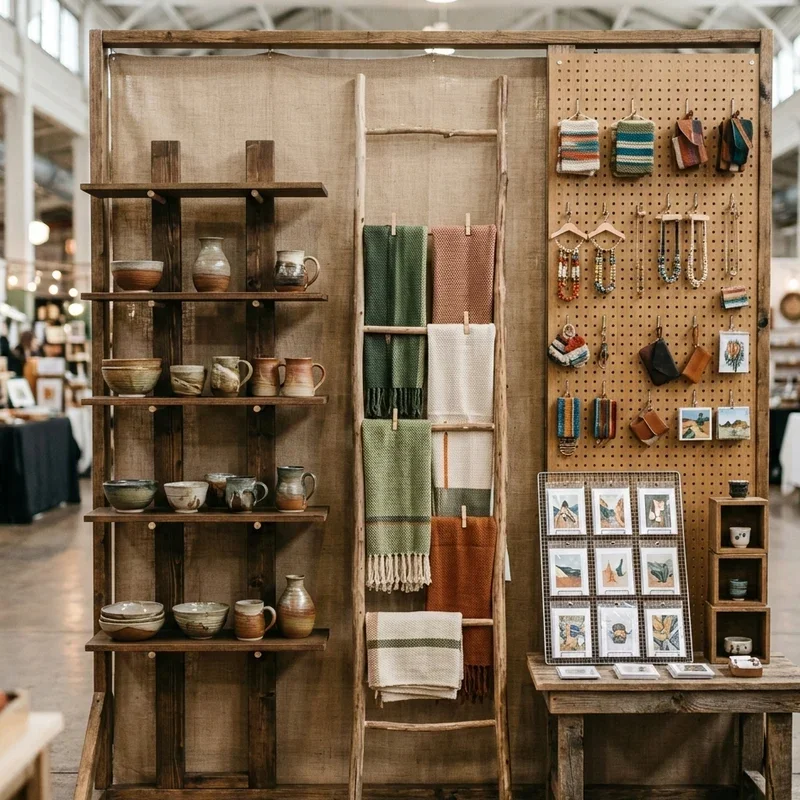
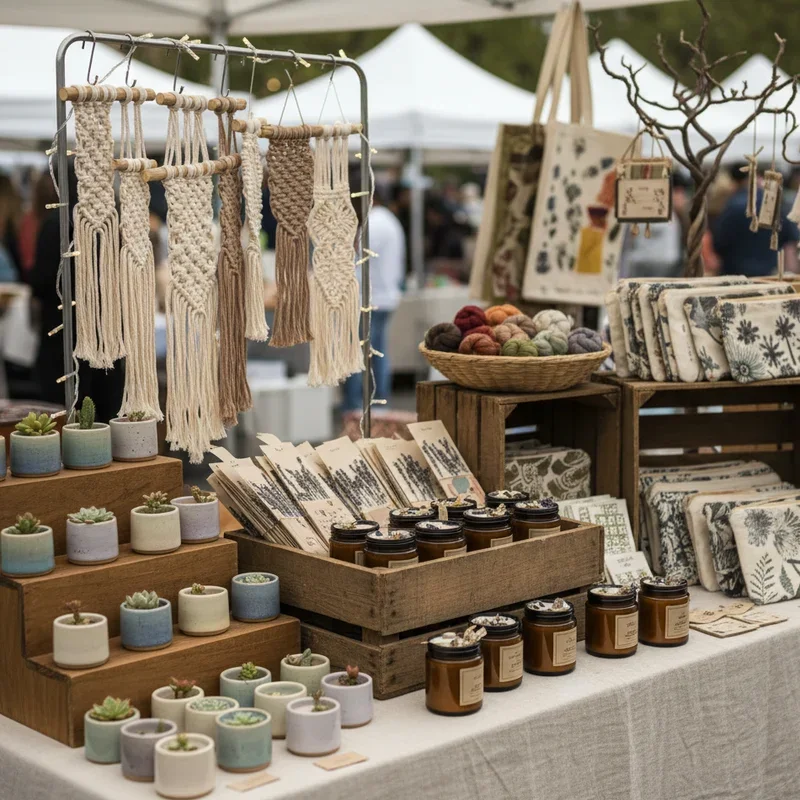
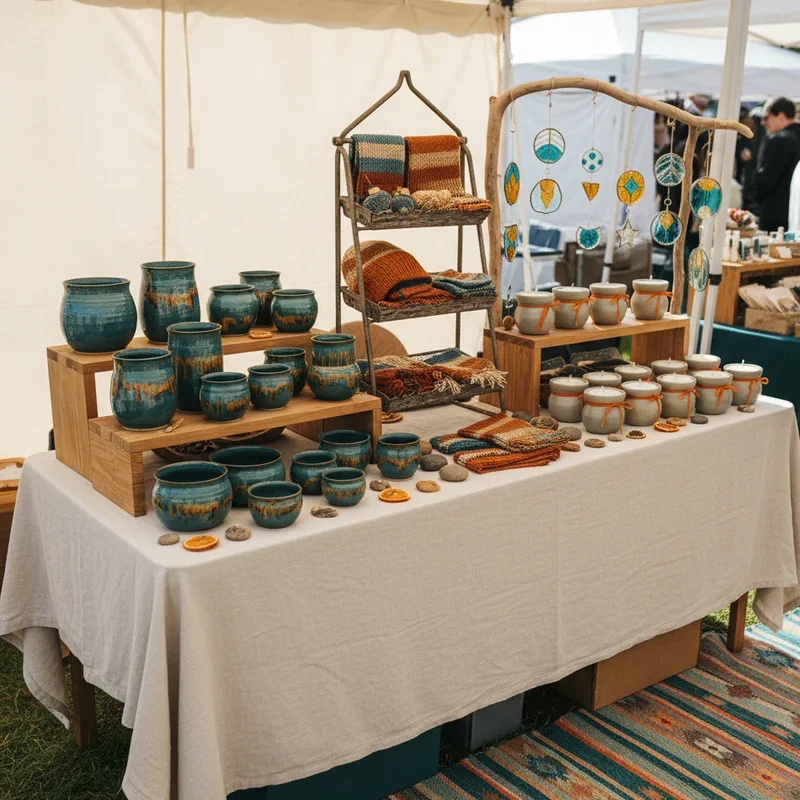
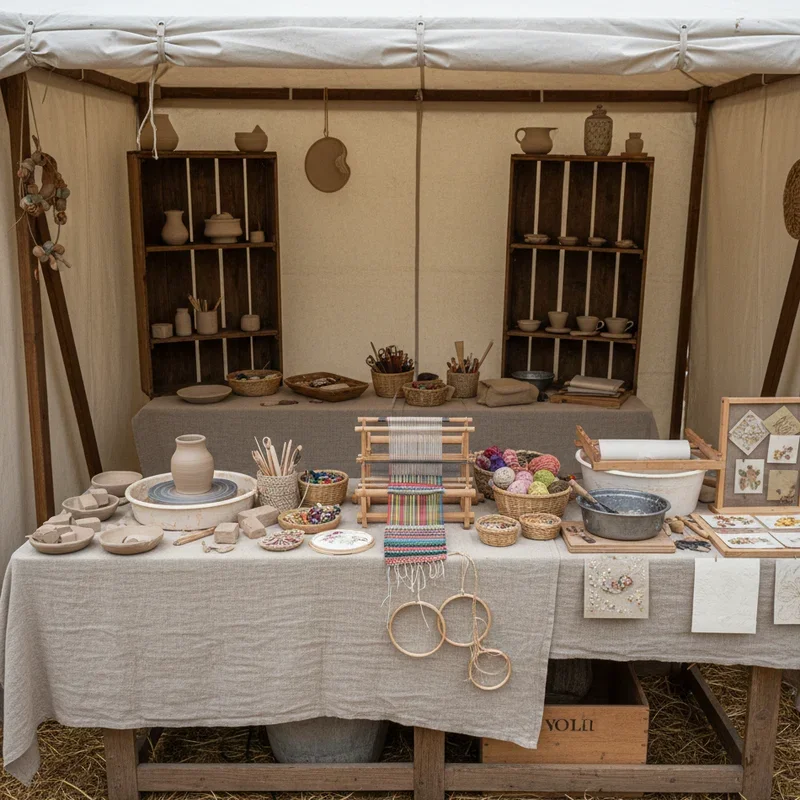
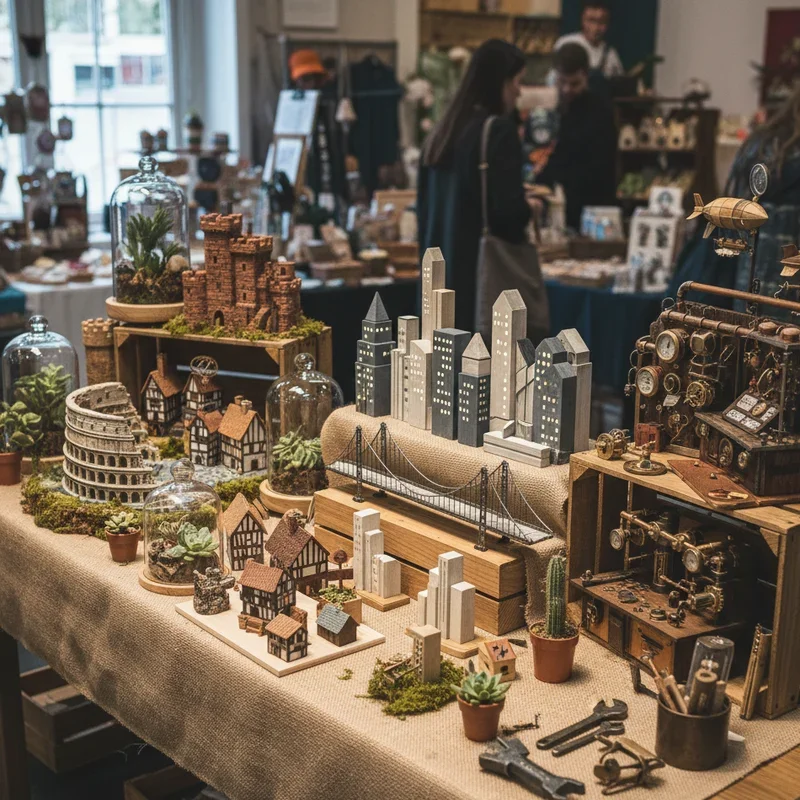
1. Create Vertical Height with Display Risers
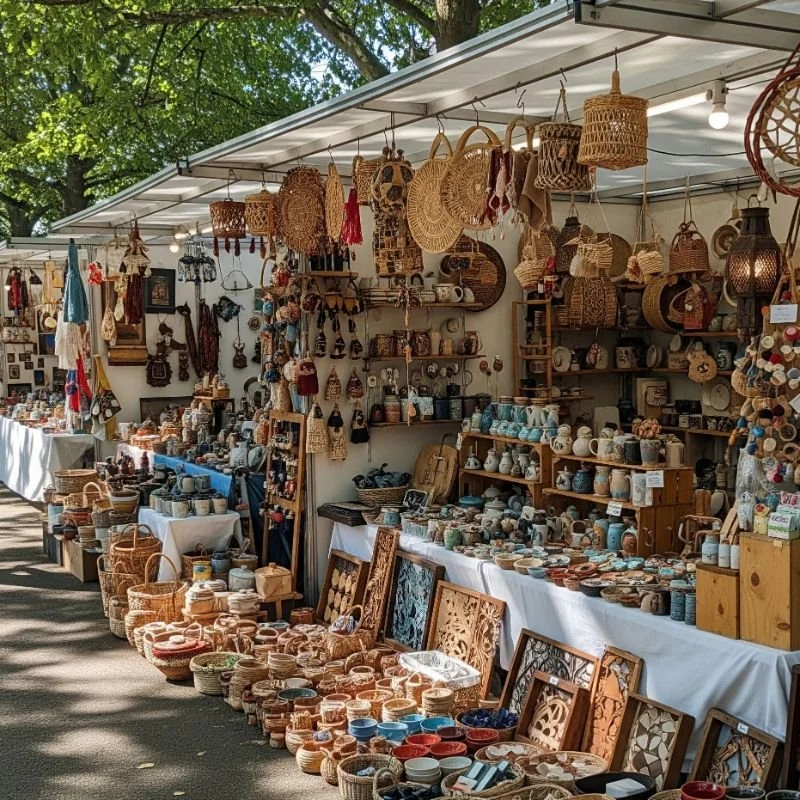
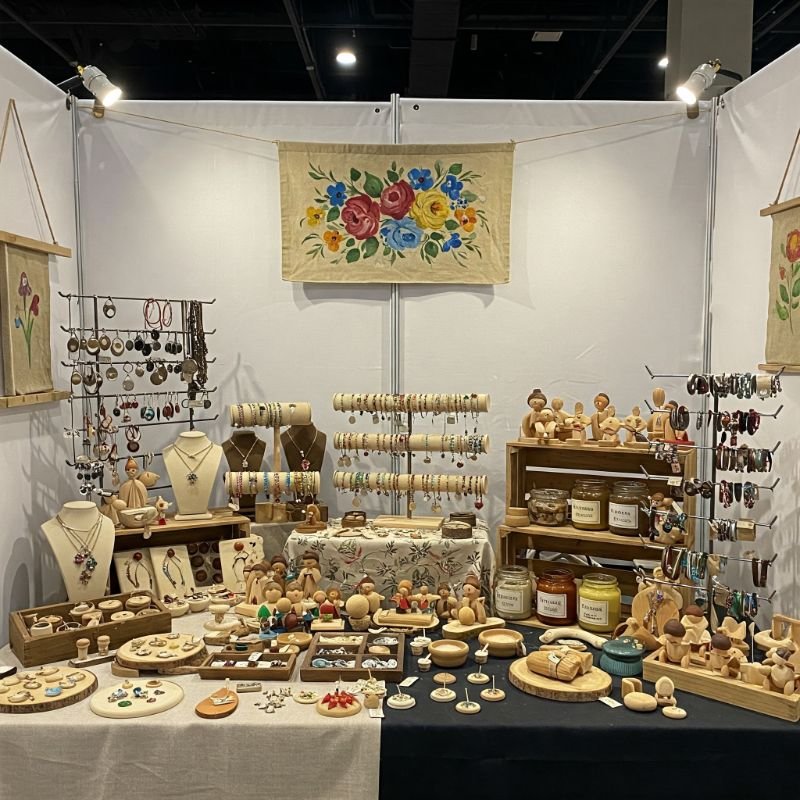
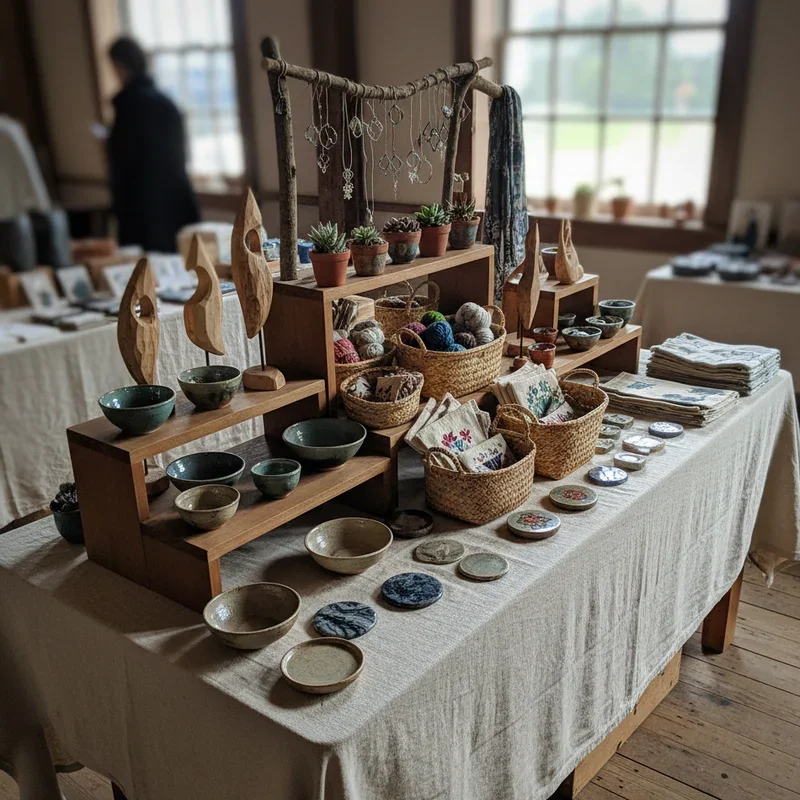
Stop letting your products lie flat like pancakes when they could be standing tall like skyscrapers! Vertical displays draw eyes from across the crowded fair, acting like beacons for your beautiful creations. Use wooden crates, acrylic risers, or even sturdy books covered with fabric to create multiple levels on your table. This technique works especially well for jewelry, small pottery, or any items that might get lost in a sea of flat displays. Think of your table like a city skyline; varied heights create visual interest that keeps shoppers engaged. Stack risers at different heights, placing your star products at eye level where they're impossible to ignore. The magic happens when customers can see everything without having to bend, lean, or dig through piles. Your back will thank you too, since elevated displays mean less stooping during setup.
2. Layer Your Tablecloths for Depth
Forget that sad, single tablecloth barely covering the legs of your folding table! Layering fabrics creates a professional, boutique-like foundation that whispers "quality" before customers even see your products. Start with a floor-length base cloth that completely hides table legs and any storage boxes underneath. Add a shorter contrasting overlay, perhaps in a complementary color or pattern that ties into your brand. The layers create dimension and visual weight that anchors your entire display. Consider textures like burlap for rustic crafts, velvet for luxury items, or crisp linen for modern pieces. This simple technique transforms a basic table into a sophisticated retail space. Pin or clip fabrics to prevent wind mishaps at outdoor venues, and always bring extras for quick changes if spills happen.
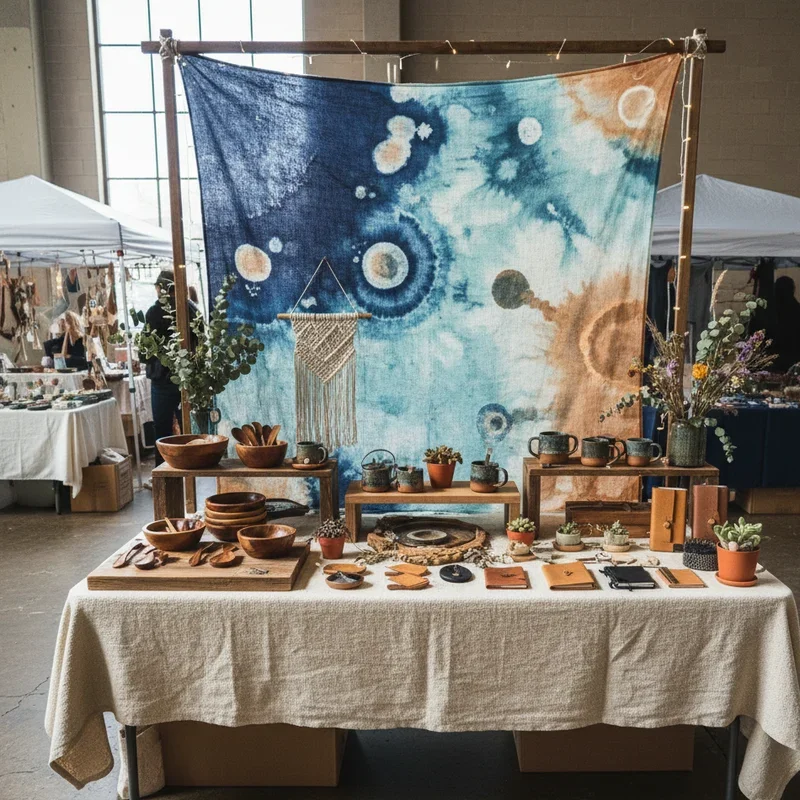
3. Design an Eye-Catching Banner Backdrop
Your banner is like a billboard that works overtime, announcing your brand while creating a professional backdrop that frames your entire setup. Invest in a retractable banner stand or create a fabric banner that hangs behind your table, displaying your business name, logo, and perhaps a tagline that captures your craft's essence. Keep text large enough to read from at least ten feet away, because squinting customers rarely become buying customers. Choose colors that complement your products without overwhelming them. This vertical element serves double duty by blocking distractions from neighboring booths while establishing your space as a distinct shopping destination. Weather-resistant vinyl works great for outdoor events, while fabric banners photograph better for those inevitable social media shots. Include your website or social handles subtly at the bottom for tech-savvy shoppers.
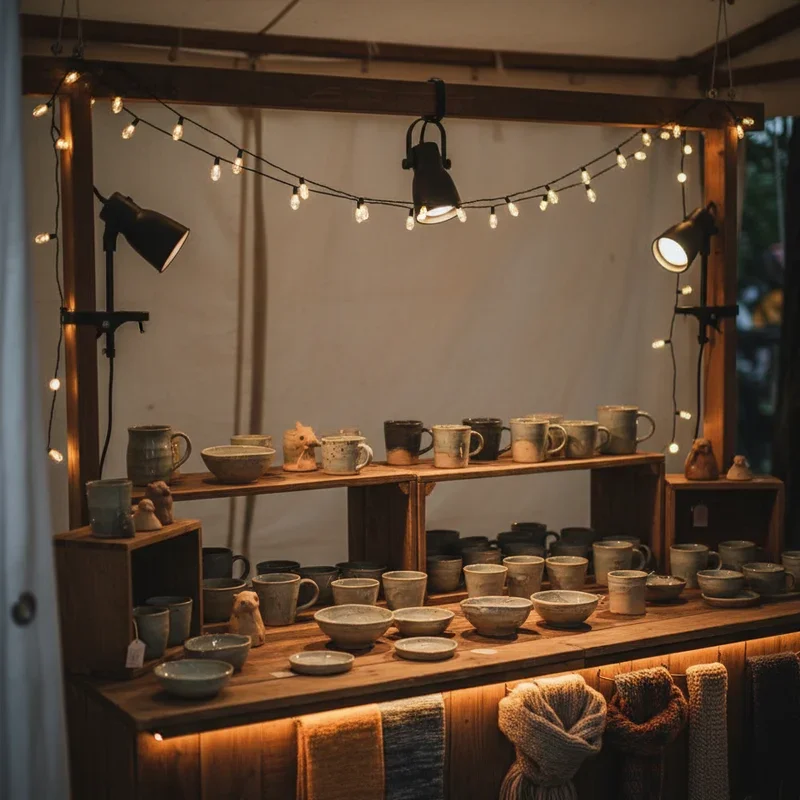
4. Use Strategic Lighting Solutions
Never underestimate the power of good lighting to transform your humble craft fair table into a glowing showcase of artistic brilliance. Battery-operated LED strips tucked under display shelves create museum-quality spotlighting that makes products pop. Fairy lights woven through displays add magical ambiance that draws people like moths to flames. Clip-on spotlights highlight featured pieces or demonstrate product details that might get lost in dim convention centers or shady outdoor spots. The right lighting literally makes your products shine, revealing true colors and craftsmanship that overhead fluorescents murder. Warm white lights flatter most products, while cool lights work better for silver jewelry or modern designs. Always pack extra batteries and have a backup plan, because dead lights equal dead sales.
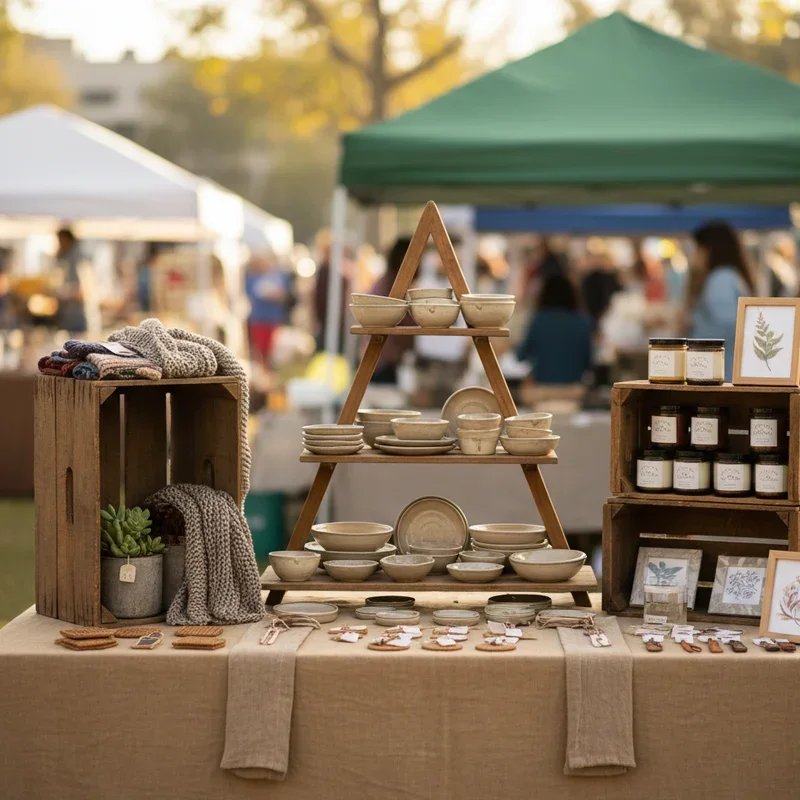
5. Implement the Triangle Display Method
Retail psychology meets geometry when you arrange products in triangular formations that naturally guide the eye and create visual harmony. Place your tallest item at the apex, with progressively shorter items forming the triangle's base, creating a mountain-like display that feels balanced and intentional. This method works whether you're arranging individual products or grouping different display elements. Our brains find triangles pleasing and memorable, making your booth stick in shoppers' minds long after they've walked by. Create multiple triangles across your table, overlapping them slightly for complex visual interest. Use odd numbers of items (three, five, seven) within triangular arrangements, as even numbers can feel static. This principle applies to everything from soap displays to painting arrangements, making it universally useful regardless of what you're selling.
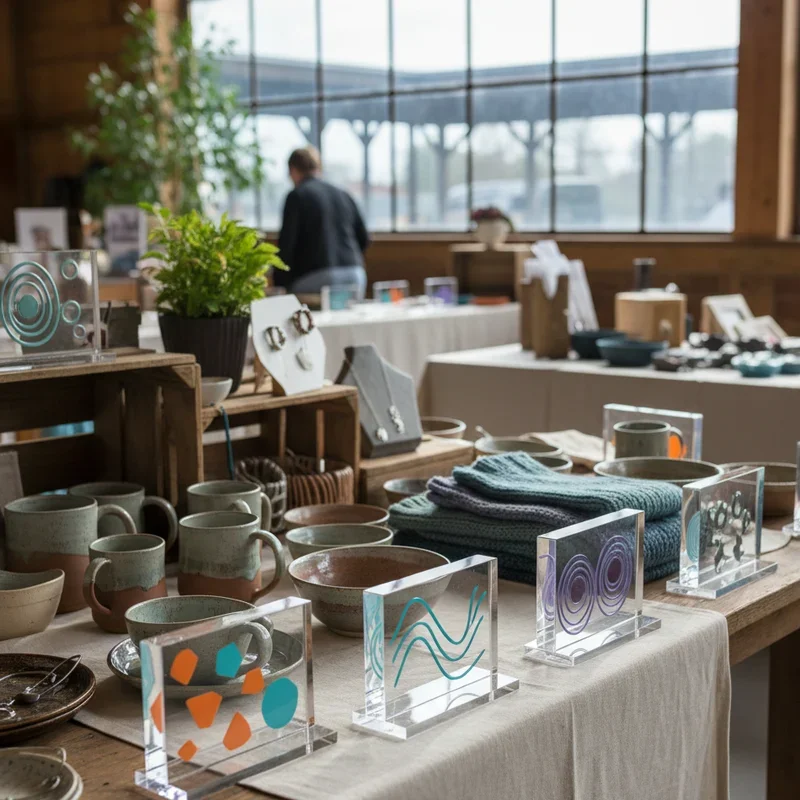
6. Build a Cohesive Color Story
Your table should tell a color story that makes sense at first glance, not look like a rainbow exploded during a craft supply clearance sale. Choose two to three main colors that represent your brand and weave them throughout your display using products, props, and packaging. This doesn't mean everything must match perfectly; instead, create a cohesive palette that guides the eye smoothly across your table. If your products are colorful, use neutral display elements to avoid visual chaos. Conversely, neutral products pop against colorful backgrounds. Think about seasonal color psychology too: warm autumn tones for fall fairs, cool pastels for spring events. Consistency in color creates a professional appearance that suggests you know what you're doing, building customer confidence before they even touch your products.
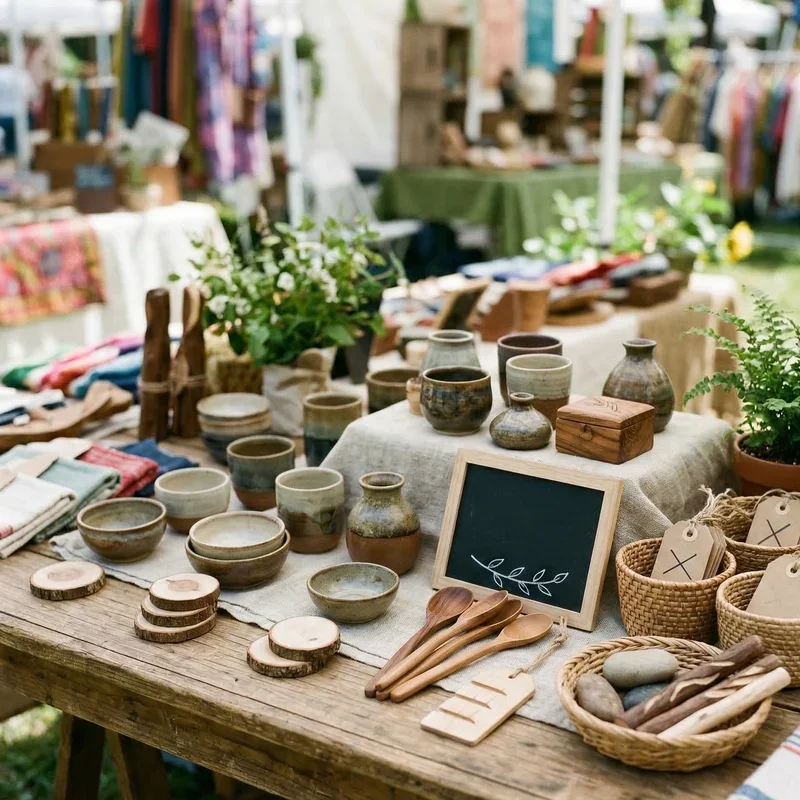
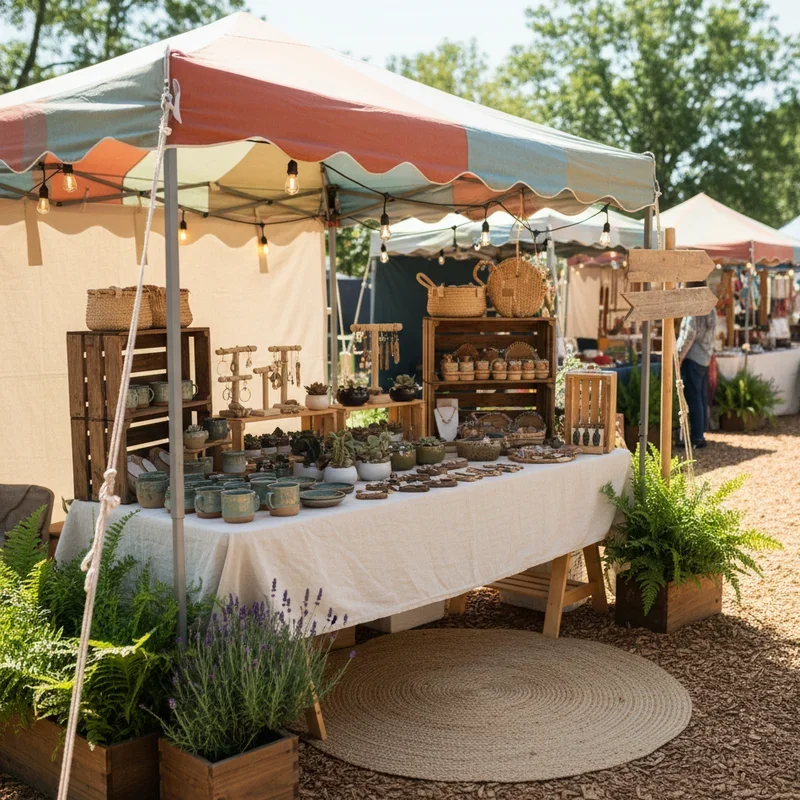
7. Add Living Elements and Greenery
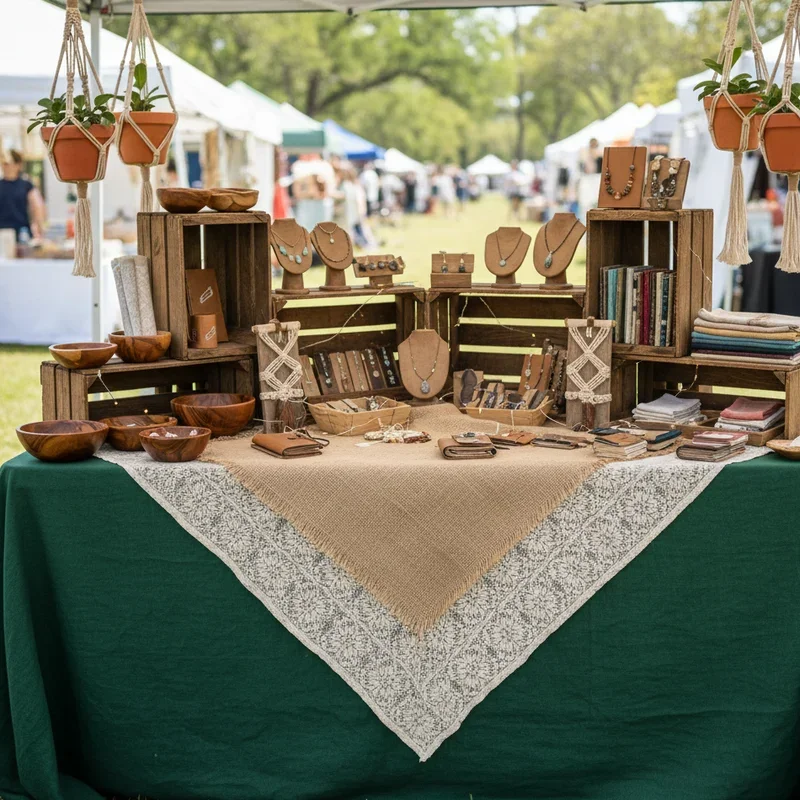
Nothing breathes life into a display quite like actual living things, whether it's a small potted succulent or fresh flower arrangements that complement your aesthetic. Greenery softens hard edges, adds organic appeal, and creates an inviting atmosphere that makes your booth feel less like a sales table and more like a curated experience. Fake plants work too if maintaining real ones seems daunting, just invest in quality silk versions that won't scream "dollar store." Small herbs in vintage tins work wonderfully for natural product vendors, while air plants in geometric holders suit modern crafters. The key is restraint; you're not creating a jungle, just adding touches of life that enhance rather than overwhelm. These elements also provide natural height variation and can hide less attractive display mechanics.

8. Create Interactive Demo Stations
Give customers permission to touch, try, and play by setting up a designated demonstration area where they can experience your products firsthand. This might be a mirror for trying on jewelry, a sample station for lotions or soaps, or a small workspace where you actively create your craft. Interactive elements transform passive browsers into engaged participants who form emotional connections with your products. Watching you work demystifies the creative process and justifies your pricing when customers see the skill involved. Keep demo areas clean and organized, with clear signage encouraging interaction. Have sanitizer available for hygiene-conscious shoppers. The magic happens when customers can imagine themselves using your products, and hands-on experience makes that imagination tangible. Plus, demonstrations naturally draw crowds, and crowds attract more crowds.
9. Design Clear Pricing Displays
Nothing kills sales momentum faster than the dreaded "How much is this?" dance, where customers feel awkward asking and you feel awkward answering. Clear, attractive pricing displays eliminate this friction, letting shoppers make decisions without interrogation. Create consistent price tags that match your brand aesthetic using cardstock, small chalkboards, or printed labels. Include prices in your larger signage for signature items, like "Handwoven Scarves from $45." Group similarly priced items together with single signs reading "All items in this section $15." Your pricing strategy should be transparent enough that shy customers never leave wondering what things cost. Consider adding brief descriptions that justify value: "Hand-thrown pottery, dishwasher safe, $35." Make prices visible from multiple angles so customers don't have to hunt.
10. Develop Instagrammable Moments
Design your display with social media in mind because today's customers are tomorrow's free marketing team when they share your booth on their feeds. Create a signature photo spot using an interesting backdrop, unique prop, or eye-catching arrangement that begs to be photographed. Maybe it's a wall of colorful products arranged in a gradient, a quirky sign with a clever saying, or a beautiful flat lay of your items. Include your business name or logo subtly but visibly in these photogenic areas. Encourage sharing with a small sign suggesting "Tag us @yourbusiness" or create a unique hashtag for the event. The goal isn't to be gimmicky but to create genuinely beautiful moments that people want to capture and share. These organic social media posts reach audiences you'd never access otherwise.
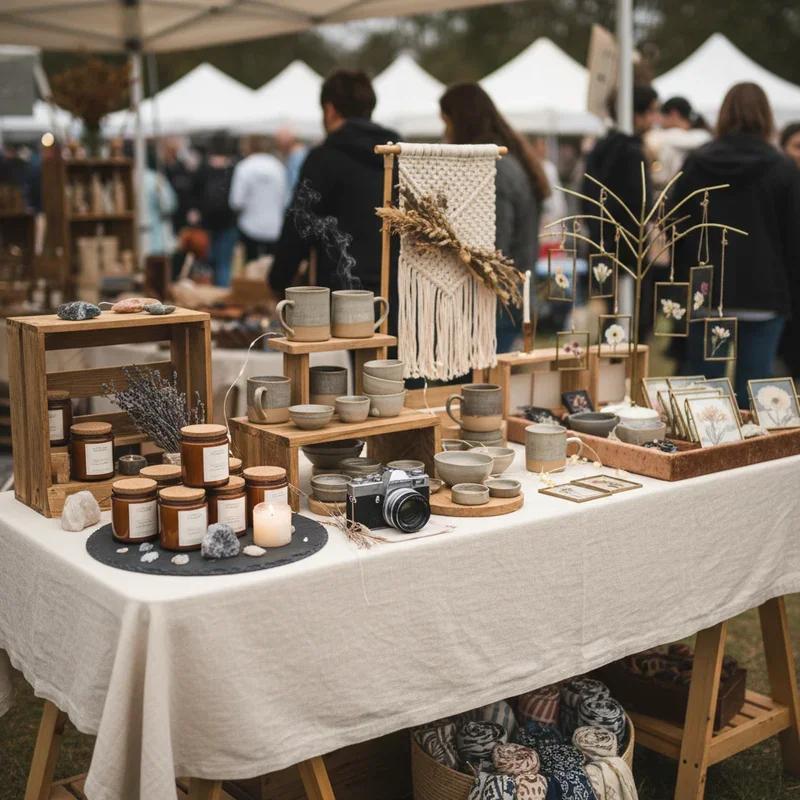
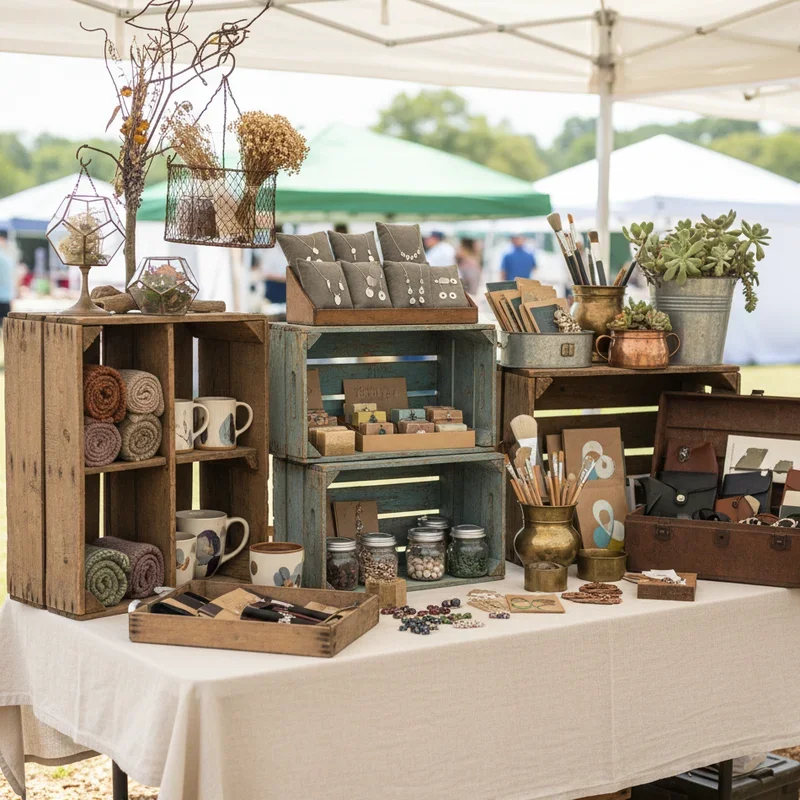
11. Organize with Vintage Crates and Containers
Vintage crates, antique suitcases, and weathered boxes add character while providing practical storage and display solutions that elevate your entire setup. These pieces tell a story before your products even enter the picture, creating an atmosphere that mass-produced displays can't match. Scout flea markets and thrift stores for unique containers that align with your brand's personality. Stack wooden crates at varying angles to create shelving, use old drawers as display trays, or prop open vintage suitcases to showcase products inside. The patina and imperfections of vintage pieces add authenticity that resonates with handmade goods. These containers pull double duty by storing extra inventory below while displaying products on top. Paint or refinish pieces to match your color scheme while maintaining that vintage charm.
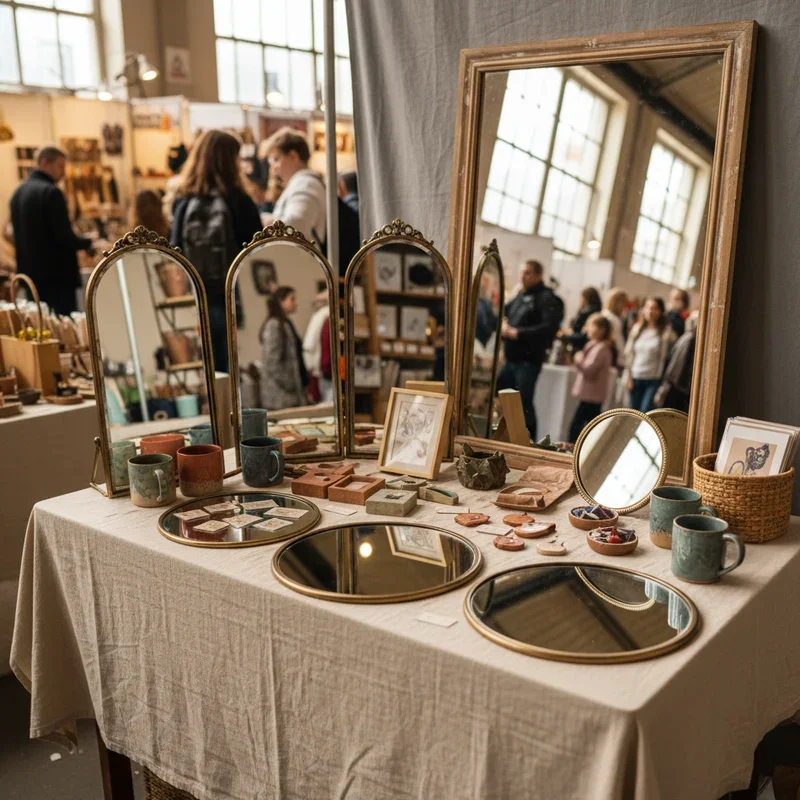
12. Incorporate Mirrors for Visual Expansion
Mirrors work like magic tricks, making your small table space feel twice as large while serving practical purposes for customers trying on wearable items. Place a standing mirror at your booth's corner to create depth, or lay small mirrors flat under translucent items like glass or jewelry to create stunning reflections. The reflective surfaces catch and bounce light, making everything appear brighter and more inviting. Vintage hand mirrors scattered among products add decorative appeal while remaining functional. For jewelry vendors, multiple mirrors at different heights mean several customers can try items simultaneously without crowding. Mirrors also reflect your beautiful display from different angles, giving passersby multiple views of your setup. Choose frames that complement your aesthetic, whether that's ornate gold for vintage vibes or sleek black for modern appeal.
13. Build Themed Vignettes
Create mini-scenes within your display that show products in context, helping customers envision items in their own lives. Rather than simply laying out soap bars, arrange them with a vintage washbasin and fresh towels. Instead of hanging scarves on a rack, drape them over an antique chair with a coordinating hat. These vignettes tell stories that engage imagination and emotion, moving beyond simple product presentation. Think of your table as a stage where each corner presents a different scene from the life your products could enhance. Keep vignettes cohesive with your overall theme while adding seasonal touches that feel current. These styled moments photograph beautifully for marketing materials and give your booth a curated, professional appearance that suggests expertise and attention to detail.
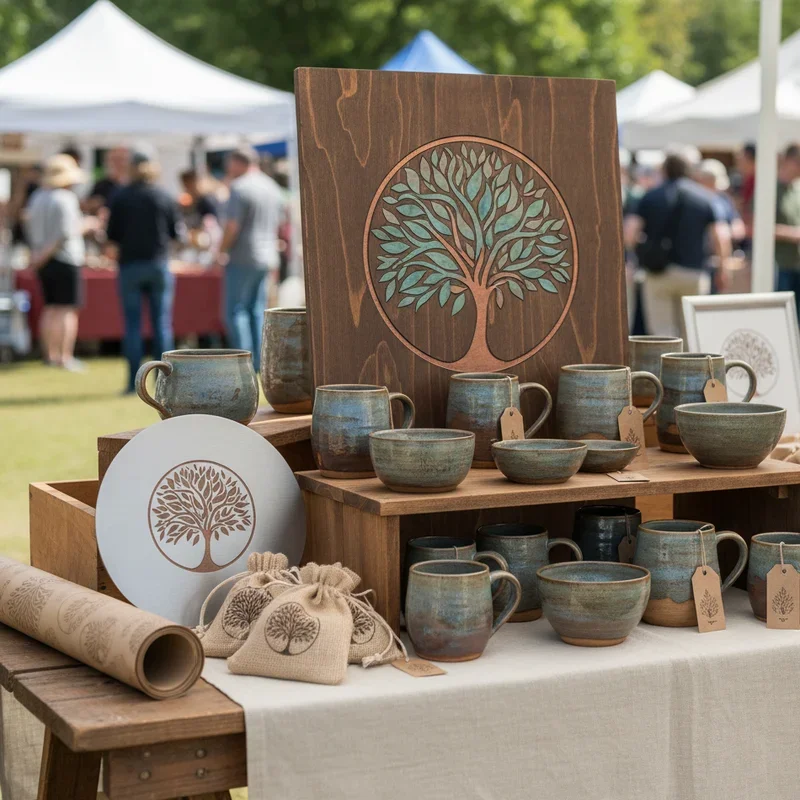
14. Use Professional Signage and Branding
Consistent, professional signage transforms your craft fair presence from hobbyist to serious business owner in customers' minds. Invest in quality business cards, hang tags, and shopping bags that reinforce your brand identity. Create informational signs that share your story, explain your process, or highlight what makes your products special. Use the same fonts, colors, and logo across all materials for brand recognition that builds trust. Consider a standing menu-style board that lists product categories and price ranges, helping customers navigate your offerings quickly. Small tent cards can share interesting facts about materials or techniques used. Professional doesn't mean expensive; consistent design executed well matters more than fancy printing. These branded elements travel home with customers, extending your marketing reach beyond the fair itself.
15. Create a Comfortable Shopping Flow
Design your table layout with customer psychology in mind, creating a natural flow that encourages browsing without bottlenecks or dead zones. Place eye-catching items at the entrance to draw people in, bestsellers at eye level for easy access, and impulse buys near your checkout area. Leave enough space between displays for customers to pick up items without knocking others over. Consider traffic patterns at the venue and angle your display accordingly. Create clear pathways that guide shoppers through your entire selection without forcing them to backtrack. Keep your payment station obvious but not obtrusive, with a designated spot for wrapping purchases. Think about approachability from all angles, ensuring wheelchair users and parents with strollers can comfortably shop. The easier you make it for people to shop, the more likely they'll buy.
Conclusion
Your craft fair table setup is more than just a place to display products; it's a three-dimensional business card that speaks volumes about your brand. These fifteen strategies work together to create displays that stop traffic, engage shoppers, and ultimately drive sales. Start implementing a few ideas at your next event, then gradually build your perfect setup. Remember, the best display is one that authentically represents you while making customers feel welcome to explore and purchase.
Read next: 15 Indoor Craft Fair Booth Ideas to Inspire
Frequently Asked Questions
Q1: What's the most important element of a craft fair display?
A: Height variation and clear pricing are equally crucial for attracting and converting browsers.
Q2: How much should I budget for display materials?
A: Start with $100-200 for basics, then gradually invest in quality pieces over time.
Q3: Should my display change for indoor versus outdoor events?
A: Yes, outdoor setups need wind weights and weather-resistant materials indoor displays don't require.
Q4: How early should I arrive to set up my booth?
A: Arrive at least 90 minutes early for stress-free setup and last-minute adjustments.
Q5: What's the biggest display mistake new vendors make?
A: Overcrowding tables instead of using edited, well-spaced displays that let products breathe visually.
Stay up to date with our latest ideas!