15 Easy Paper Craft Ideas Anyone Can Make
Master 15 easy paper craft ideas perfect for beginners! From origami to 3D art, create stunning projects with just paper and scissors.

Who says you need fancy supplies to create something amazing? All those masterpieces you've been scrolling past on social media started with the same humble material sitting in your printer right now: plain old paper! If you've ever felt that crafting itch but got overwhelmed by complicated supply lists and hefty price tags, you're about to discover your new favorite hobby. Paper crafting is like meditation with scissors, where a simple sheet transforms into butterflies, flowers, or even miniature worlds. Whether you're looking to decorate on a dime, keep kids entertained on a rainy day, or finally start that creative hobby you've been promising yourself, these projects are your golden ticket. Best part? You probably have everything you need within arm's reach. Ready to prove that creativity doesn't require a craft store shopping spree?
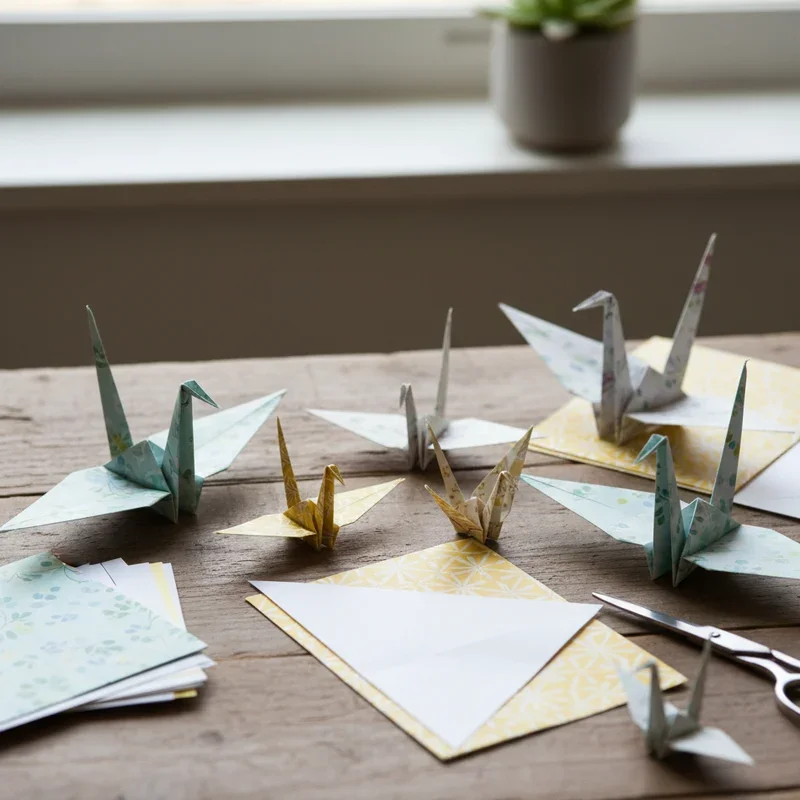
1. Classic Origami Crane
The origami crane stands as the gateway drug to paper folding addiction, and once you master this elegant bird, you'll understand why! Starting with a simple square of paper, you'll create something that seems to defy the laws of flat surfaces. The process teaches patience and precision while delivering that satisfying "aha" moment when the final fold reveals a graceful crane. Legend says folding 1,000 cranes grants a wish, but honestly, the zen-like state you reach around crane number 50 is reward enough. Use different sized papers to create a whole flock, from tiny ones made from sticky notes to impressive displays using wrapping paper. The repetitive folding becomes muscle memory, making this the perfect craft for nervous hands during phone calls or Netflix binges. String them together for stunning mobile decorations that dance in the breeze.
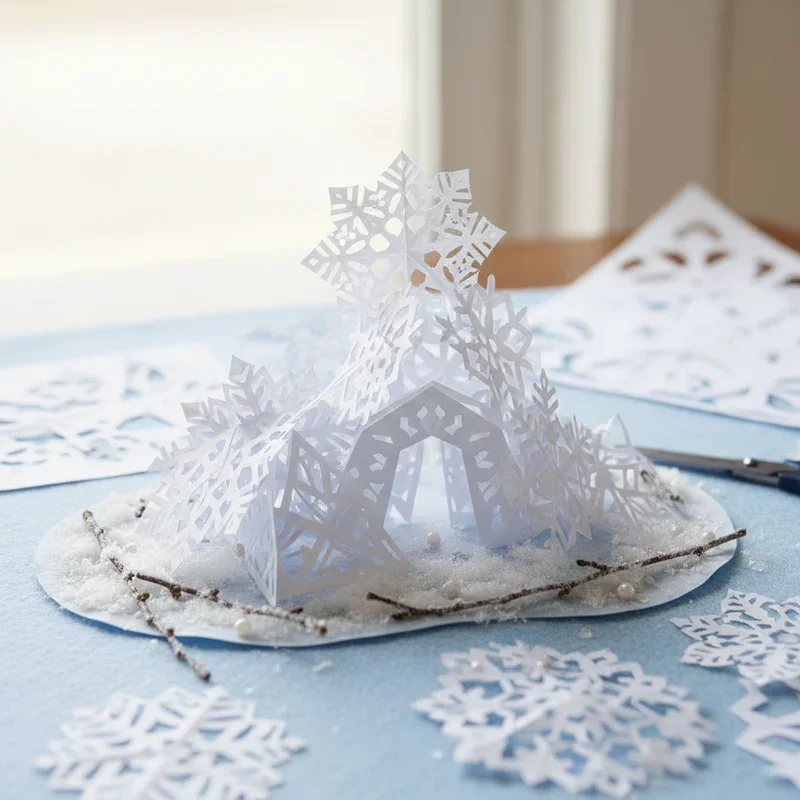
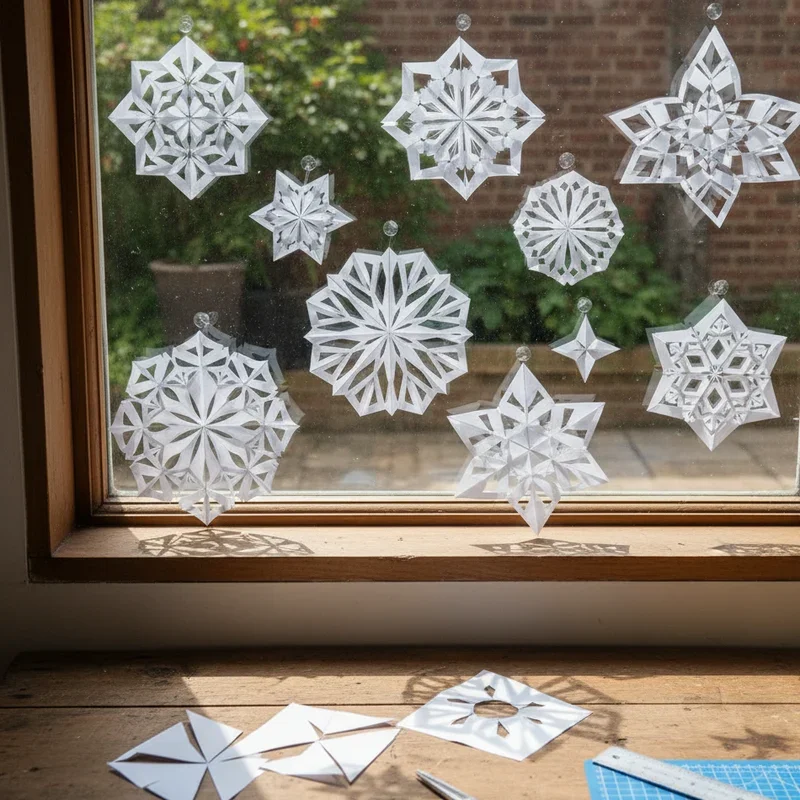
2. Paper Snowflakes Wonderland
Remember cutting snowflakes in elementary school and thinking you'd peaked artistically? Well, prepare to blow your younger self's mind with advanced paper snowflake techniques! The magic lies in the folding pattern: more folds equal more intricate designs, while strategic cuts create everything from delicate lace to bold geometric patterns. Start with regular printer paper for practice, then graduate to tissue paper for ethereal window displays. The key is understanding that what looks like random snipping actually follows mathematical principles of symmetry. Create templates by drawing designs before cutting, or go freestyle and embrace the surprise reveal. Coffee filter snowflakes add dimension when sprayed with water and food coloring, creating tie-dye effects. Layer different sizes on windows or walls for a 3D winter wonderland that costs pennies but looks like professional decorating.
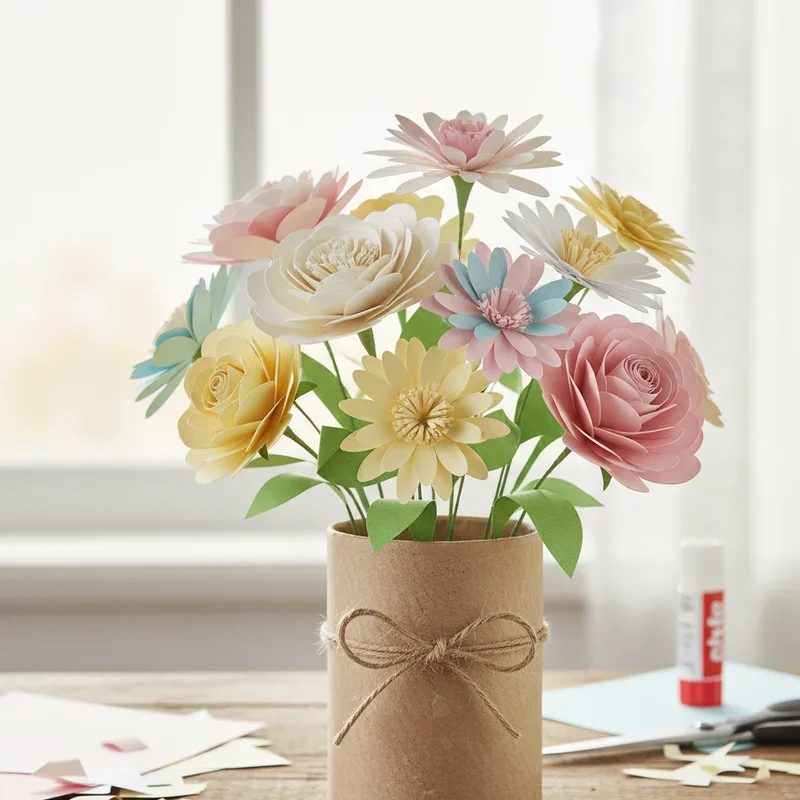
3. DIY Paper Flowers Bouquet
Fresh flowers die, but paper blooms last forever, making them the ultimate commitment-free botanical experience! Crepe paper and tissue paper work magic here, mimicking real petal textures when stretched and shaped. Start with simple roses by rolling strips into spirals, then advance to layered peonies that fool people from across the room. The secret weapon is varying your paper weights and colors: combine tissue for delicate inner petals with cardstock for sturdy bases. Wire stems wrapped in green tape complete the illusion, while a dab of perfume adds sensory trickery. These flowers let you have peonies in December and cherry blossoms in October, defying nature's schedule. Create custom wedding bouquets, permanent centerpieces, or flower crowns that never wilt. Each flower teaches new techniques, from fringing to cup-shaping, building your paper manipulation skills exponentially.
4. Accordion Fold Paper Fans
These aren't your grandma's funeral home fans; modern paper fans are having a serious decorative moment! The accordion fold technique transforms flat paper into dimensional art that works as both functional cooling devices and stunning wall decor. Start with basic folds, then experiment with cutting patterns into the folded edges for lace-like effects when opened. Glue two fans together for full circles that become rosettes, or keep them semicircular for that classic fan shape. Decorative papers, maps, or sheet music add personality, while metallic papers create glamorous party decorations. The size possibilities are endless: tiny fans for cupcake toppers or giant ones for dramatic backdrops. Master the basic technique, then add wooden handles for practical use or create layered fans with multiple papers for rainbow effects. They're perfect for weddings, parties, or adding texture to gallery walls.
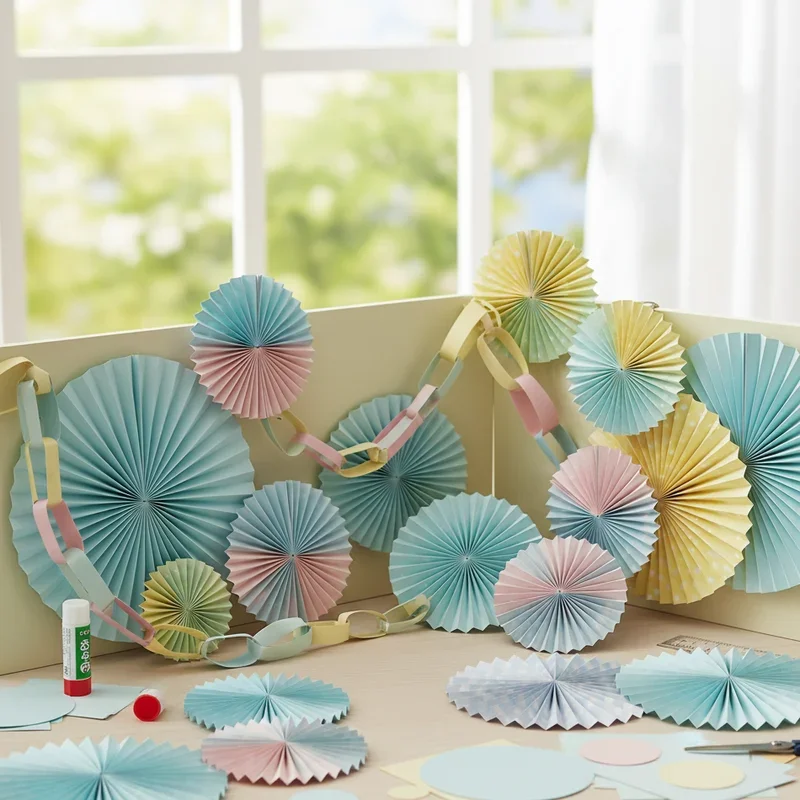
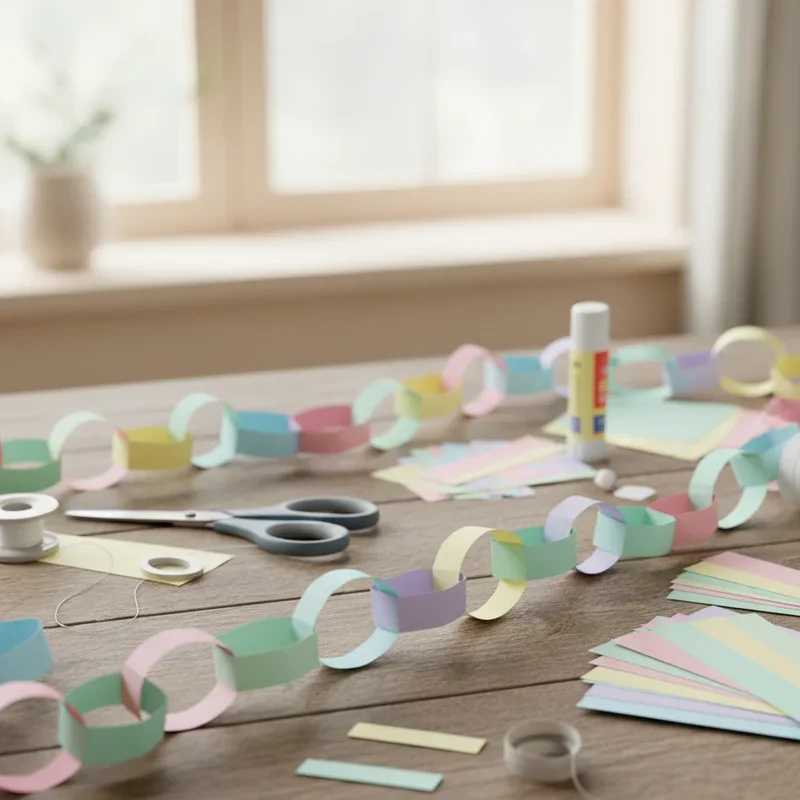
5. Paper Chain Garlands
Paper chains might seem kindergarten-basic, but modern interpretations elevate this humble craft into sophisticated decor! Beyond the standard loop-through-loop method, explore heart-shaped links for Valentine's, star-shaped connections for holidays, or geometric patterns for year-round style. Use double-sided scrapbook paper for visual interest from every angle, or create ombre effects with paint chips from hardware stores. The repetitive action becomes meditative, perfect for crafting while binge-watching or chatting with friends. Kids can handle simple versions while adults create complex interlocking designs that look like they came from high-end boutiques. These garlands work for every occasion: metallic papers for New Year's, pastels for baby showers, or newspaper for vintage vibes. The best part? They pack flat for storage and resurrect instantly for the next celebration, making them the ultimate reusable decoration.
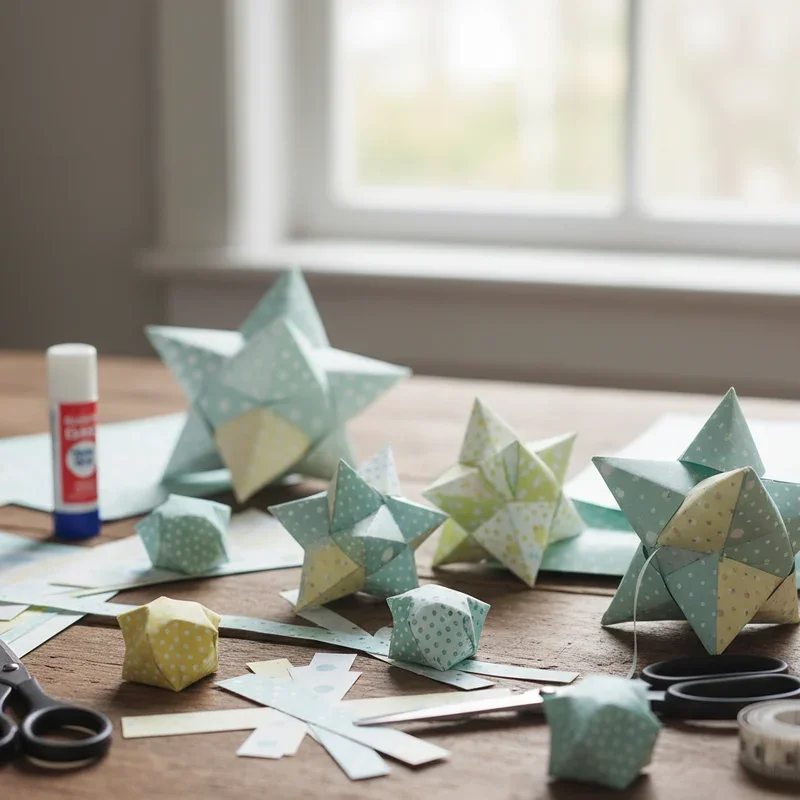
6. 3D Paper Stars
Flat stars are fine, but dimensional stars turn any space into a constellation of creativity! The basic technique involves folding and cutting identical pieces that slot together without glue, creating sturdy structures that hold their shape. Start with five-pointed stars using simple templates, then explore eight-pointed Moravian stars for advanced challenges. Different papers yield different effects: vellum creates lantern-like transparency, while cardstock offers crisp, architectural edges. Vary sizes from tiny ornaments to statement pieces that command entire walls. The assembly process feels like solving a pleasant puzzle, with that satisfying click when pieces lock into place. Hang them at different heights for dynamic displays, or attach to string lights for magical illumination. These stars work year-round, not just for holidays, adding geometric interest to minimalist spaces or whimsical touches to kids' rooms.
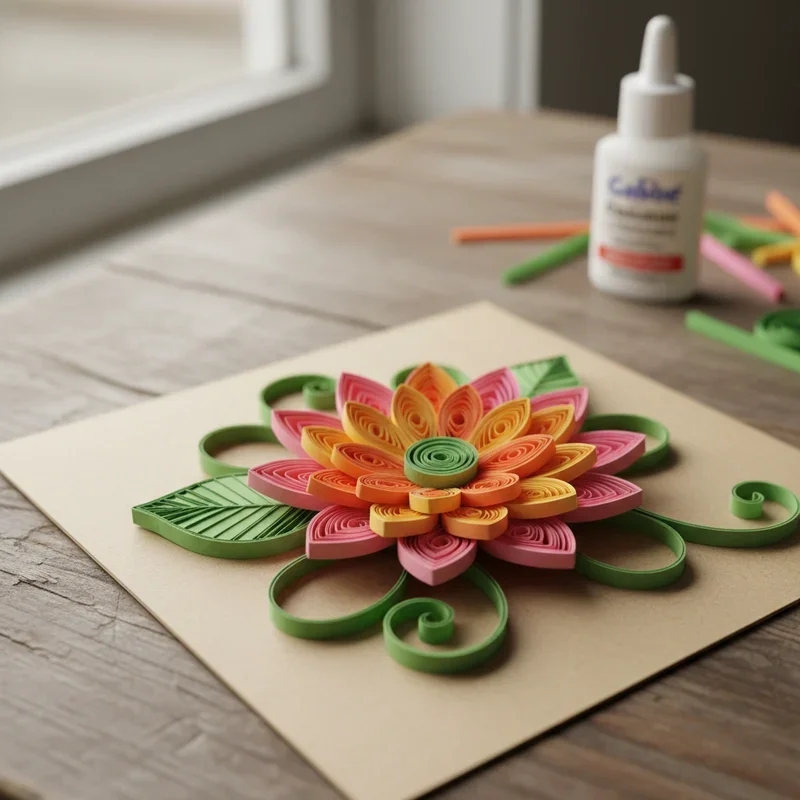
7. Quilled Paper Art Basics
Quilling turns paper strips into miniature sculptures that look impossibly complex but start ridiculously simple! This Renaissance-era technique involves rolling thin papers into coils, then pinching them into shapes like teardrops, hearts, or leaves. A toothpick or specialized quilling tool becomes your magic wand, transforming strips into dimensional art. Start with basic shapes, then combine them into flowers, butterflies, or abstract designs. The process requires patience but delivers meditation-level calm as you roll, shape, and arrange. Gradient paper strips create natural shading effects, while metallic edges add luxury touches. Frame your creations for wall art, decorate cards for extra-special occasions, or create jewelry that weighs nothing but impacts everything. Once you understand the basic shapes, you can create anything from portraits to landscapes, all from humble paper strips.
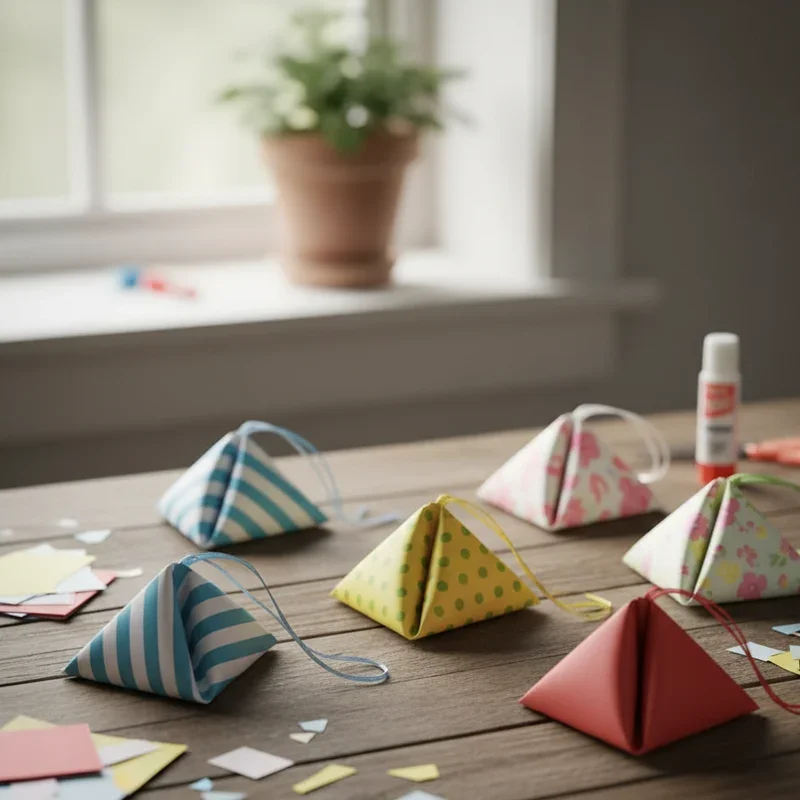
8. Paper Fortune Tellers
These childhood playground favorites deserve a comeback because they're surprisingly versatile beyond predicting who you'll marry! The folding technique creates a functional toy that entertains while teaching origami basics. Write fortunes, jokes, dares, or educational facts under the flaps for customized entertainment. Adult versions might include wine recommendations, date night ideas, or decision-making tools for the chronically indecisive. The square base means any paper works: magazine pages for collage effects, maps for travel themes, or custom-printed designs for branded party favors. Create themed sets for different occasions: spooky predictions for Halloween, resolutions for New Year's, or conversation starters for dinner parties. Kids can make them independently once shown, providing screen-free entertainment that travels anywhere. The interactive nature makes them perfect ice breakers at events or unique business cards that people actually keep.
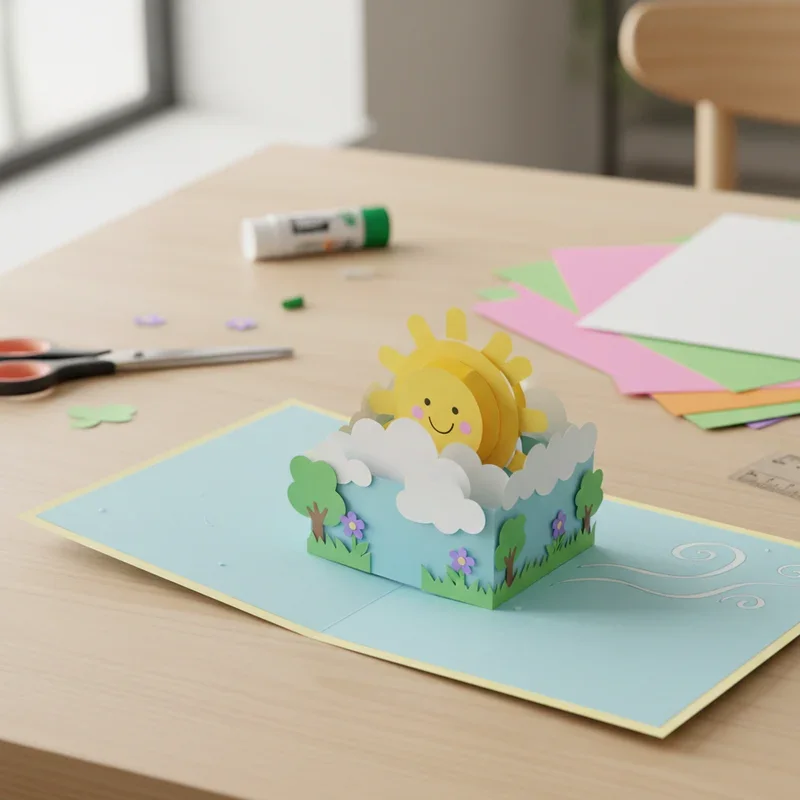
9. Pop-Up Greeting Cards
Flat cards are fine, but pop-up cards create moments of genuine delight when opened! Master basic mechanisms like V-folds and box pops, then combine techniques for complex scenes that spring to life. Start with simple shapes popping forward, then advance to layered designs creating depth and movement. The engineering aspect appeals to puzzle lovers while the decorative possibilities satisfy artists. Birthday cakes that rise, flowers that bloom, or cityscapes that unfold make every card an event. Use the element of surprise strategically: calm exteriors hiding elaborate interiors pack the most punch. These cards become keepsakes rather than recycling fodder, displayed long after occasions pass. The skills transfer to other projects like pop-up books or dimensional scrapbook pages. Each card teaches spatial reasoning and planning, as you must visualize the closed and open states simultaneously.
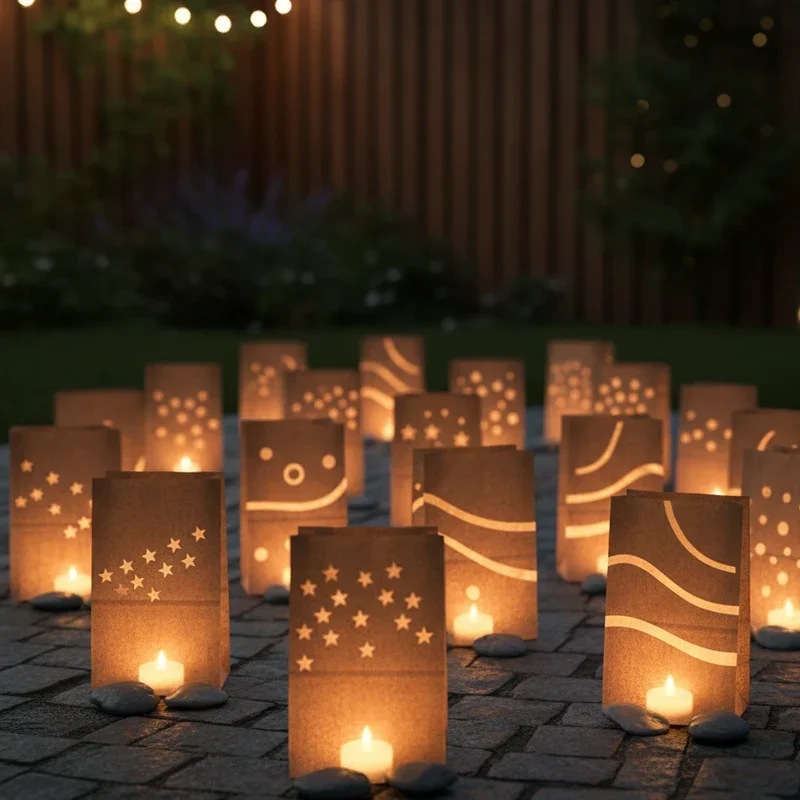
10. Paper Bag Luminaries
Transform humble lunch bags into enchanting light displays that cost virtually nothing but deliver maximum ambiance! Cut designs into bag sides, from simple stars to intricate lace patterns, then place battery-operated candles inside for safe, flickering magic. The brown kraft paper creates warm, inviting glows, while white bags offer cleaner, more modern aesthetics. Line walkways for parties, create centerpieces for tables, or use as permanent mood lighting in kids' rooms. Colored tissue paper inside adds tinted glows, while sand or rice in the bottom provides stability for outdoor use. These luminaries work for every season: snowflakes for winter, flowers for spring, leaves for fall. The cutting process ranges from simple hole punches to complex knife work, accommodating all skill levels. Weather-resistant versions using wax paper bags extend usage to outdoor events regardless of conditions.
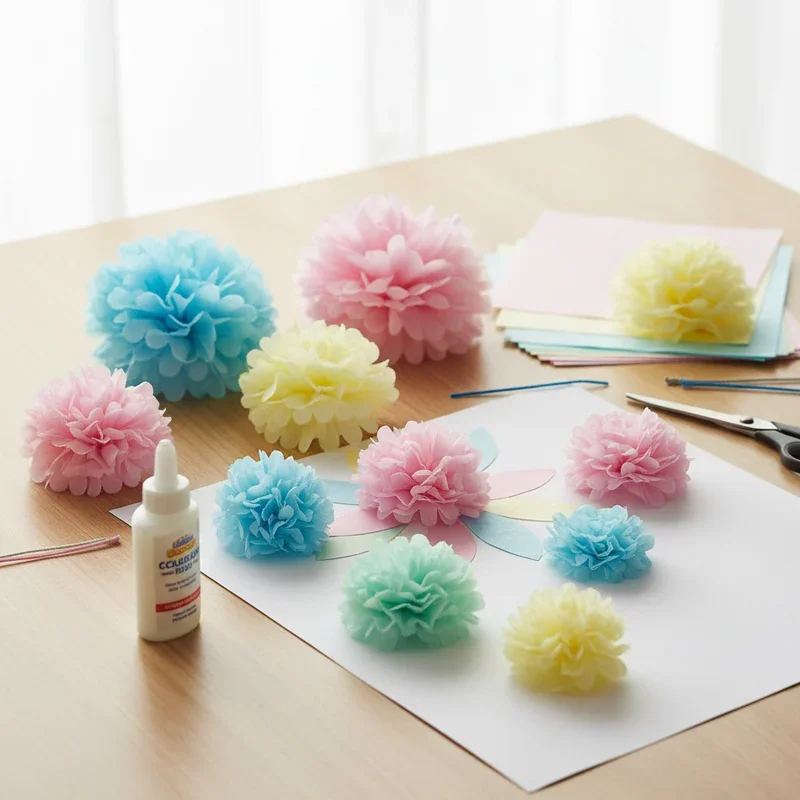
11. Tissue Paper Pom-Poms
These fluffy spheres of joy prove that party decorations don't require party supply store prices! Layer tissue paper sheets, accordion fold, secure the center, then gently separate layers to create voluminous poms that rival expensive honeycomb decorations. Size varies from tiny cupcake toppers to massive ceiling installations simply by adjusting paper dimensions. Mix colors within single poms for gradient effects, or stick to monochromes for elegant simplicity. The technique works with other materials too: coffee filters for textured whites, crepe paper for durability, or metallic tissue for glamour. Hang at varying heights for dynamic party spaces, or attach to dowels for cheer-leading props. These reusable decorations flatten for storage then refluff instantly for the next event. The making process entertains groups, turning decoration preparation into a pre-party activity that builds anticipation.
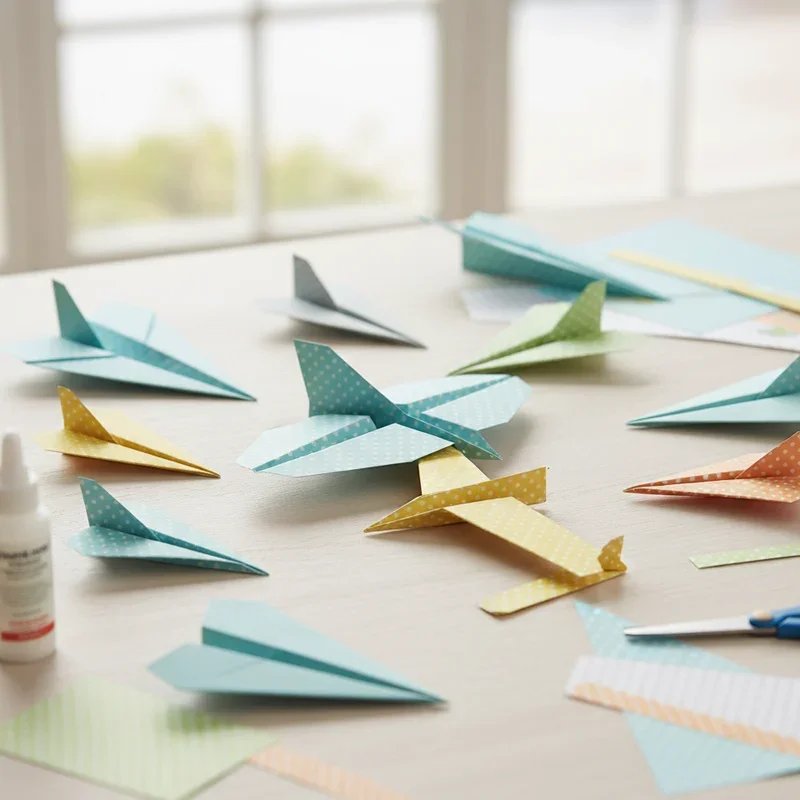
12. Paper Airplane Fleet
Forget basic dart planes; modern paper airplane design has evolved into an engineering art form! Different folds create different flight patterns: gliders that float forever, stunt planes that loop, or speed demons that zoom straight. The iterative process teaches physics principles through trial and error, making adjustments to improve performance. Use different paper weights to discover how material affects flight: printer paper for reliability, origami paper for precision, or newspaper for size. Decorate before folding for personalized aircraft, or add paper clips for weight distribution experiments. Create target games, distance competitions, or accuracy challenges that get everyone moving. This craft scales perfectly for groups, costs almost nothing, and provides immediate satisfaction. Advanced folders can attempt world-record designs or create their own innovations. The humble paper airplane proves that sometimes the simplest crafts provide the most fun.
13. Kirigami Window Decorations
Like origami's rebellious sibling, kirigami adds cutting to folding, creating intricate designs that cast beautiful shadows! Unlike random cutting, kirigami follows specific patterns creating connected designs that unfold into geometric mandalas or pictorial scenes. Start with simple symmetric cuts, then advance to architectural kirigami creating 3D structures from flat sheets. Window placement transforms these into dynamic art as sunlight creates moving shadow patterns throughout the day. Seasonal designs change your window display easily: snowflakes for winter, flowers for spring, leaves for fall. The negative space becomes as important as the paper itself, teaching design principles about balance and composition. Use colored tissue paper for stained glass effects, or white paper for subtle elegance. These decorations photograph beautifully, creating Instagram-worthy backgrounds that cost literally cents to make.
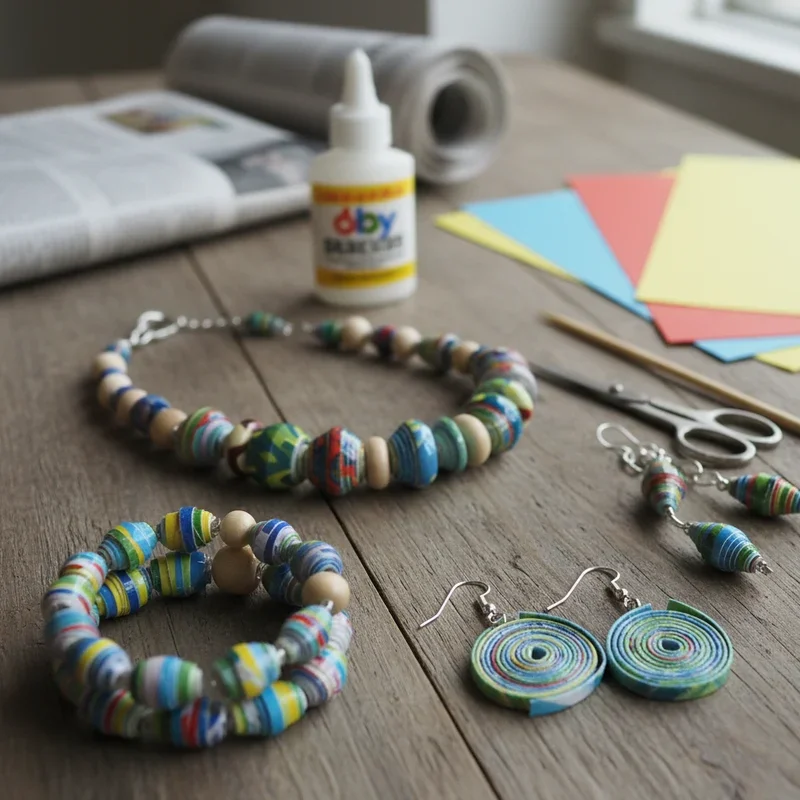
14. Paper Beads Jewelry
Who knew magazine pages and junk mail could become wearable art? Rolling paper strips around toothpicks creates beads rivaling store-bought versions, especially when sealed with varnish or mod podge. The paper choice determines the final look: magazines for colorful abstracts, maps for travel themes, or sheet music for musical jewelry. Triangle-cut strips create bicone shapes while rectangles make cylinders, offering design variety. The rolling technique matters: tight for durability, angled for unique shapes, or loose for lightweight pieces. String into necklaces, bracelets, or earrings that weigh nothing but impact everything. This craft transforms trash into treasure literally, making it perfect for eco-conscious creators. Each bead is unique based on the paper section used, ensuring one-of-a-kind jewelry. The process is addictive; you'll find yourself evaluating all paper for bead potential.
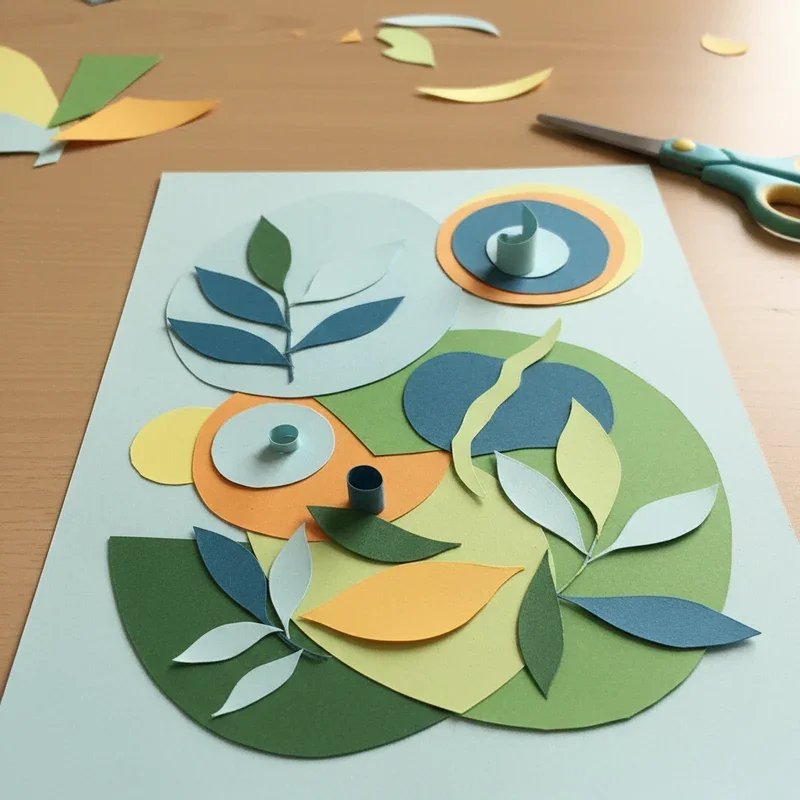
15. Layered Paper Collage Art
Collage elevates paper scraps into museum-worthy compositions through thoughtful layering and arrangement! Start collecting interesting papers: tickets, maps, book pages, photographs, anything with visual or emotional value. The key lies in composition: balance colors, vary textures, and create focal points that guide the eye. Build depth through overlapping, with transparent papers adding mysterious layers. Techniques range from precise geometric arrangements to organic, torn-edge compositions that feel spontaneous yet intentional. Add dimension with foam tape between layers, creating shadow boxes effects on flat surfaces. Theme your collages around memories, places, or abstract concepts, telling stories through accumulated imagery. The process becomes therapeutic, sorting through materials and making aesthetic decisions that reflect personal style. Frame finished pieces for gifts that cost little but mean everything, or create series exploring variations on themes.
Conclusion
Paper crafting proves that creativity isn't limited by budget or fancy supplies. These fifteen projects show that with just paper and basic tools, you can create decorations, gifts, and art worthy of admiration. Start with whatever paper you have, embrace imperfection as character, and watch your skills grow with each fold and cut. The real magic isn't in the paper; it's in the transformation your hands create!
Read next: 15 Paper Craft Ideas for DIY Lovers
Frequently Asked Questions
Q1: What type of paper works best for beginners?
A: Standard printer paper is perfect for learning; it's forgiving, cheap, and readily available.
Q2: Do I need special tools for paper crafting?
A: Basic scissors and glue will handle most projects; fancy tools can come later.
Q3: How do I prevent paper crafts from tearing?
A: Work slowly, crease firmly, and use appropriate paper weight for each project type.
Q4: Can children do these paper crafts safely?
A: Yes, with supervision and child-safe scissors, most projects suit kids over age five.
Q5: How should I store finished paper crafts?
A: Keep them flat in boxes, away from moisture and direct sunlight for longevity.
Stay up to date with our latest ideas!