Setting Up a Fall Restraint System for Roof Repairs at Home
Discover how to set up a fall restraint system for roof repairs to protect yourself, stay secure, and work confidently at heights.
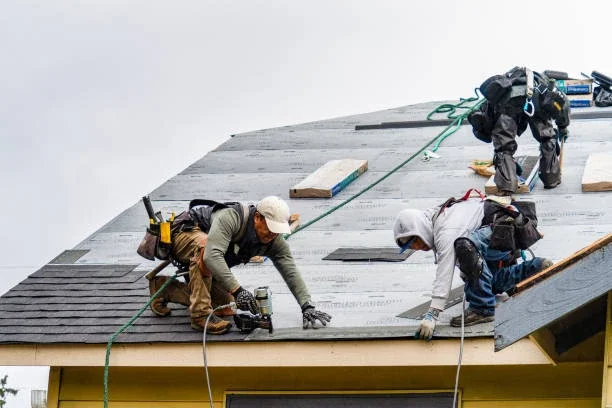
Working on a roof can seem simple—until you slip. Falls from even one story can cause serious injuries.
According to OSHA and the CDC, roof falls are among the top causes of home repair accidents. Most happen because homeowners rely on ladders or move on steep slopes without proper safety systems.
A fall restraint system prevents you from reaching the roof edge in the first place. Unlike fall arrest setups, which stop a fall midair, a restraint system keeps you secure so the fall never happens. Setting it up correctly can make roof repair, cleaning, or inspection work much safer.
What Is a Fall Restraint System
A fall restraint system is a proactive safety setup designed to limit your range of movement while working at height.
It includes:
Full-body harness – worn snugly to distribute force.
Anchor point – the secure attachment on the roof structure.
Lifeline or lanyard – connects your harness to the anchor.
Rope grab or connector – controls length and movement.
When properly adjusted, the line stays tight enough to stop you from reaching the roof edge. The system doesn’t catch a fall—it prevents it.
Fall Restraint vs Fall Arrest: Know the Difference
Homeowners often confuse these two systems, but their purpose is different.
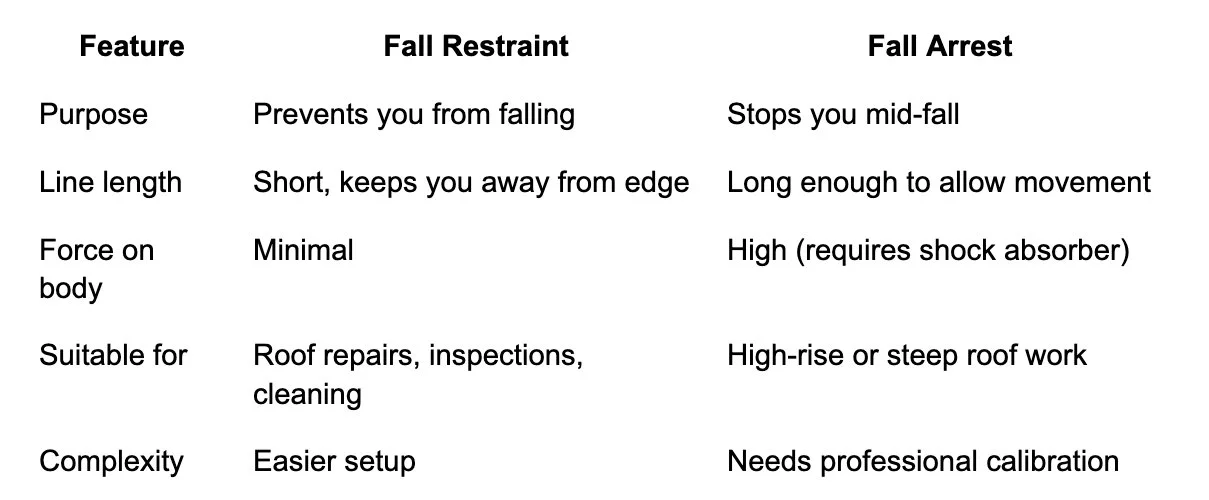
For most home projects—like shingle replacement or gutter cleaning—a fall restraint system is safer and simpler.
Components of a Home Fall Restraint System
Understanding each part helps you assemble it correctly:
Harness – full-body type with D-ring on the back (dorsal) and adjustable leg and shoulder straps.
Anchor point – metal plate or bracket bolted to roof framing or ridge beam.
Lanyard or lifeline – adjustable line (often static) that connects the harness to the anchor.
Connector or rope grab – allows you to shorten or lock the line length.
Carabiners and hardware – attach points rated for fall protection loads.
All components must meet ANSI Z359 and OSHA 1926 Subpart M standards. Never mix parts from different systems unless they are certified compatible.
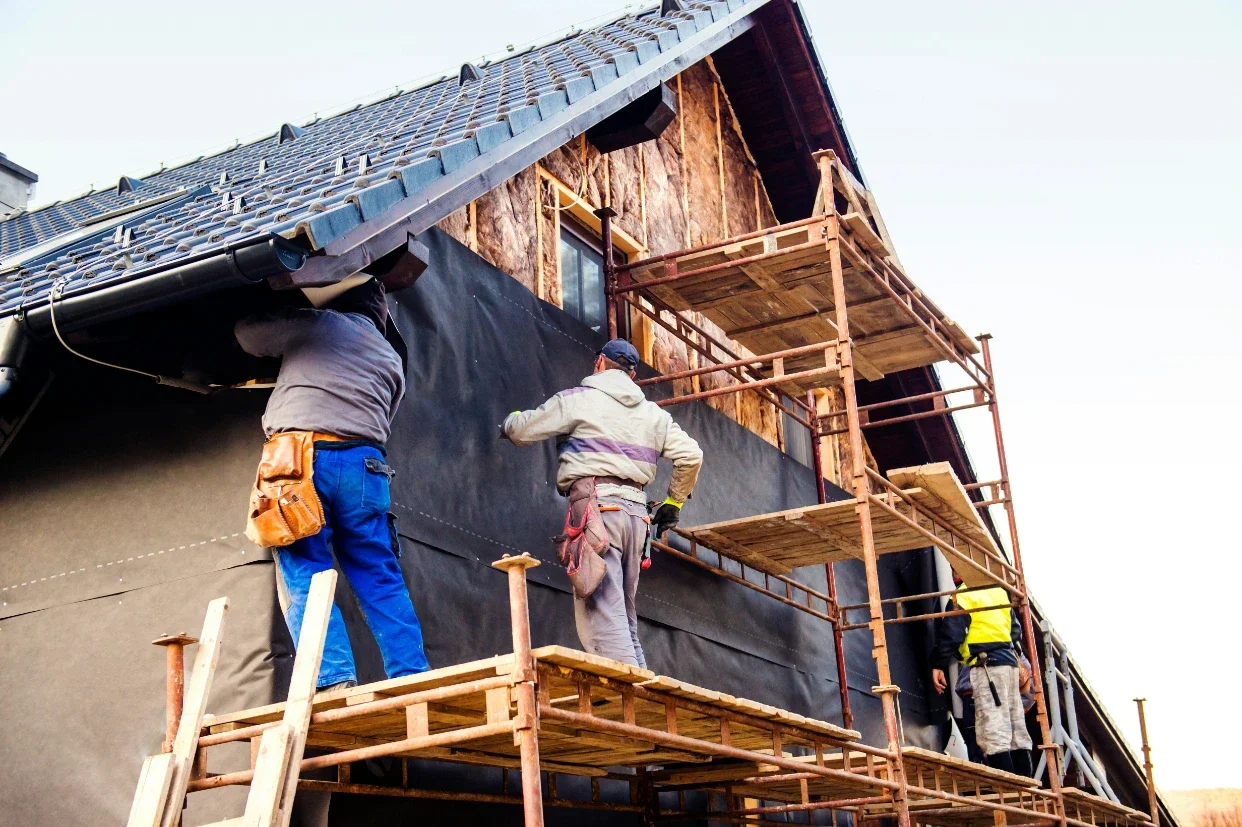
Plan and Inspect the Roof Area
Before you step on the roof, take time to plan your workspace:
Check the weather. Avoid rain, frost, or wind over 25 mph.
Inspect the roof surface. Look for loose shingles or rot near edges.
Plan access. Set your ladder at a 75° angle, extending at least 3 feet above the eave.
Measure roof slope. A slope over 6:12 (about 26°) requires extra caution.
Choose a secure anchor spot. Centered on a strong truss or ridge beam, away from skylights and vents.
Clear all debris, cords, or tools that could trip you during setup. A clean work area is one of the simplest ways to stay safe.
How to Install a Roof Anchor Point
A reliable anchor point is the heart of your fall restraint system. Here’s how to set it up safely.
Locate a solid structural member. Use a stud finder or attic access to find the roof truss or rafter line.
Remove a few shingles if necessary. You’ll reinstall them later to seal around the anchor.
Position the anchor plate over the truss. The plate should sit flat and aligned with the roof slope.
Secure with lag screws or bolts. Use hardware specified by the anchor manufacturer—usually 3-inch or longer lag bolts.
Tighten firmly and inspect. Ensure no movement or flex when you tug the anchor.
Seal around fasteners. Apply roofing sealant to prevent leaks.
Attach the lifeline. Clip it to the anchor D-ring using a rated carabiner.
Always install anchors into structural framing, not just sheathing or shingles. If you’re unsure about load capacity, consult a local contractor or building inspector.
Fitting and Adjusting Your Safety Harness
A properly fitted harness is essential for comfort and safety. Follow these steps before you climb:
Inspect the harness. Look for frayed webbing, rusted rings, or worn stitching.
Step into the leg straps like putting on overalls.
Pull up the shoulder straps and connect chest buckles.
Adjust the leg and shoulder straps until snug but not tight. You should fit a flat hand between strap and body.
Check the D-ring position. It should rest between your shoulder blades.
Tuck in loose ends to avoid tripping or snagging.
Test movement before climbing. If the harness shifts or rides up, tighten straps again.
Connecting the Lifeline or Restraint Line
After installing the anchor and fitting your harness, connect the system:
Attach one end of the lifeline to the roof anchor using a rated carabiner.
Thread the other end through the rope grab or connector.
Attach the rope grab to your D-ring.
Adjust line length so you can move freely but cannot reach the roof edge.
Test by walking toward the edge. Stop when tension forms in the line.
Avoid leaving slack in the rope—this defeats the system’s purpose. The lifeline should stay taut and follow your movement without pulling you off balance.
Testing and Maintaining Proper Tension
Before starting work, perform a quick system test:
Apply gentle pressure. Lean slightly toward the roof edge. The system should resist smoothly without jerking.
Check anchor and bolts. Make sure nothing loosens.
Inspect rope grab or connector. It should lock when pulled sharply.
Ensure harness comfort. Adjust straps if they dig or slip.
Recheck every hour or when you reposition your work area. If you move to a new section of the roof, relocate your anchor accordingly and repeat the test.
Safe Work Practices on the Roof
Even with a fall restraint system, you need disciplined habits:
Keep the line above your work position. Avoid letting it trail underfoot.
Face the roof ridge when working—never the edge.
Move slowly and deliberately.
Use a tool belt or hoist line instead of carrying tools by hand.
Avoid distractions. Stay focused on footing and line position.
Stay clear of power lines. Keep all metal equipment at least 10 feet away.
Remember: safety systems work best when paired with calm, consistent behavior.
Inspection, Maintenance, and Storage
After every use:
Inspect for wear. Look for frayed edges, broken stitching, or rusted hardware.
Clean with mild soap and water. Avoid bleach or harsh chemicals.
Dry completely. Store gear in a cool, dry place away from sunlight.
Check the anchor point. Remove it after the job if it’s temporary, and patch roofing holes.
Replace old components. Retire any harness or rope that shows visible damage or exceeds its service life (usually 5 years).
Regular inspection is a requirement under ANSI Z359.2—and it’s good common sense.
Homeowner Roof Safety Checklist
Before starting your next roof repair, go through this quick checklist:
Weather is dry and calm
Roof slope checked and stable
Ladder secured and extended above eave
Anchor point installed into framing
Harness inspected and fitted correctly
Lifeline length adjusted with no slack
Line tension tested before work
Tools secured and workspace clear
System reinspected
All equipment cleaned and stored after work
If every box is checked, your setup meets basic home roof safety standards.
Conclusion
Roof repairs don’t have to be dangerous. With a properly installed fall restraint system, you can move confidently while staying safe.
Plan your work, secure your anchor, fit your harness correctly, and keep your lifeline tight. A few careful steps before climbing could be what prevents a life-changing fall.
FAQs About Fall Restraint Systems
1. What’s the difference between fall restraint and fall arrest?
Fall restraint prevents you from reaching the edge. Fall arrest allows movement but stops a fall midair.
2. Can I install a roof anchor permanently?
Yes, but inspect it regularly for rust or loose bolts. Some homeowners install anchors under ridge caps for ongoing maintenance.
3. How often should I replace my harness or rope?
At least every five years or sooner if any wear, sun damage, or fraying appears.
4. Can two people use the same anchor?
Only if the anchor is rated for multiple users—check the label or manufacturer’s guidelines.
5. What roof slope is too steep for DIY restraint systems?
Slopes greater than 6:12 (about 26°) should be handled by professionals with advanced fall arrest gear.
Stay up to date with our latest ideas!