15 Simple Wood Projects for Beginners
Discover 15 easy wood projects for beginners, from birdhouses to floating shelves. Get step-by-step guidance to build stylish, functional pieces and boost your DIY skills today!
Have you ever wanted to dive into woodworking but felt intimidated by elaborate furniture plans? Good news: you don’t need a full workshop or years of experience to create charming, functional pieces. These fifteen simple wood projects for beginners will guide you through measuring, cutting, and joining basic materials into treasures you’ll actually use. Picture greeting birds with a hand‑built birdhouse, organizing your keys on a custom rack, or showcasing photos in a frame crafted by your own hands. With minimal tools—think saws, drills, clamps, and sandpaper—you’ll learn core skills like miter cuts, pilot holes, and finishing techniques. Each project combines straightforward steps with playful analogies and hands‑on learning, so you gain confidence and enjoy the process. Ready to transform raw lumber into everyday delights? Let’s fire up the workshop and start making!
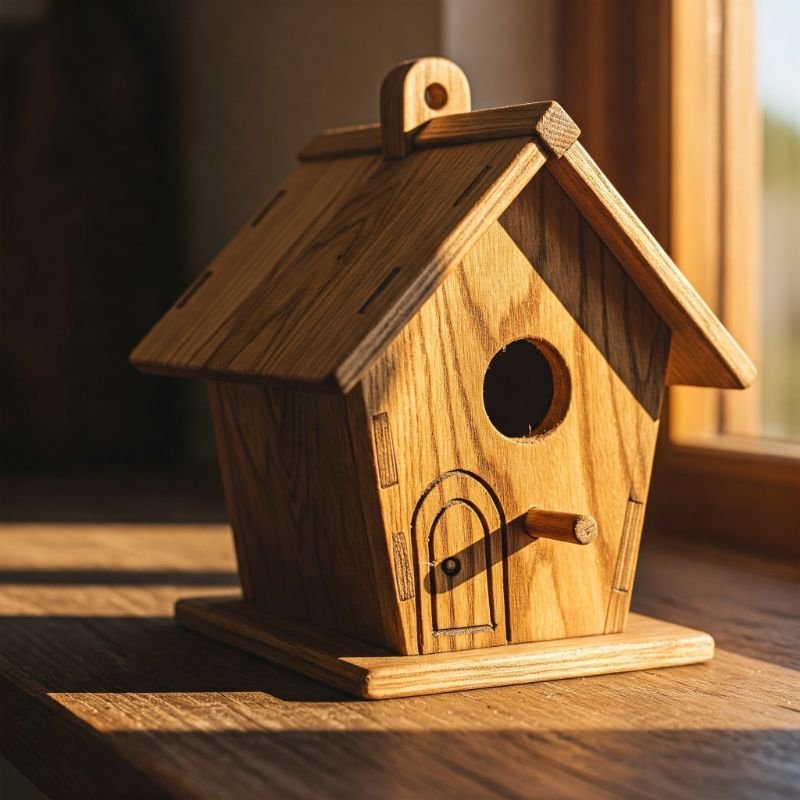
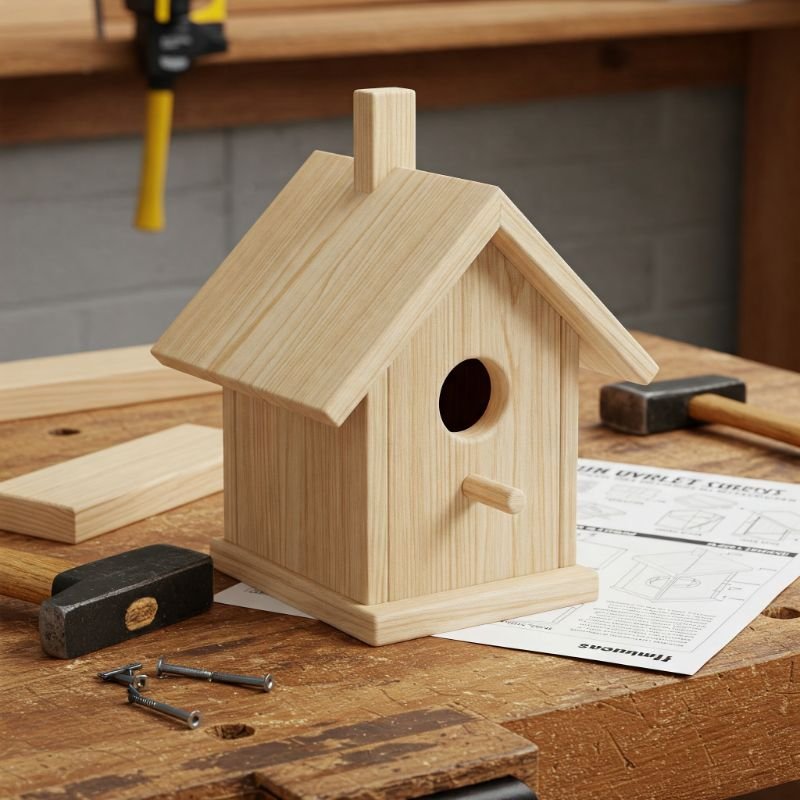
1. Simple Birdhouse for Beginners
Building a simple birdhouse feels like welcoming a new feathered friend into your backyard. It’s the perfect beginner project that introduces you to measuring, cutting, and basic assembly without complexity. Gather pine boards or cedar planks, a handsaw, a drill, screws, and sandpaper. First, measure and cut a 6×6‑inch front and back panel, plus two side pieces and a base. Next, drill a 1½‑inch entry hole centered near the top of the front panel. Glue the pieces together, then reinforce with screws for extra stability against wind and rain. Sand all edges until they feel smooth under little bird feet—and your own. You can finish with non‑toxic, outdoor paint or a clear sealant to protect against the elements. In a single afternoon, you’ll transform raw wood into a charming nesting box ready for dawn visitors. That first bird landing on your handmade house is the sweetest reward for your beginner’s effort.
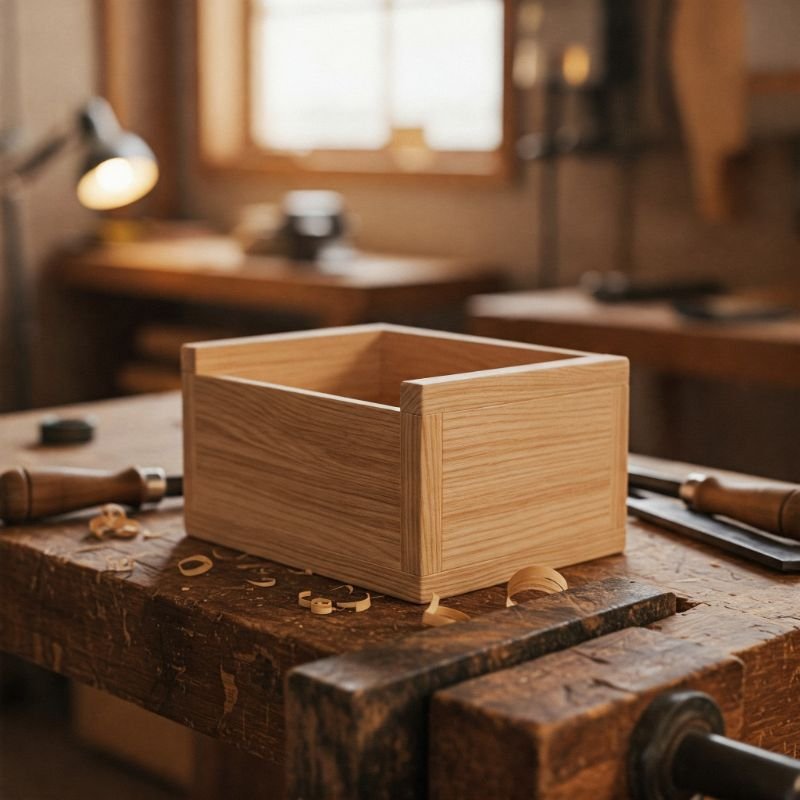
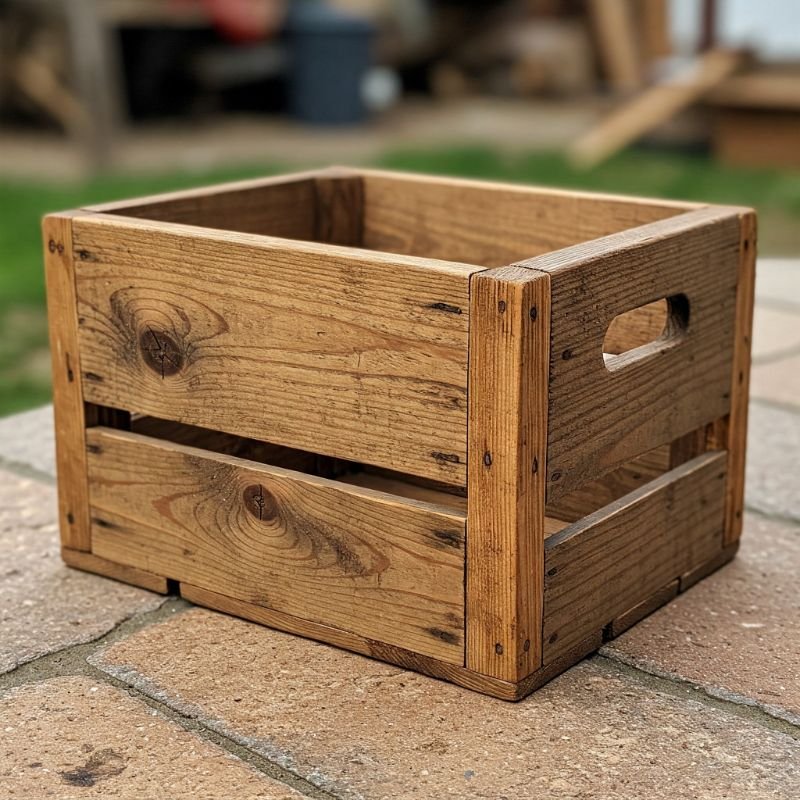
2. Rustic Wooden Crate
Building a rustic wooden crate feels like crafting a treasure chest for your tools, books, or knickknacks. This beginner project requires just a few pine or cedar planks, nails, wood glue, and basic hand tools. Measure and cut four side boards to identical lengths, then two shorter ends to frame your box. Spread wood glue at each seam, align panels squarely, and hammer nails through predrilled pilot holes for stability. Sand the exterior smooth to remove splinters and lend a polished feel, while slight imperfections add rustic charm. Finish with clear stain or matte sealant to protect the wood and showcase its natural grain. You can stack these crates as modular shelves, use them as planters, or stash blankets in a cozy corner. Each crate teaches basic joinery and measurement skills, boosting confidence for more complex builds. By the end, you’ll have a versatile storage solution that showcases your growing woodworking know‑how.
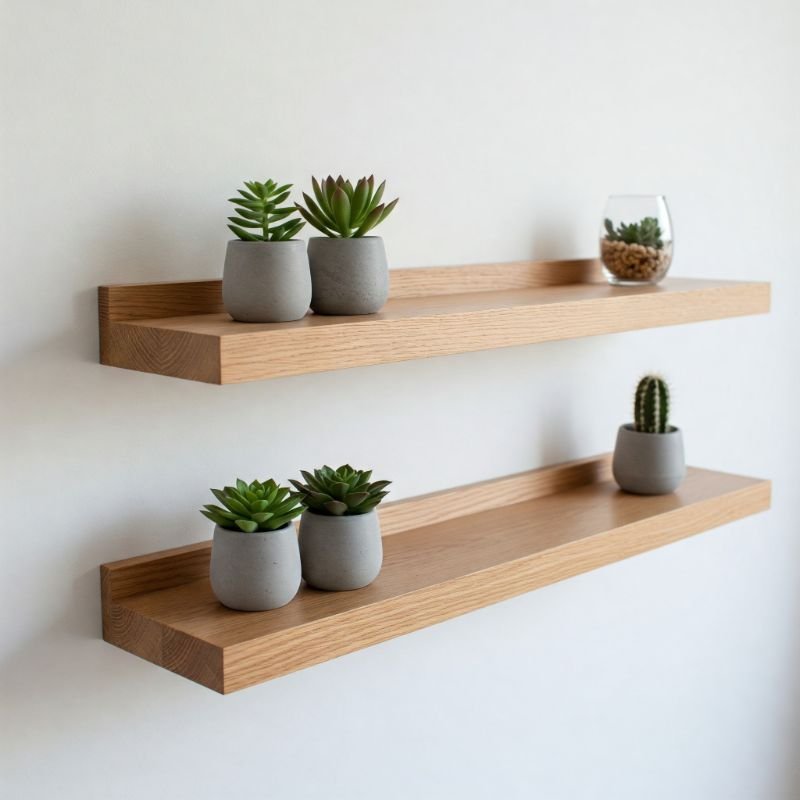
3. Floating Wall Shelves
Floating wall shelves magically appear to hover on the wall, like invisible ledges showcasing your favorite décor. They’re surprisingly beginner‑friendly—grab a sturdy board, a level, a stud finder, and floating shelf brackets. First, locate and mark studs on your wall to ensure the brackets anchor securely into solid wood. Screw the bracket flange into each stud, using a level so your shelf won’t slope downhill. Slide your board onto the brackets, tapping gently to seat it fully and confirm a snug fit. Sand the board edges smooth before applying a clear coat or colored stain for flair and protection. These shelves deliver a modern, uncluttered look perfect for plants, framed photos, or small collectibles. You’ll gain confidence in measuring, leveling, and secure mounting—skills crucial for any wood project. Plus, a floating shelf turns a blank wall into a stylish display area that seems to defy gravity.
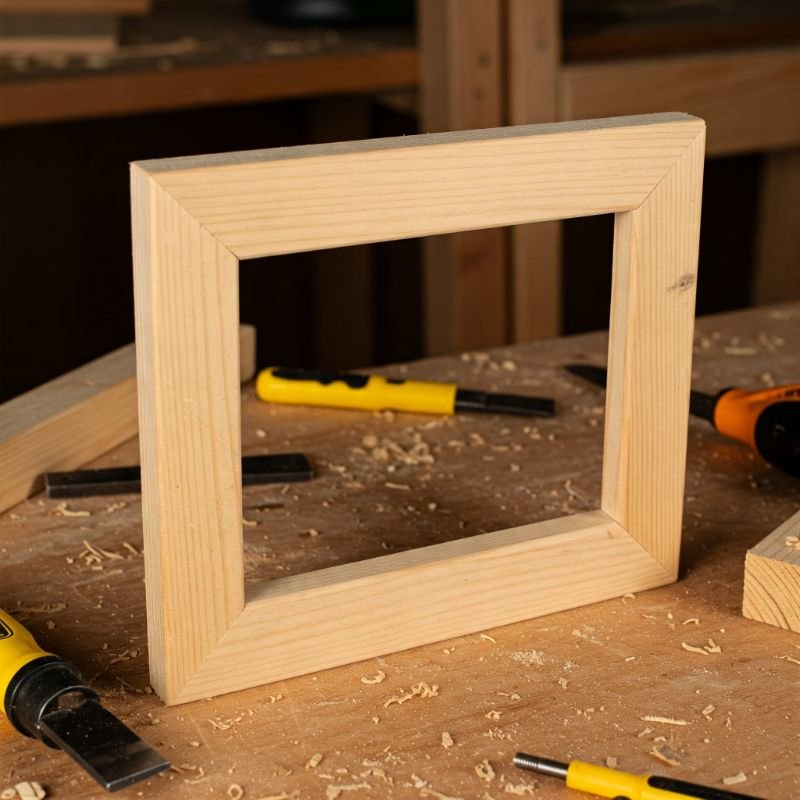
4. Basic Picture Frame
Creating a picture frame is like framing a memory with your own hands. This basic frame uses four mitered 45‑degree cuts to form a perfect rectangle—ideal for practicing saw skills. Measure your photo, then add a half‑inch for a border to determine board lengths. Use a miter box to guide each cut so corners align snugly. Once cut, glue the corners and reinforce with small finishing nails for stability. Sand all edges smooth for a professional feel before adding paint or stain. Apply a finish that complements your décor—matte black, warm walnut, or crisp white. Attach D‑ring hardware or a sawtooth hanger on the back for easy wall mounting. You’ll learn precise measuring, cutting, and joining techniques that pave the way for larger builds. Displaying a loved photo in a frame you built proves that personal touches make every glance more meaningful.
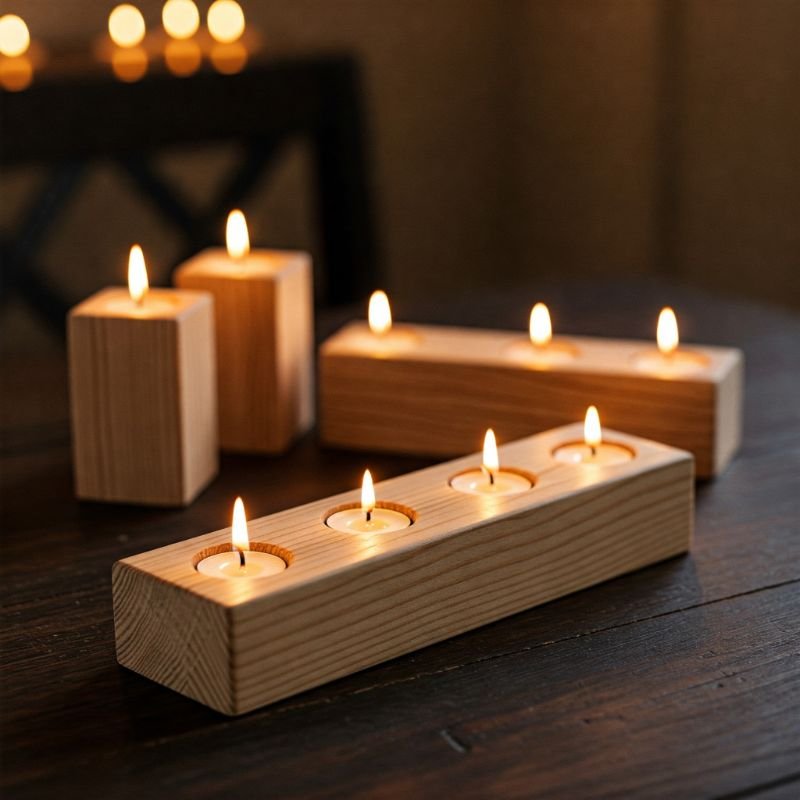
5. Wooden Candle Holders
Handcrafted wooden candle holders bring a cozy glow and sharpen your woodworking skills in one go. Choose a hardwood block—oak or walnut—and mark evenly spaced candle spots. Use a Forstner bit and drill to bore recessed cups that hold tea lights or small pillars snugly. Control your drill speed and pressure to prevent splintering and maintain smooth edges. Sand the entire block, softening corners and ensuring the candle cups are splinter‑free. Apply food‑grade mineral oil or clear varnish to highlight the wood grain and protect against wax drips. You’ll practice precise drilling and finishing techniques, building confidence for bigger builds down the road. These holders make charming gifts or elegant table accents that bathe your space in warm light. Each flicker reflects the craftsmanship and care you poured into this simple yet striking project.
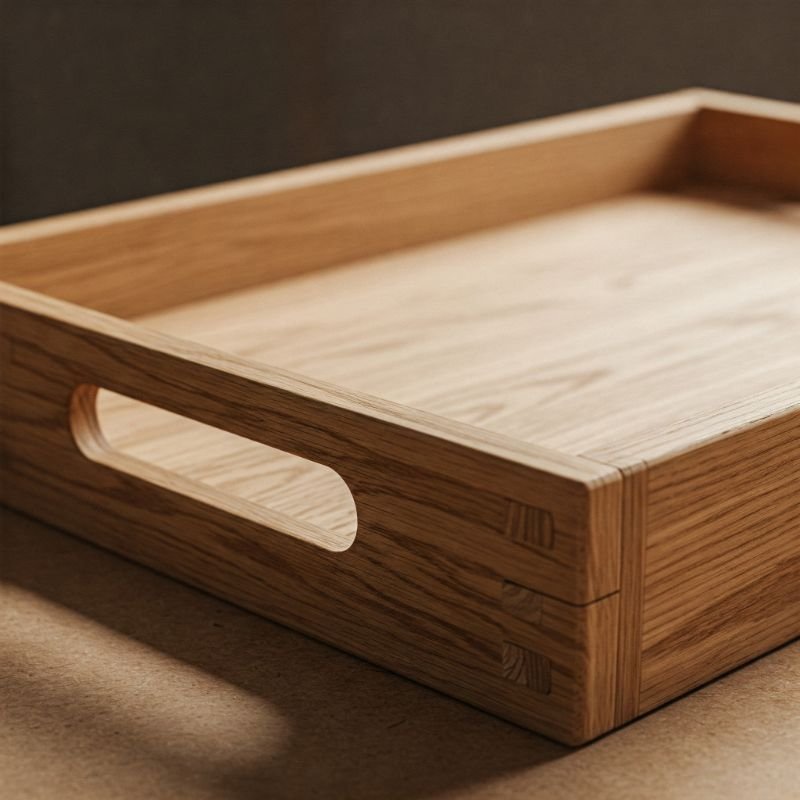
6. Serving Tray with Handles
DIY serving trays transform ordinary gatherings into gourmet experiences and teach basic woodworking in the process. Pick a birch or maple board sized to your desired tray dimensions, then smooth edges with sandpaper. Cut two shorter handle pieces from scrap wood, then rout shallow grooves into the ends of the tray base for a snug fit. Glue the handles into the grooves, clamping them until the adhesive cures to ensure a solid bond. Sand the entire tray again to blend seams and remove any glue residue. Apply a food‑safe finish like mineral oil or beeswax to protect the surface and highlight the wood’s natural warmth. You’ll practice routing, clamping, and finishing—all essential skills for more advanced furniture projects. Decorate with engraved initials or burned accents to personalize your piece. By serving snacks on a tray you built yourself, you’ll beam with pride and impress guests with handmade flair.
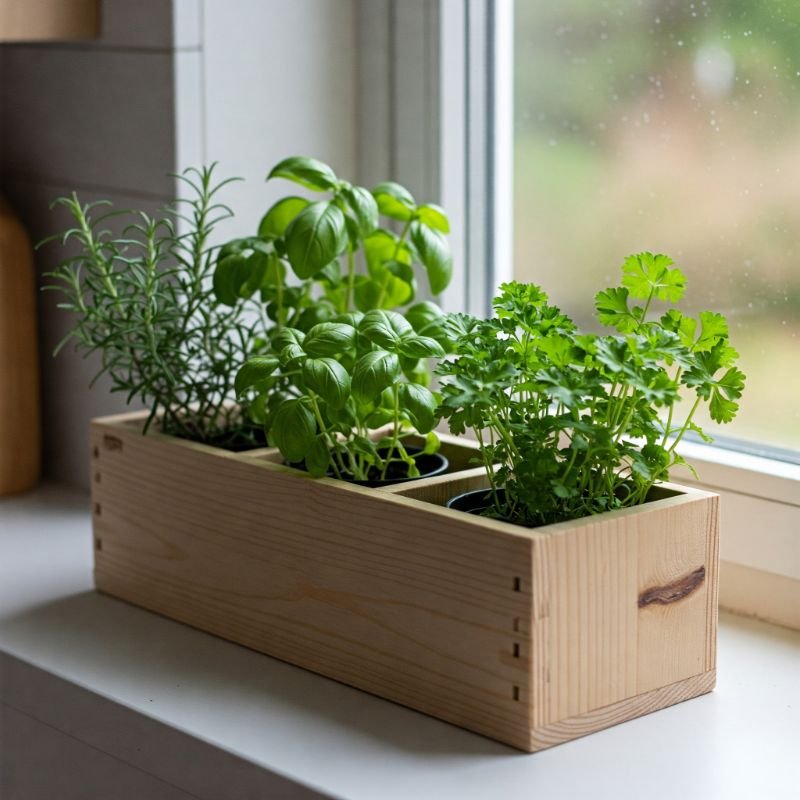
7. Herb Planter Box
Growing culinary herbs indoors connects you to nature and sprouts practical results from a small wood project. Start with narrow pine boards—two for the long sides, two for short ends, and a base—to craft a simple box. Cut and assemble with wood glue and finishing nails, ensuring right angles for a square structure. Drill a few drainage holes in the bottom so excess water escapes, preventing root rot. Sand exterior surfaces until smooth, paying extra attention to the top rim where your hands rest. Protect against moisture by applying outdoor‑grade sealant or a thin coat of marine varnish. Line the interior with landscape fabric before adding potting mix and your favorite herbs—basil, mint, or parsley. This project teaches measuring, nailing, and moisture‑proofing techniques that bridge woodworking and gardening. Watching basil sprouts push through soil in a planter you built feels like nurturing both plants and skill sets.
8. Simple Coat Rack
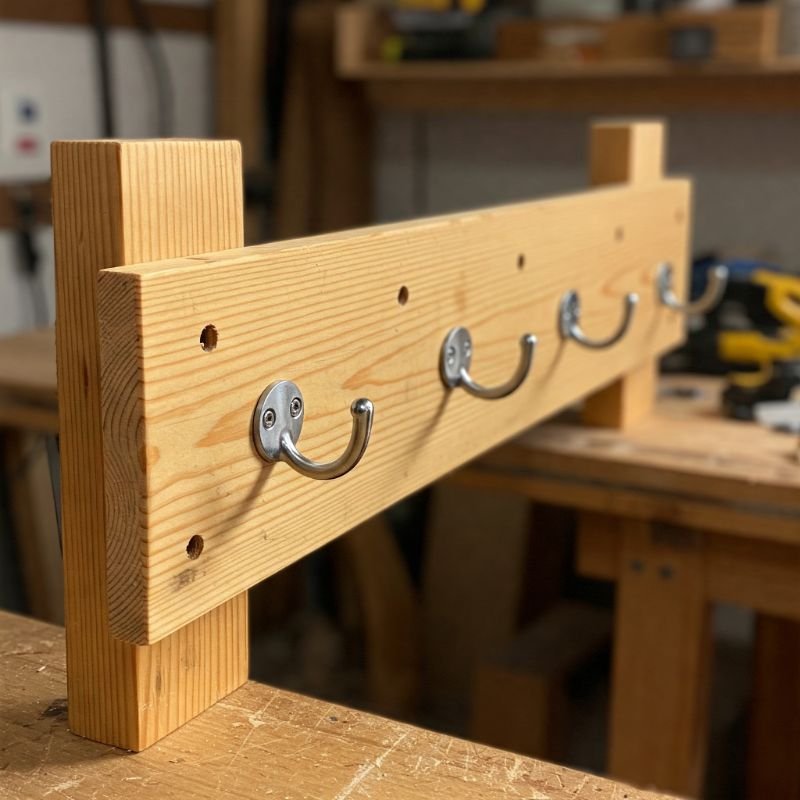
Creating a coat rack is like building a friendly welcome committee for your hallway or mudroom. Select a wide plank of poplar or pine, then sand edges and corners for a smooth finish. Mark evenly spaced hook locations—three to five usually works—then predrill holes to avoid splitting. Screw in sturdy coat hooks or decorative pegs, ensuring they align straight by checking with a level. Use wall anchors if not hitting studs, so your rack supports jackets without sagging. Sand off any rough spots and apply an oil‑based finish or paint in a color that complements your décor. Adding a small shelf above the rack boosts function and organization. You’ll gain confidence in measuring, predrilling, and secure mounting—essential for any wall‑mounted build. In just an afternoon, you’ll transform blank walls into a tidy, stylish hub for jackets, hats, and backpacks.
9. Jewelry Organizer
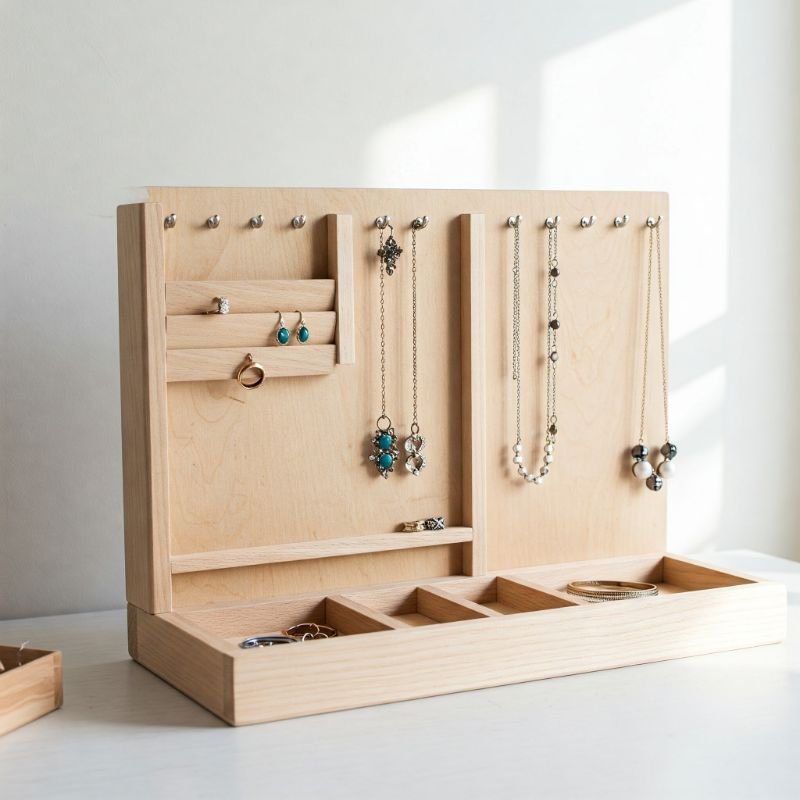
Designing a wooden jewelry organizer turns cluttered surfaces into tidy, eye‑pleasing displays. Use a 1×6 board or a scrap plywood piece as your base, cutting it to a manageable length. Attach small hooks in neat rows for necklaces and bracelets, and screw in pegs for rings. Sand the surface until it feels silky smooth under fingers, avoiding rough edges that catch delicate chains. Finish with a coat of chalk paint or clear varnish, showcasing the wood grain or achieving a matte pastel hue. This build also helps practice precise spacing and drilling. By organizing accessories on a board you built, you’ll streamline your morning routine and free up drawer space. This project teaches layout planning, hook installation, and finishing techniques—key skills for decorative woodworking. Your handmade organizer becomes both functional art and a stylish showcase for your favorite treasures.
10. Wooden Coasters Set
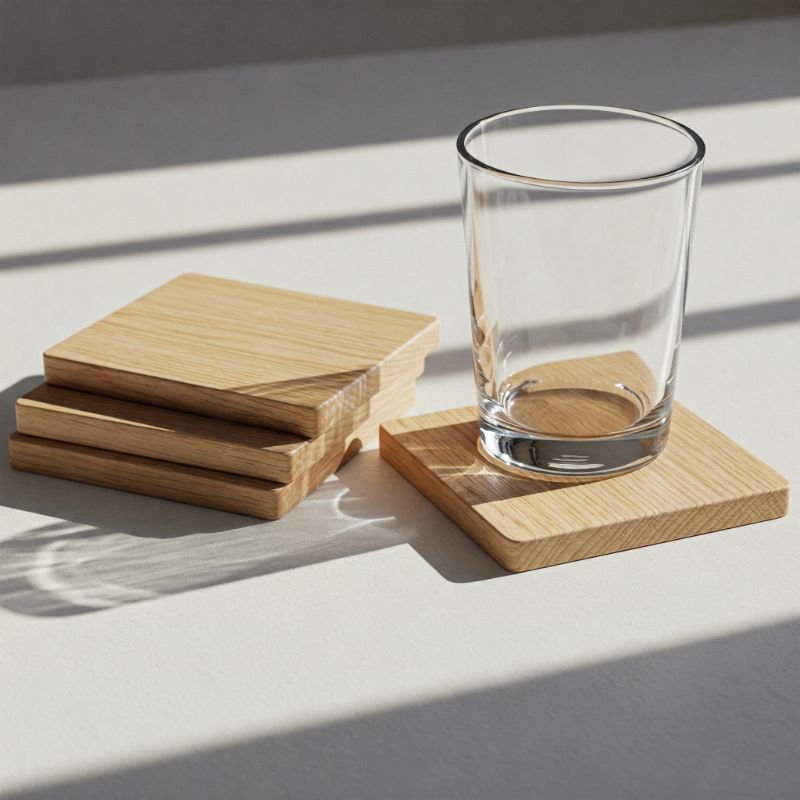
Crafting wooden coasters is like giving your coffee table a personality makeover. Start by cutting wood slices or squares—one‑by‑five‑inch pieces work perfectly. Sand all edges and surfaces until they’re smooth enough to rest a drink without wobbling. Optionally, carve shallow grooves or use a wood‑burning tool to add patterns like leaves or geometric lines. Apply a heat‑resistant polyurethane finish to protect against rings and spills, ensuring your coasters last for seasons. You can also stain each piece in different hues for a colorful matching set. This simple build reinforces measurement accuracy and surface finishing best practices while delivering functional décor. Offering these coasters as housewarming gifts or party favors adds a personal, handcrafted touch that store‑bought sets can’t match. You’ll be amazed how a handful of small coasters can elevate both your coffee habit and your DIY pride.
11. Entryway Key Holder
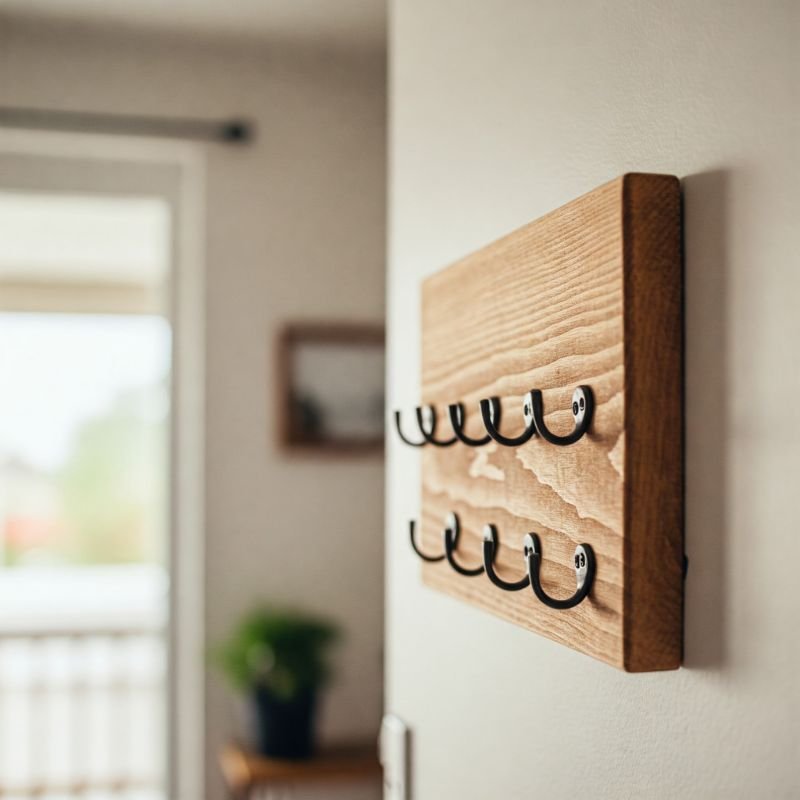
An entryway key holder saves you from fishing for keys every morning and sharpens your skills. Select a slender board—about ten inches long—and create spacing guidelines for three to five hooks. Drill pilot holes for each hook, then screw them in, checking alignment with a level to avoid crooked hanging. Sand the board smooth, then apply a finish—stain, paint, or chalkboard coating for quick notes. Hang the finished piece by screwing through the board into studs or using strong picture‑hanger plugs. This quick build enhances both function and form at your doorway. The project teaches hook installation, pilot‑hole drilling, and finishing—all core techniques for wall‑mounted woodworking. A sleek key holder built by your hands transforms a chaotic entryway into a curated welcome space where you’ll never misplace keys again.
12. Small Bench or Stool
Building a small bench or stool is like crafting a sturdy stage for your next woodworking triumph. Use a solid board—oak or maple—for the seat, cutting it to your chosen dimensions. Attach four legs made from dowels or board scraps, gluing and clamping them into place. Reinforce each leg with metal corner brackets for extra stability and to prevent wobbling. Ensure legs are plumb using a square, then sand all surfaces smooth to the touch. Finish with stain or paint, and protect with clear coat, bringing out the wood’s natural beauty. This build teaches essential joinery, load‑bearing assembly, and finishing techniques you’ll use on bigger projects. When you sit down, you’ll feel proud of a seat you constructed. A custom bench or stool makes a versatile accent for any room and validates your budding skills.

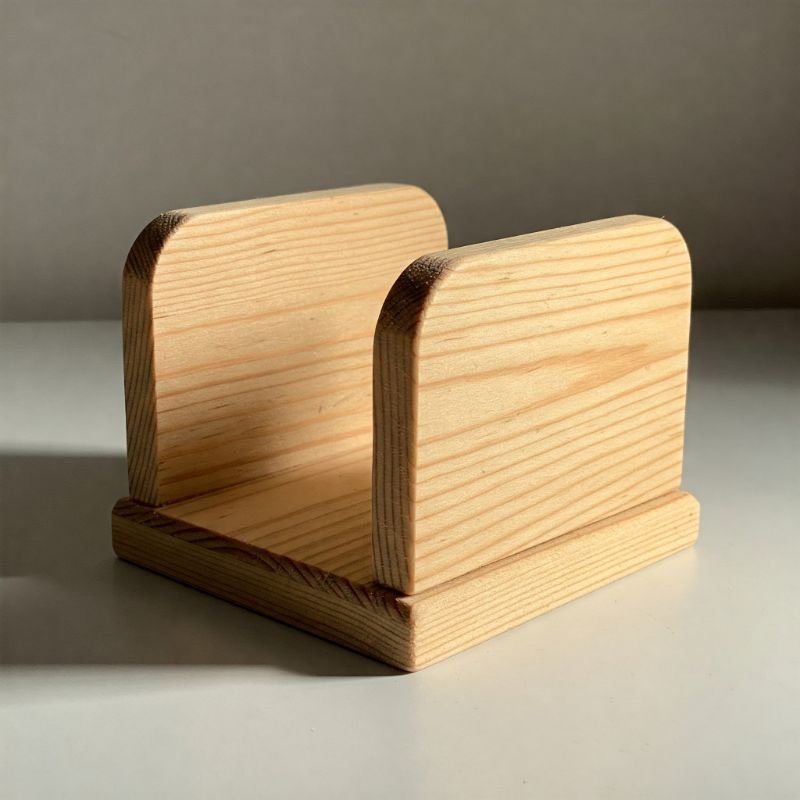
13. Napkin Holder
Crafting a wooden napkin holder transforms mealtime clutter into curated style. Choose a flat base and two upright panels from hardwood or plywood, cutting them to match napkin dimensions. Sand all edges smooth, eliminating rough spots that catch paper. Mark and drill pilot holes at the base of each side panel, then use wood glue and screws to secure them upright. Ensure panels stand perfectly parallel to cradle napkins snugly without bending or slipping. Finish with food-safe paint or oil to protect against kitchen messes and spills. This project reinforces precise measurement, drilling, and square assembly while producing a daily‑use item. You can carve decorative cutouts or paint seasonal motifs for extra charm. By the end, you’ll have an elegant napkin dispenser that marries function and flair on your dining table.
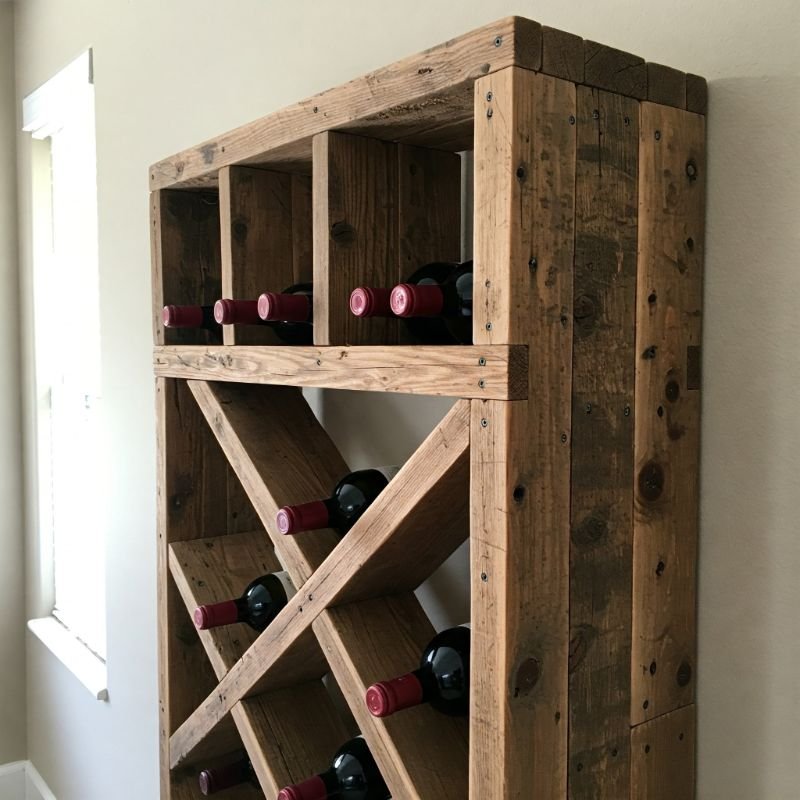
14. DIY Wine Rack
Building a wine rack feels like crafting a mini cellar for your prized bottles right at home. Use a sturdy board for the back panel and attach horizontal slats with evenly spaced notches to cradle bottle necks. Measure bottle widths carefully so each slot holds securely without slipping. Glue and nail slats into place, then reinforce with screws for heavy-duty support. Sand surfaces smooth and apply a rich stain or matte paint to complement your décor. This rack teaches accurate measuring, notch cutting, and load-bearing assembly—key skills for furniture building. Your handcrafted wine rack becomes a focal point, displaying your collection like a boutique vineyard. It elevates your bar area while showcasing your woodworking flair. A simple rack built by your hands proves that pleasure and craftsmanship make the best pairing.
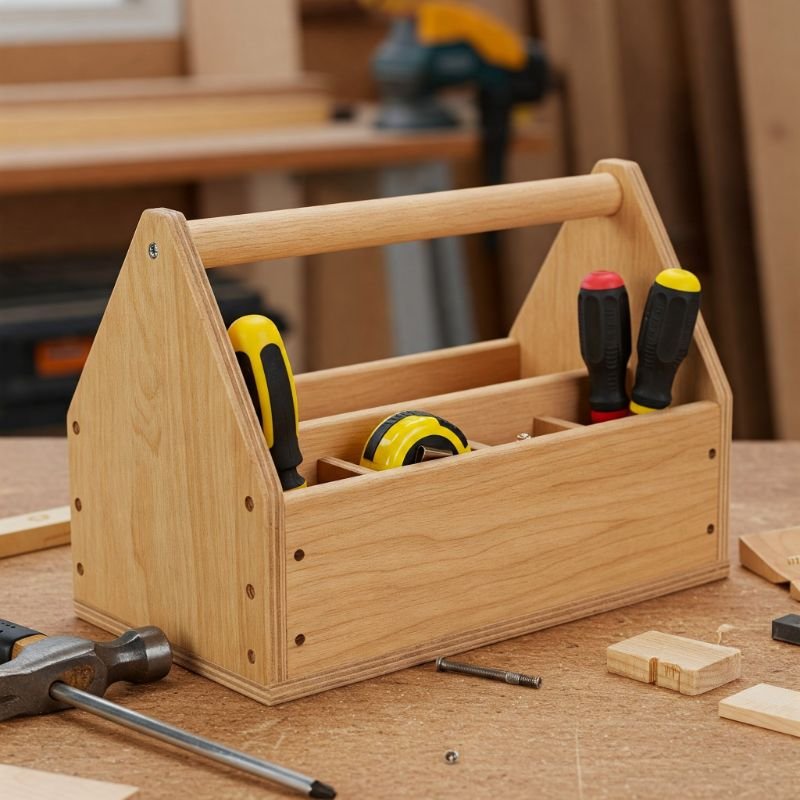
15. Portable Tool Caddy
Every maker needs a reliable spot for essentials, and a portable tool caddy is woodworking on-the-go made real. Cut four side panels and a base from plywood, then assemble with wood glue and finish nails for a secure box. Sand all surfaces, focusing on edges so they won’t snag tool handles or sleeves. Cut handles into the top edges or attach a sturdy dowel rod across the center for comfortable carrying. You can partition the interior with thin wood strips to keep hammers, screwdrivers, and measuring tapes organized. Finish with color‑coded paint or clear varnish to protect against wear. This caddy teaches box assembly, handle installation, and interior planning for tool storage efficiency. A custom tool caddy boosts productivity and demonstrates that simple woodworking solves real-world needs.
Conclusion
These fifteen simple wood projects for beginners prove that you don’t need a professional workshop to start making beautiful, functional items. Each build—from cozy birdhouses to elegant wine racks—introduces core skills like measuring, cutting, joinery, and finishing. As you progress through these projects, you’ll gain confidence, sharpen problem‑solving abilities, and develop a deeper appreciation for craftsmanship. Displaying your creations not only adds character to your home but also sparks pride in every handmade detail. Remember to practice safety, take your time with each step, and enjoy the process as much as the finished result. With each new project, you’ll build both your portfolio and your passion for woodworking—one project at a time.
Read next: 15 Wood Craft Ideas to Try at Home
Frequently Asked Questions
Q1: What essential tools do beginners need for these wood projects?
Start with a handsaw, cordless drill, set of wood clamps, measuring tape, square, sandpaper or sanding block, wood glue, and finishing nails. These basics cover most simple cuts, holes, and assembly tasks.
Q2: How can I ensure accurate cuts on my first few projects?
Use a miter box or a cutting guide attached to your saw for straight, repeatable cuts. Measure twice, mark clearly with a pencil or marking knife, and practice on scrap wood to build confidence before cutting final pieces.
Q3: What type of wood is best for beginner projects?
Softwoods like pine and poplar are affordable and easy to cut, making them ideal for learning. Once comfortable, you can explore hardwoods like oak or maple for projects that benefit from extra durability and striking grain patterns.
Q4: How do I choose the right finish for my project?
Consider project use and location: indoor items work well with polyurethane or water‑based varnish, while outdoor pieces need exterior sealant. Food‑contact projects—like trays or coasters—require food‑safe mineral oil or beeswax finishes.
Q5: Can I modify these plans to better fit my space or style?
Absolutely! Feel free to adjust dimensions, add decorative details, or experiment with color and hardware. Woodworking is as much about creativity as technique, so customize each project to reflect your personal taste and needs.
Stay up to date with our latest ideas!