15 Small Pallet Wood Projects to Try Today
Discover 15 simple pallet wood projects to try today, from rustic coasters to mini planters. Upcycle pallets into stylish DIY decor with easy step-by-step guides.

If you’ve ever eyed a stack of weathered pallets and wondered what treasures hide within those slats, you’re in luck. Small pallet wood projects offer an eco-friendly, budget-friendly entry into woodworking, and you don’t need a full workshop to get started. From crafting sleek serving trays to charming mini planters, each project transforms reclaimed wood into everyday delights. You’ll learn core skills—measuring, cutting, sanding, and finishing—while flexing your creative muscles. With just a few basic tools and a bit of enthusiasm, you can tackle fifteen hands‑on builds that add character to any space. Ready to roll up your sleeves, rescue a pallet, and make something amazing? Let’s dive into small pallet wood projects that feel like crafting magic—one slat at a time.
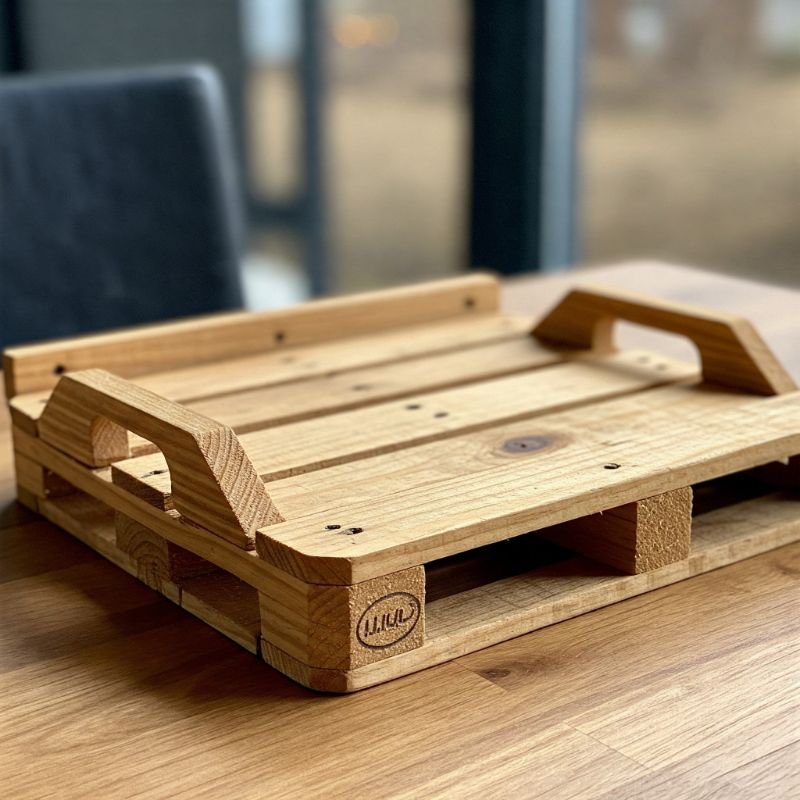
1. Pallet Serving Tray
Transforming a humble wooden pallet into a serving tray feels like turning forgotten leftovers into a gourmet feast. You begin by salvaging a one-foot by twelve-inch plank from a pallet, ensuring you choose a smooth and sturdy piece. Next, you cut four smaller planks for the side rails, about one inch by twelve inches each. Sand every surface down with medium and fine grit sandpaper until the wood feels as smooth as butter under your fingertips. Arrange the rails around the base plank and secure them with wood glue and finishing nails, clamping each corner until it cures. Once dry, drill pilot holes for the handles and fasten metal or rope handles to add functional flair. Finally, apply a clear coat of polyurethane to protect against spills. This DIY serving tray not only stamps your personality on your table but also sparks conversations about creativity and sustainability. By upcycling pallets, you reduce waste while crafting a beautiful, practical piece. Doesn’t it feel rewarding to present snacks on a tray you built yourself?
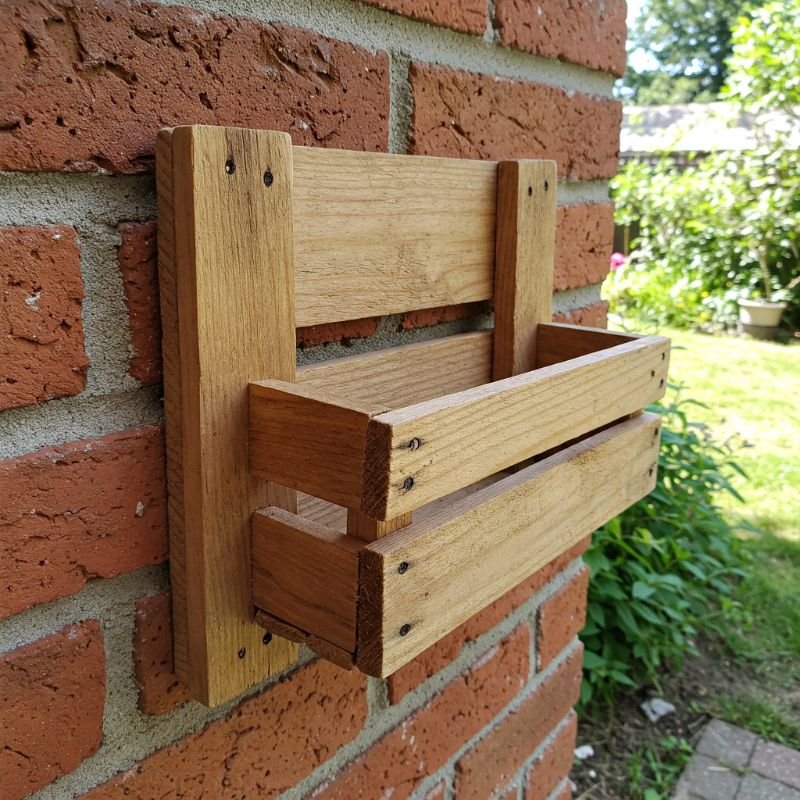
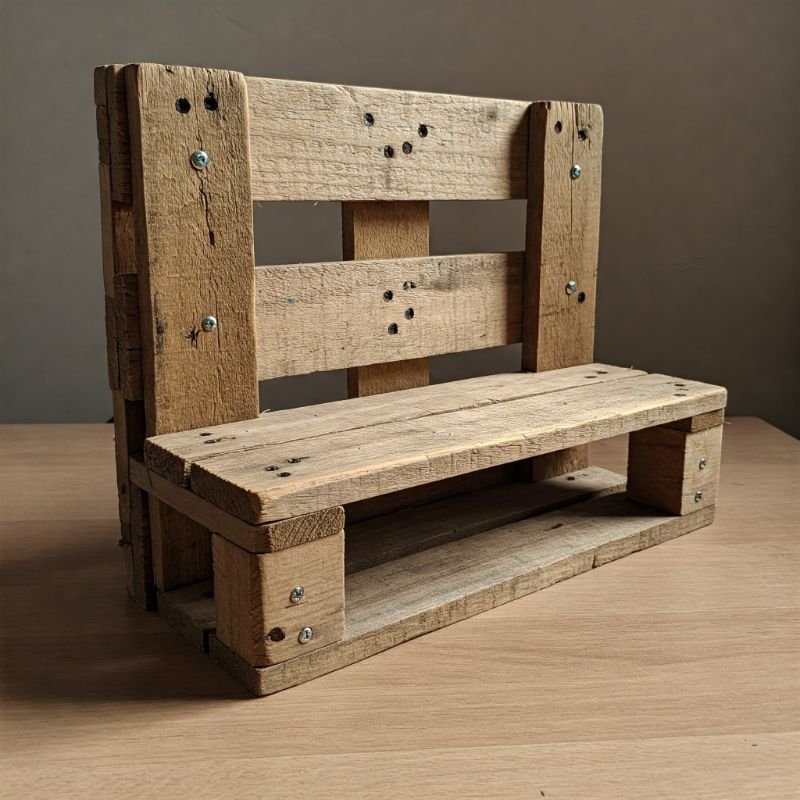
2. Pallet Wall Planter
A pallet wall planter turns bare walls into living green canvases, like hanging a portrait that grows. Start by selecting two narrow pallet planks as vertical supports and several shorter slats for the planter boxes. Cut and assemble each box by nailing or screwing slats together in a rectangular shape, leaving one side open to cradle soil. Attach a landscape fabric liner inside each box to hold the potting mix. Sand and seal the wood to guard against moisture, using an outdoor-grade finish. Next, secure the planter boxes to the vertical supports with screws, spacing them evenly. Finally, mount the entire unit on your fence or patio wall using heavy-duty brackets or hooks. Fill each box with your favorite herbs or trailing succulents to create a tiered garden that feels like a waterfall of greenery. This project teaches basic box assembly, liner installation, and secure mounting, while rewarding you with fresh herbs or vibrant blooms cascading across your space.
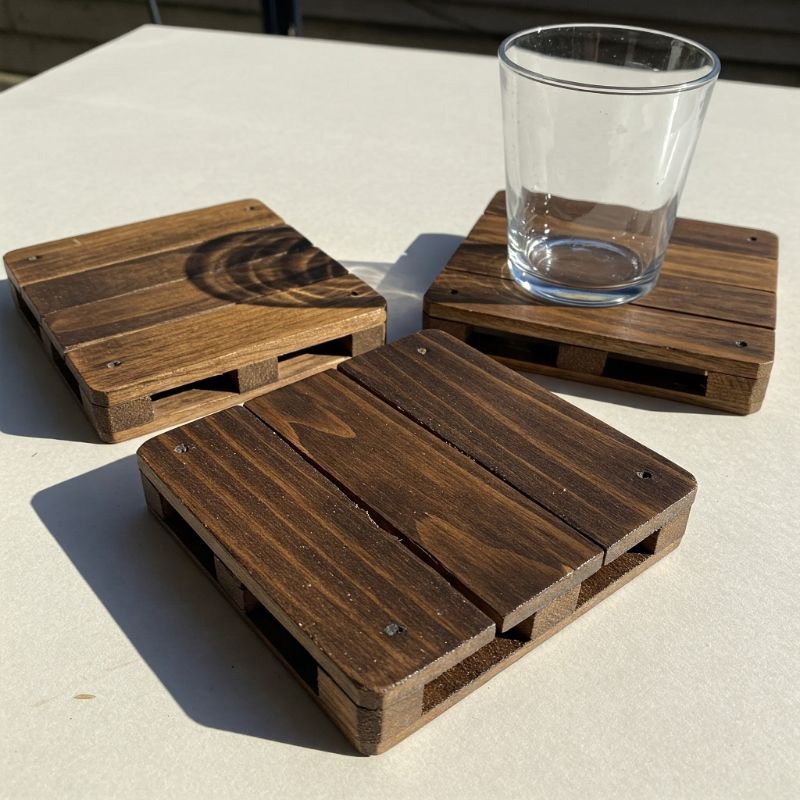
3. Pallet Coasters Set
Crafting a set of pallet coasters feels like giving your coffee table a warm hug. Gather scrap pallet wood and cut it into uniform squares—four inches by four inches works perfectly. Sand each piece thoroughly to remove rough edges and splinters, progressing from coarse to fine grit until they’re silky smooth. Optionally, route a decorative groove around the perimeter or burn simple patterns using a wood-burning tool for visual interest. Next, apply two coats of a water-resistant, heat-safe finish—such as clear varnish or food-grade mineral oil—to safeguard against mug rings and spills. Let each coat dry fully before adding the next. Your new coasters will showcase rustic wood grain and bring a handcrafted vibe to every morning coffee. They make thoughtful gifts too, presenting a bundle of artisanal charm. As you set down drinks, you’ll appreciate how a simple coaster elevates ordinary moments into mindful rituals.
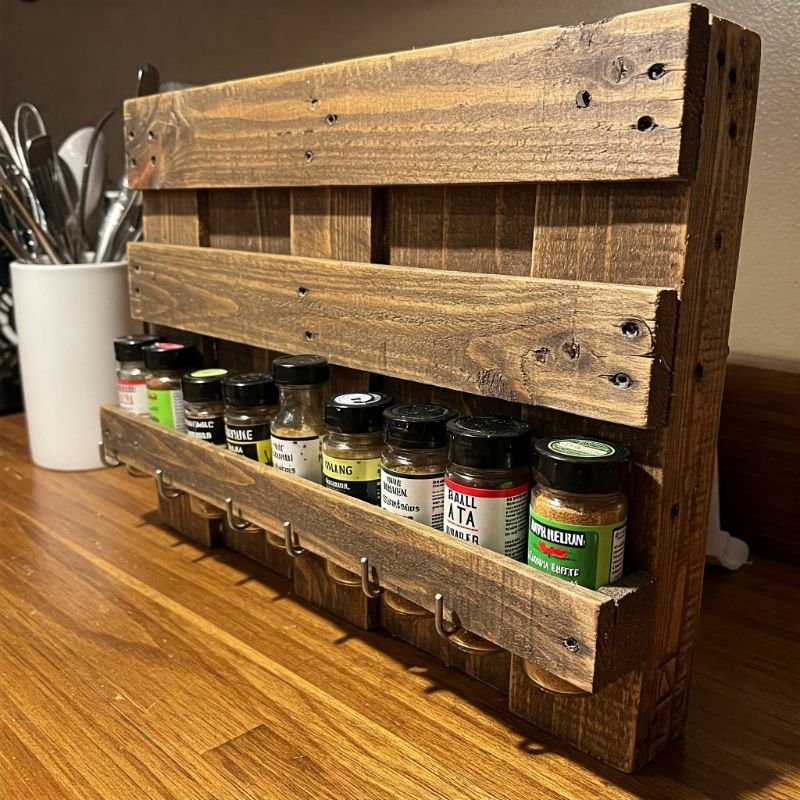
4. Pallet Spice Rack
A pallet spice rack organizes your kitchen like a tiny farmers’ market on your wall. Choose a sturdy pallet board at least twelve inches wide. Cut two horizontal slats twelve inches long for top and bottom rails, then position shorter vertical dividers between them to form narrow compartments. Pre-drill holes for mounting screws, then glue and nail the dividers in place. Sand the entire rack smooth, focusing on edges where labels might peel. Stain or paint the wood to match your kitchen’s palette—rustic cinnamon, crisp white, or deep charcoal. Install small hooks or dowels beneath each compartment for hanging measuring spoons or small utensils. Finally, fix the rack to your wall using drywall anchors or direct-to-stud screws for maximum support. Slide in uniform spice jars, and you’ve created a visually pleasing, space-saving display that turns cooking into a breeze. You’ll practice precise measuring, cutting, and wall-mounting—skills that translate to larger builds down the road.
5. Mini Pallet Picture Frame
Building a mini pallet picture frame feels like bottling a memory in reclaimed wood. First, disassemble a pallet carefully to preserve the narrow slats, then cut four pieces to match your photo’s dimensions plus border width. Miter each end at 45 degrees for snug corner joints. Sand the cut faces to remove roughness and test-fit the frame until the corners align perfectly. Secure corners with wood glue and reinforce with small finishing nails or corner brackets for durability. Sand the outer and inner edges for a flawless finish. Apply a stain or paint wash to highlight the grain, then gently wipe away excess for a weathered look. Finally, attach a thin backing board and glass or acrylic front, then add hanging hardware. Framing a snapshot of loved ones or scenery in pallet wood imbues it with warmth and story, reminding you that even the simplest materials can cradle cherished moments.

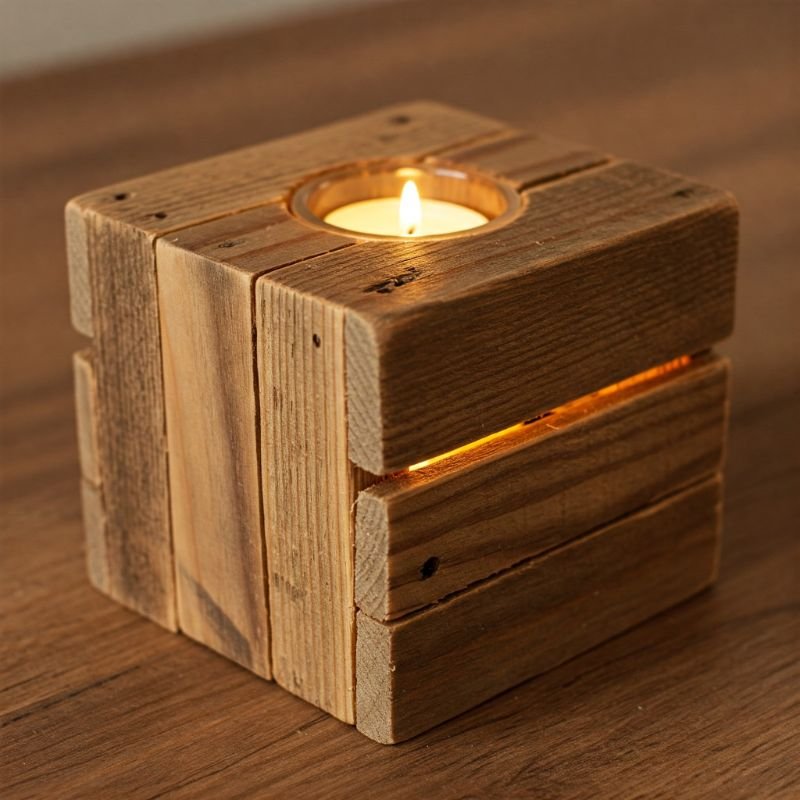
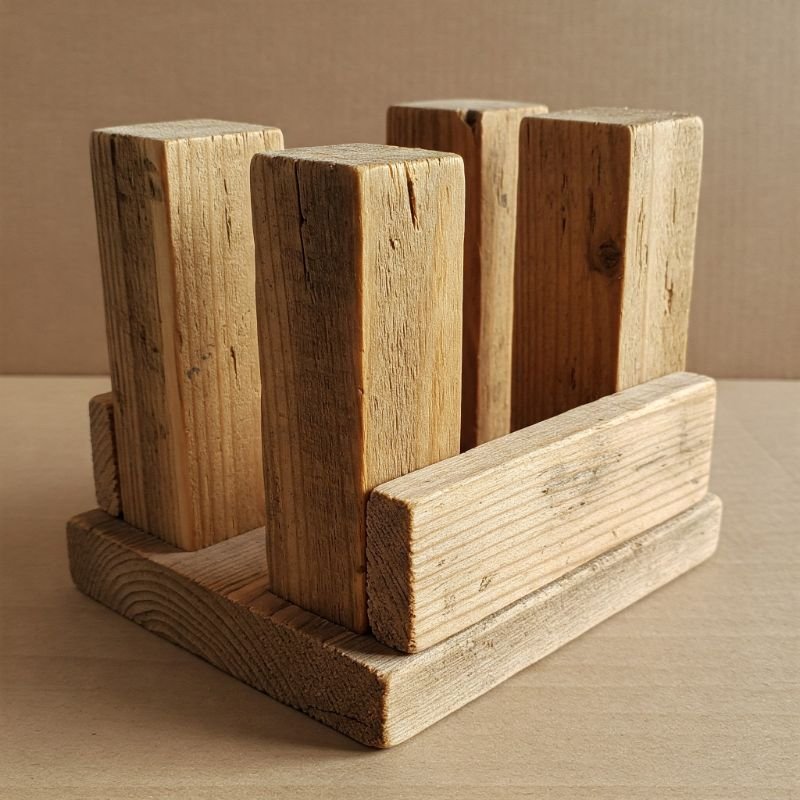
6. Pallet Candle Holder
A pallet candle holder brings cozy ambiance with a rustic twist. Start by selecting a thick pallet board block, around six inches long and three inches high. Mark evenly spaced circles on top to fit tea lights or small pillar candles. Use a Forstner bit on your drill press or handheld drill to bore clean, shallow cups that cradle each candle securely. Sand the entire block thoroughly, rounding sharp corners and smoothing the candle cups to avoid scratches. Wipe away dust, then apply a high-heat–resistant finish or clear outdoor sealant if you use them outdoors. Slide in candles and light them to watch warm pools of light dance on rough wood grain. This project teaches precise drilling, sanding, and finishing—key woodworking fundamentals—while delivering a stunning centerpiece. Each flicker highlights the contrast between rugged pallet wood and the delicate glow of candlelight, crafting an atmosphere as inviting as a crackling hearth.
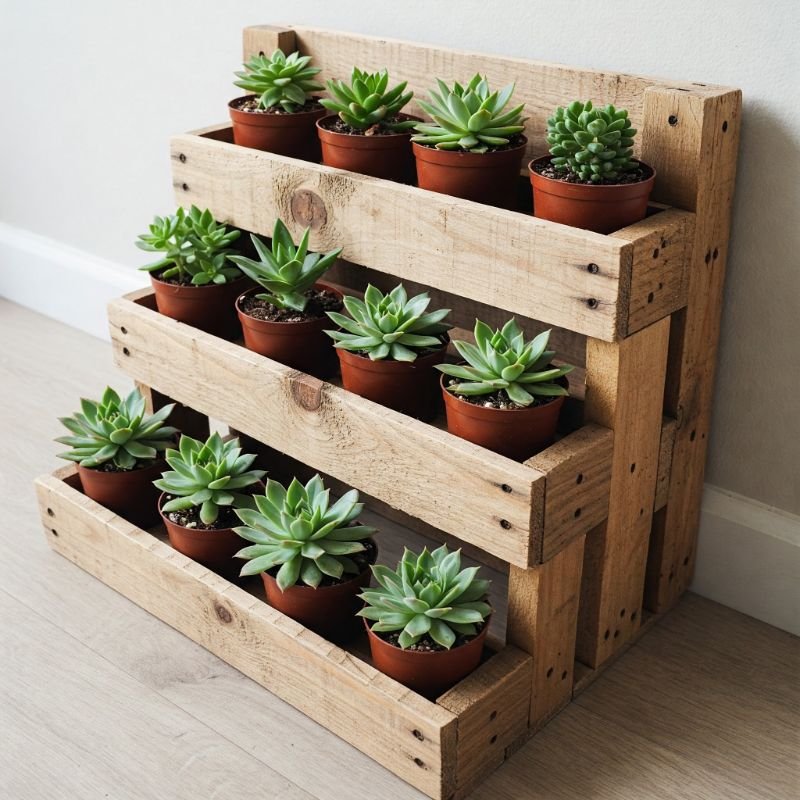
7. Pallet Succulent Stand
A multi-tiered pallet succulent stand resembles a tiny hillside garden on display, perfect for small succulents and cacti. Salvage three or four pallet slats of equal length—about twelve inches—and attach them at staggered heights onto two vertical supports cut from a thicker board. Pre-drill holes to secure each slat with screws, using a level to ensure they sit flat. Sand all surfaces smooth, focusing especially on edges where pots rest. Stain or paint the stand to complement your plant colors—light gray for a modern line-up or weathered oak for earthy vibes. Once dry, position your succulents in small pots on each tier. The stand showcases each plant like artwork while saving floor space. You’ll practice precise spacing, secure fastening, and finishing techniques, culminating in a living display that thrives on your windowsill or balcony. Watching sunlight play across your mini hillside of greenery feels like nurturing a tiny forest of resilience.
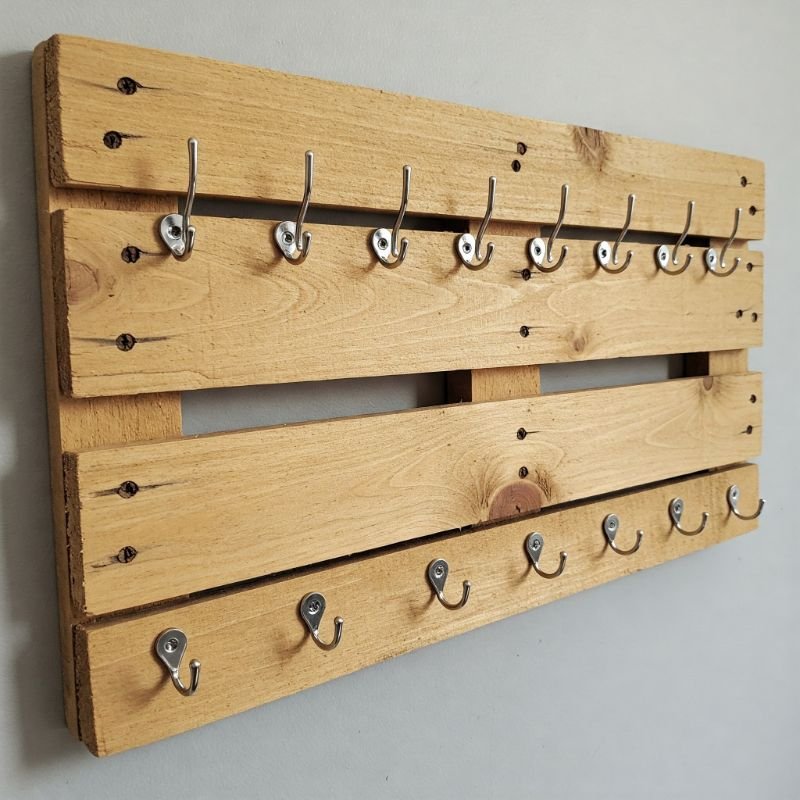
8. Pallet Key Holder
A pallet key holder acts like a sturdy concierge for your everyday essentials. Choose a narrow pallet plank roughly one foot long. Sand it until the surface feels like velvet beneath your fingers, then stain or paint for a polished backdrop. Mark equal intervals for three to five decorative hooks, ensuring they align straight by checking with a level. Pre-drill pilot holes to prevent splitting, then screw in the hooks firmly. Add a small shelf above the hooks by attaching another slat horizontally if you crave more functionality—perfect for mail or sunglasses. Finally, mount the entire piece on your entryway wall using anchors or screws into studs. Each key turns into a VIP guest with a designated spot, eliminating frantic searches for lost keys. This build hones measuring, drilling, and secure wall-mounting skills, all while delivering a charming organizer that greets you daily and bids farewell each morning.
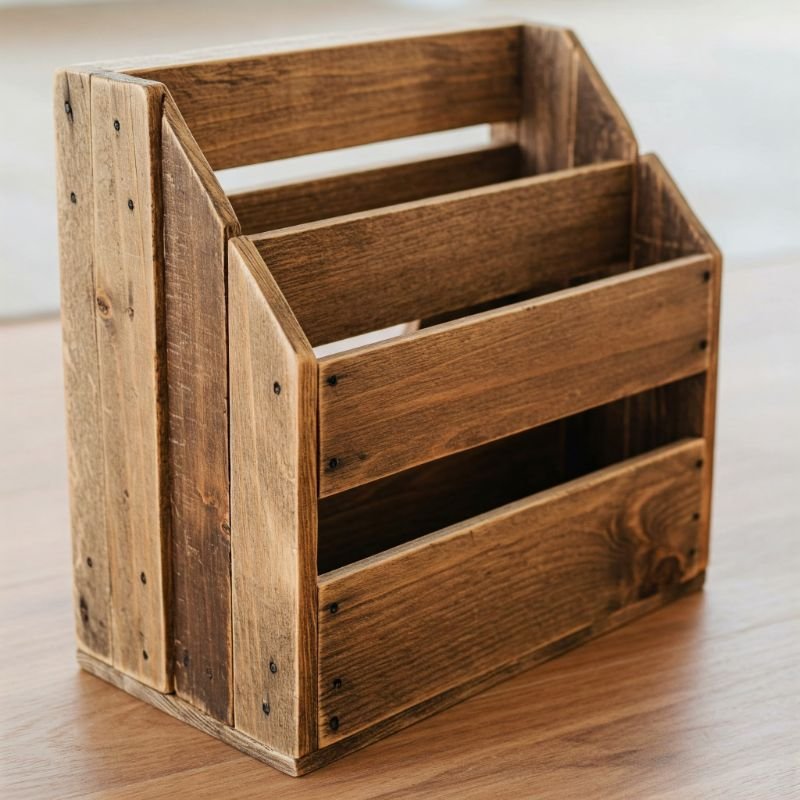
9. Pallet Magazine Rack
A pallet magazine rack corrals reading material like a mini-library in your living room. Start by cutting two side panels with angled tops—think a gentle slope reminiscent of old school desks. Sand edges and surfaces smooth. Cut four horizontal slats, spacing them to cradle magazines at a slight backward angle for easy browsing. Pre-drill and attach slats to the side panels using wood glue and finish nails, reinforcing each joint with screws for heft. Sand any rough spots and apply your finish of choice—clear varnish to showcase rustic tones or a bold color pop. Place the assembled rack near your favorite reading nook, fill it with current issues, and enjoy the satisfaction of a clutter-free floor. As you slip in magazines, you’ll practice angled cuts, assembly precision, and finish application, boosting your confidence for more elaborate custom furniture projects.
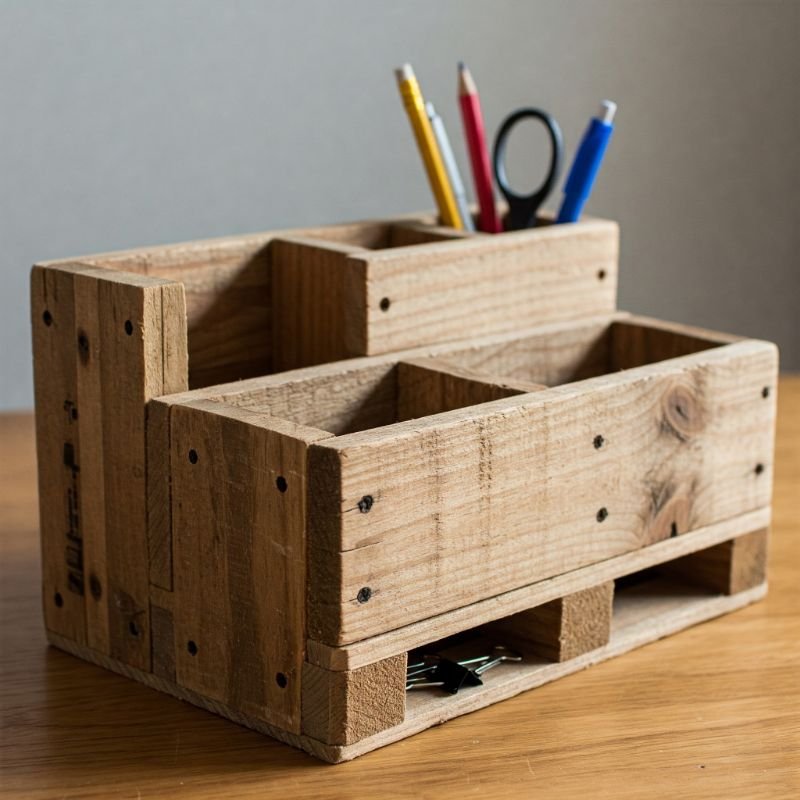
10. Pallet Desk Organizer
A pallet desk organizer feels like giving your workspace a mini-makeover. Gather scrap pallet wood and cut a base about eight inches by six inches. Attach two shorter side panels on the back and two front panels in a stepped arrangement to create compartments for pens, notepads, and small gadgets. Sand all surfaces thoroughly to avoid splinters—your hands will thank you. Pre-drill and glue each panel in place, clamping until the adhesive sets. Reinforce joints with small nails or brad nails for durability. Apply a coat of chalk paint if you love a distressed farmhouse vibe, then sand edges lightly for a worn finish. Slide your staples, sticky notes, and highlighters into their new slots—suddenly, the chaos of desktop clutter becomes organized bliss. This build reinforces fundamental joinery, clamping, and finishing techniques while delivering a personalized tool caddy you’ll admire during every work session.
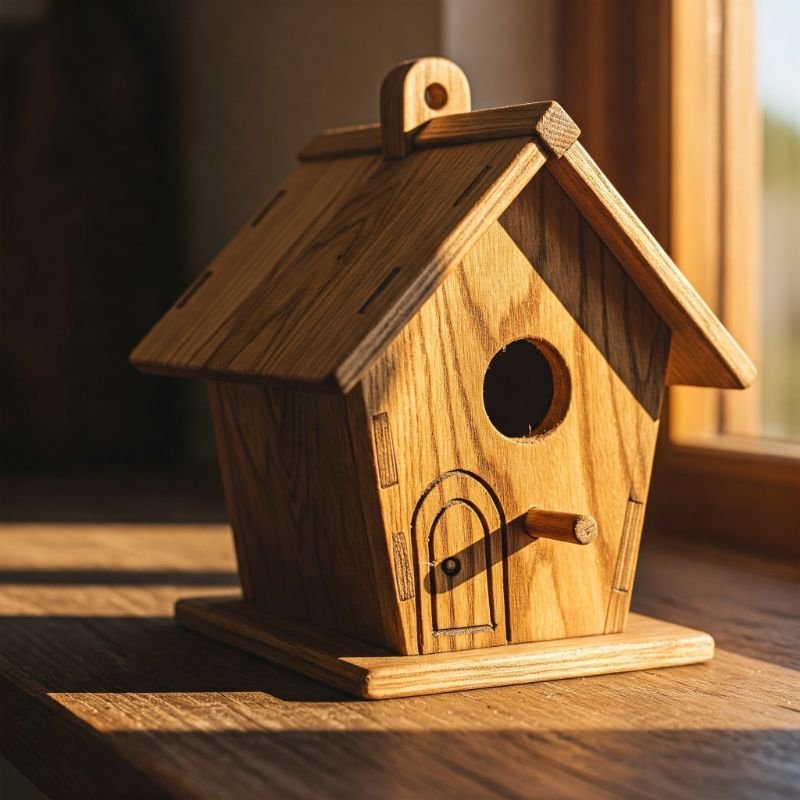
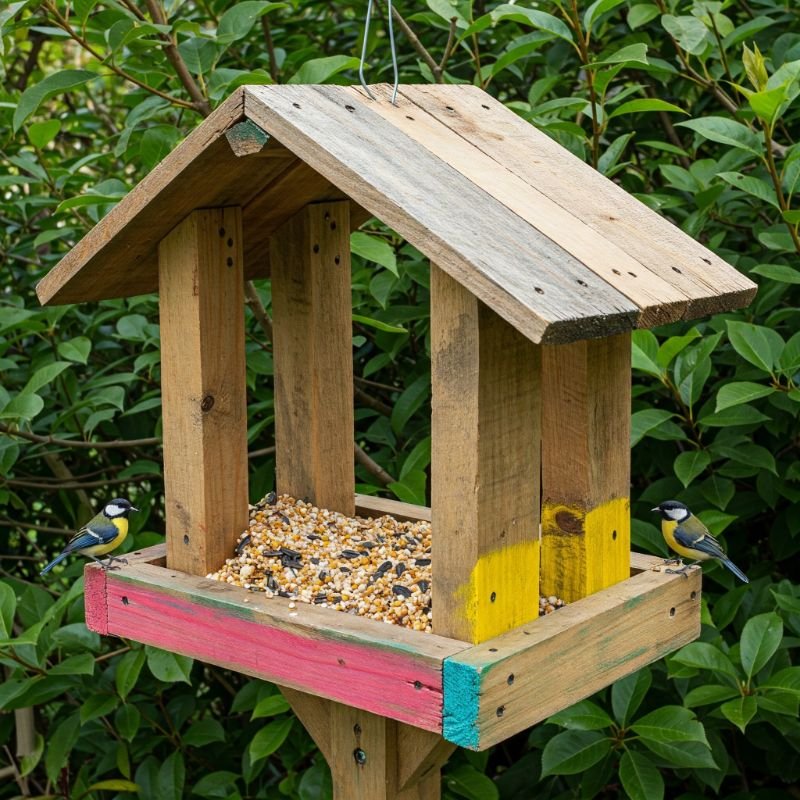
11. Pallet Bird Feeder
Turning a pallet into a bird feeder feels like inviting nature’s symphony to your backyard. Cut a rectangular pallet slat for the feeder’s base and two narrow strips for side rails to contain birdseed. Attach a pitched “roof” using two angled slats meeting at a ridge, securing with glue and nails. Sand all edges until the wood feels smooth under little talons. Drill small drainage holes in the base to prevent soggy seed, then apply a weatherproof sealant to protect the wood from rain. Tie durable rope or chain to the roof corners, creating a hanger, and choose a shady branch to suspend it. Within days, colorful birds will flit and perch on your homemade feeder. This project teaches angled cuts, basic roofing assembly, and weatherproof finishing principles while transforming reclaimed wood into a bustling wildlife café.
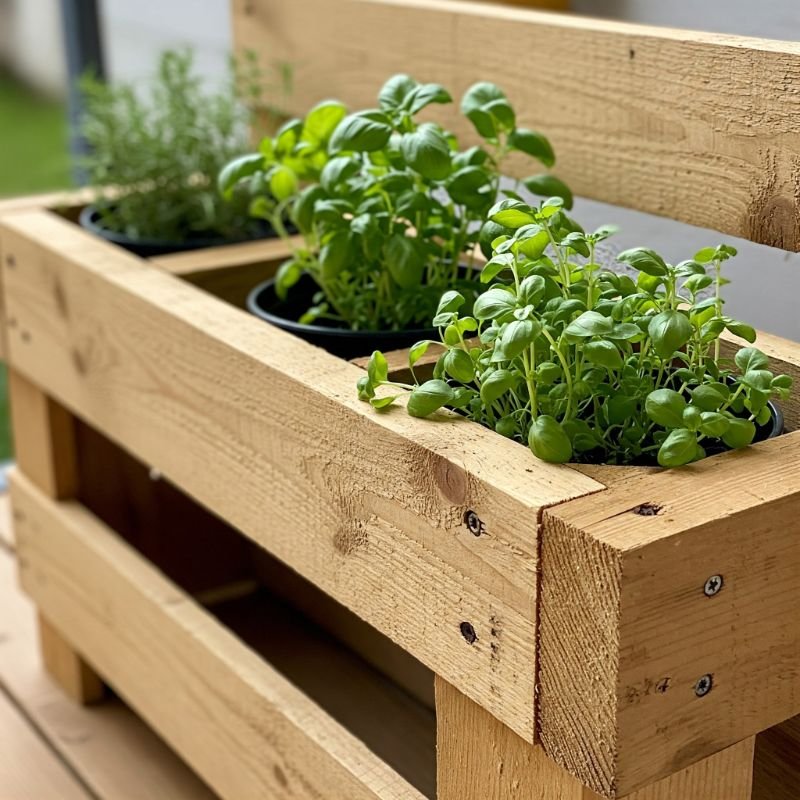
12. Pallet Herb Planter Box
A pallet herb planter box brings fresh flavors within arm’s reach of your kitchen window. Select four narrow pallet slats—two for long sides and two for short ends—and cut a piece for the base. Pre-drill, glue, and nail the sides to the base to form a shallow box. Drill several drainage holes in the bottom to let excess water escape. Sand the entire planter smooth, paying special attention to the top rim. Apply a food-safe, outdoor-rated sealant to protect the wood and soil moisture. After it dries, fill with potting mix and plant basil, thyme, or rosemary in neat rows. The scent of fresh herbs will perfume your air while you chop ingredients just steps away. This build covers box assembly, drainage solutions, and sealing—all central woodworking skills—while yielding a functional garden in a handcrafted container right on your windowsill.
13. Pallet Napkin Holder
A pallet napkin holder keeps mealtime tidy and feels like adding refinement to a rustic table. Cut a base slat slightly longer than your napkin stack and two side panels tall enough to cradle the napkins. Sand each piece until they’re smooth to the touch. Pre-drill holes at the base of each side panel, apply glue, and clamp them upright onto the base. Reinforce with finishing nails for extra strength. Round the top edge of each panel with sandpaper or a rasp for comfort when grabbing napkins. Coat the entire holder with a durable finish—food-safe mineral oil or polyurethane—to protect against spills. Slide in your napkins, and voilà: you have a charming dispenser that complements any dining setting. This simple project teaches base-and-panel assembly, finishing, and edge profiling, all while delivering everyday practicality.
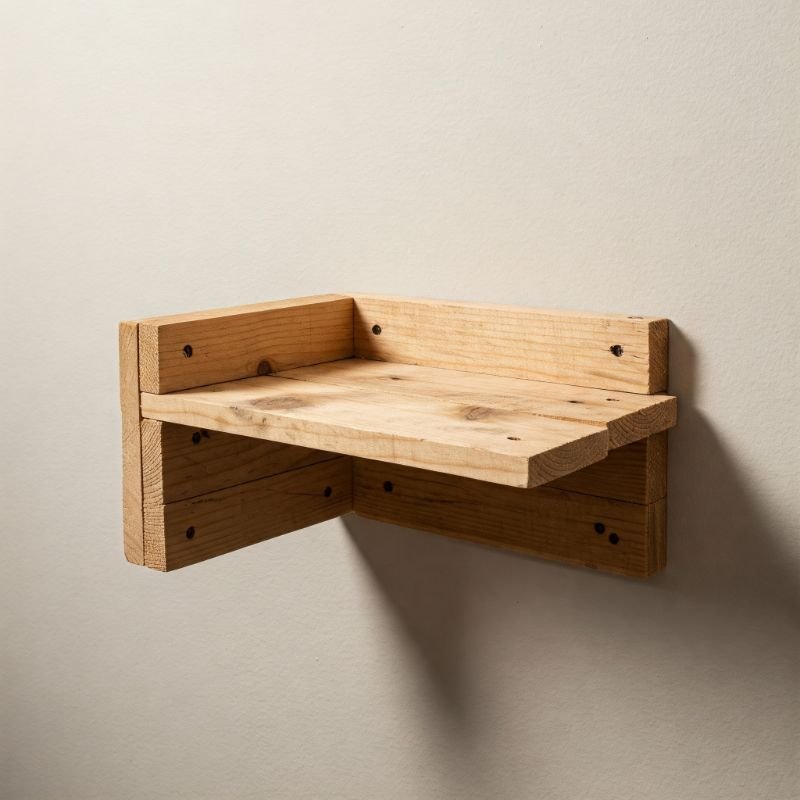
14. Pallet Picture Ledge
Crafting a pallet picture ledge feels like building a floating window for your favorite art. Cut a wide pallet board to your desired length, then rout a small front lip to prevent frames from sliding off. Sand the surface until it’s as smooth as fine silk, then apply stain or paint to match your décor. Mount a concealed floating shelf bracket into wall studs, ensuring it sits perfectly level. Slide the ledge onto the bracket’s simulated invisibility, and watch it appear to hover effortlessly. Arrange framed photos, art prints, or small succulents atop it for a dynamic, changeable display. This project demystifies hidden hardware installation and finishing touches, giving you a versatile platform that elevates wall décor—and literally elevates your crafting confidence for future floating shelving builds.
15. Pallet Floating Shelf
A pallet floating shelf combines reclaimed charm with sleek minimalism. Select a thick pallet plank and cut it to length, then sand the top and bottom surfaces until you feel nothing but smooth wood beneath your hand. Drill two or three deep holes into the back edge, sized to slip snugly over wall-mounted steel shelf pins. Apply a finish—clear varnish or tinted stain—to highlight the wood grain while protecting against dust. Install the matching pins into wall studs using a level to ensure precise alignment. Slide the finished plank onto the pins, and it appears to float like magic. This shelf offers a clean display for books, candles, or collectibles without visible brackets. You’ll learn pin-placement accuracy, secure mounting techniques, and finish application, all wrapped into a single project that showcases both your pallet’s history and your budding woodworking prowess.
Conclusion
Small pallet wood projects offer a gateway into DIY woodworking that feels as thrilling as discovering hidden treasure. From serving trays and succulent stands to bird feeders and floating shelves, each build repurposes reclaimed pallet wood into functional, stylish pieces for your home. You’ve practiced measuring, cutting, sanding, joinery, and finishing techniques—skills that form the backbone of any successful woodworking journey. These projects prove that you don’t need elaborate setups or expensive materials to create meaningful décor. By upcycling pallets, you reduce waste, save money, and infuse your living space with character and craftsmanship. Grab your tools, rescue a pallet today, and try one project or all fifteen. You’ll be amazed how a few slats and nails can transform both your home and your confidence in the workshop.
Read next: 15 Wood Craft Ideas to Try at Home
Frequently Asked Questions
Q1: Where can I find free pallet wood safely?
Look for local businesses like garden centers, hardware stores, or warehouses that often discard pallets. Always inspect wood for signs of chemical treatment or rot, and choose pallets stamped with “HT” (heat-treated), which indicates safer, chemical-free wood.
Q2: What basic tools do I need to start these pallet projects?
A reliable tape measure, pencil, handsaw or circular saw, drill with bits, wood glue, clamps, medium and fine sandpaper, finishing nails, and a choice of finishes (stain or varnish) will cover most small pallet builds.
Q3: How do I prepare pallet wood for crafting?
Disassemble pallets gently with a pry bar or reciprocating saw to avoid splitting boards. Remove all nails and staples, then thoroughly sand to eliminate roughness and splinters. Cleaning with a damp cloth and letting the wood dry prevents dust in your finish.
Q4: Can I paint pallet wood projects instead of staining?
Absolutely! Use a primer suitable for rough wood, then apply acrylic or latex paint in your chosen colors. Lightly sand between coats for smoothness, and seal with a clear water-based polyurethane to protect painted surfaces.
Q5: How do I ensure my floating shelves hold weight safely?
Always mount floating shelf pins or brackets into wall studs, not just drywall. Use a stud finder to locate solid backing and choose heavy-duty steel hardware rated for at least twice the projected load. This prevents sagging and keeps your shelves secure.
Stay up to date with our latest ideas!