15 DIY Tote Bag Ideas for Creative Everyday Style
Discover 15 creative DIY tote bag ideas that express your unique style. Easy projects for fashionable, functional everyday bags!
Plain canvas totes have become the blank canvases of the fashion world, waiting for creative souls to transform them from boring basics into statement accessories worth flaunting. Why carry the same mass-produced bag as everyone else when your hands possess the power to create something uniquely yours that sparks conversations and turns heads? DIY tote bags offer the perfect intersection of practicality and creativity, allowing you to express personal style while carrying everything from groceries to gym gear throughout busy days. The affordability of blank totes makes experimentation risk-free: mess one up, and you've lost mere dollars rather than designer bag investments. These projects suit all skill levels, from absolute beginners wielding fabric markers for the first time to experienced crafters operating sewing machines with professional confidence. Ready to transform ordinary bags into extraordinary accessories that announce your creative spirit to the world?
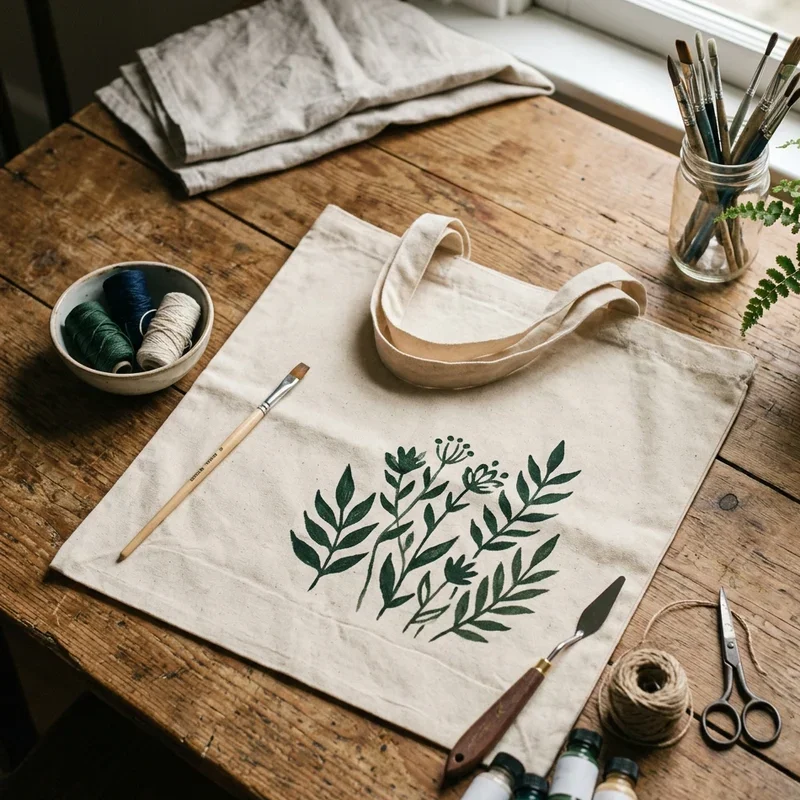
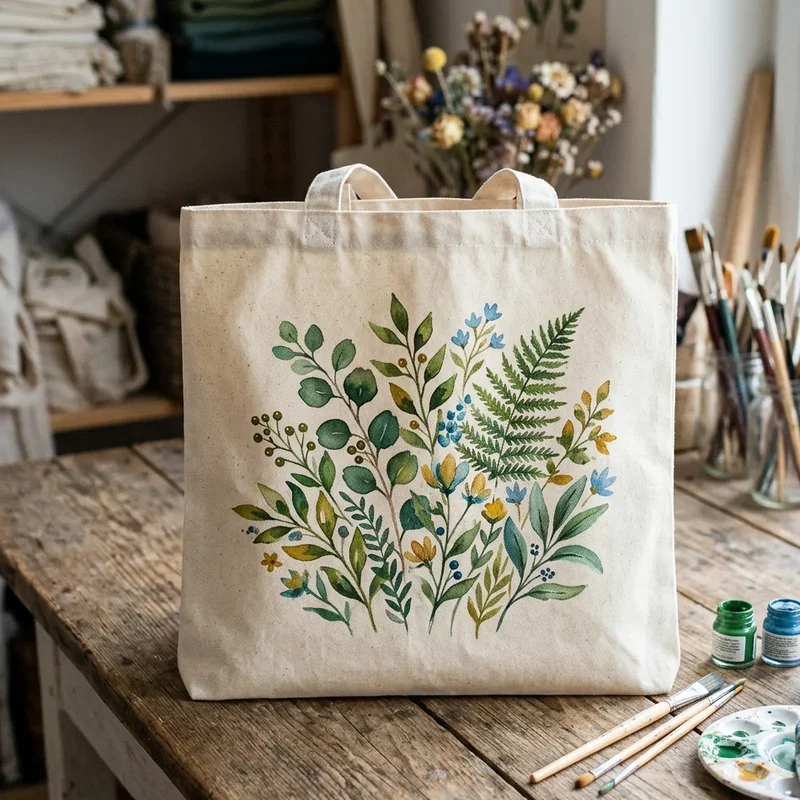
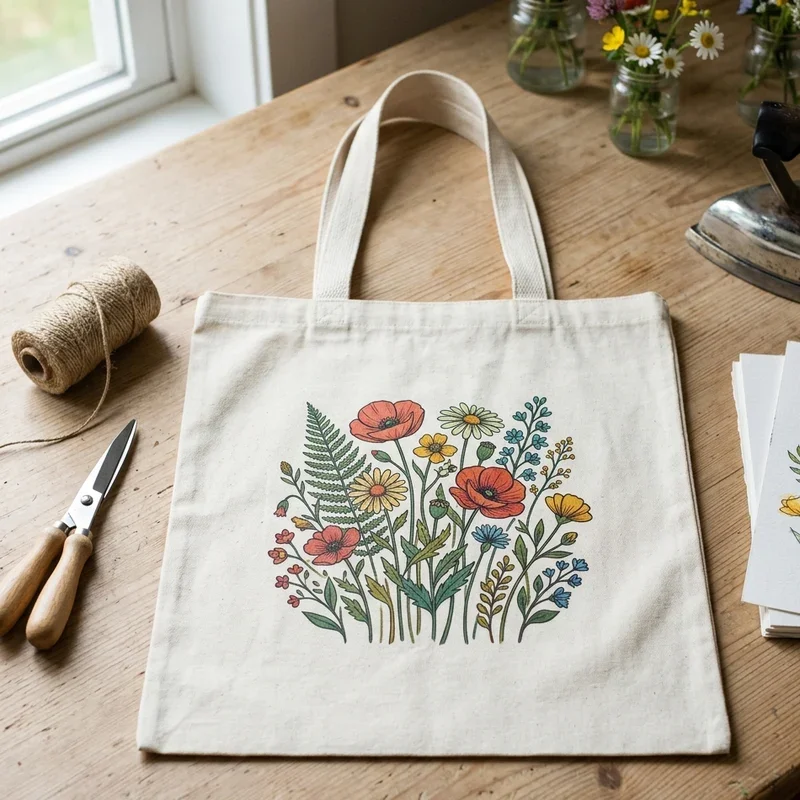
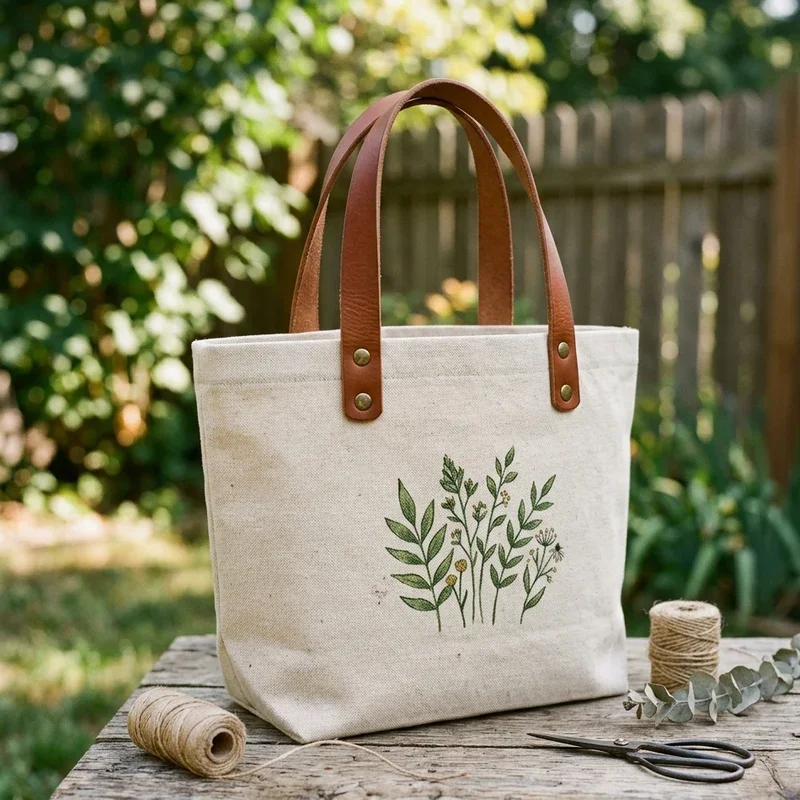
1. Hand-Painted Botanical Design
Transform plain canvas into garden-inspired art by hand-painting botanical illustrations that bring natural beauty to everyday accessories you carry. Sketch leaf shapes, flower silhouettes, or trailing vines directly onto fabric using pencil guidelines that paint will cover during application. Fabric paints in various green shades create depth, while pops of floral colors add vibrancy that catches eyes across crowded streets. The organic nature of hand-painted botanicals means imperfection becomes character rather than flaw, embracing the handmade aesthetic that mass production cannot replicate. Seal completed designs with fabric medium that ensures paint flexibility and prevents cracking during regular use and washing cycles. Layer paint applications for richer color saturation that single coats cannot achieve regardless of paint quality or application thickness. Your botanical tote brings nature's beauty wherever daily adventures take you throughout seasons.
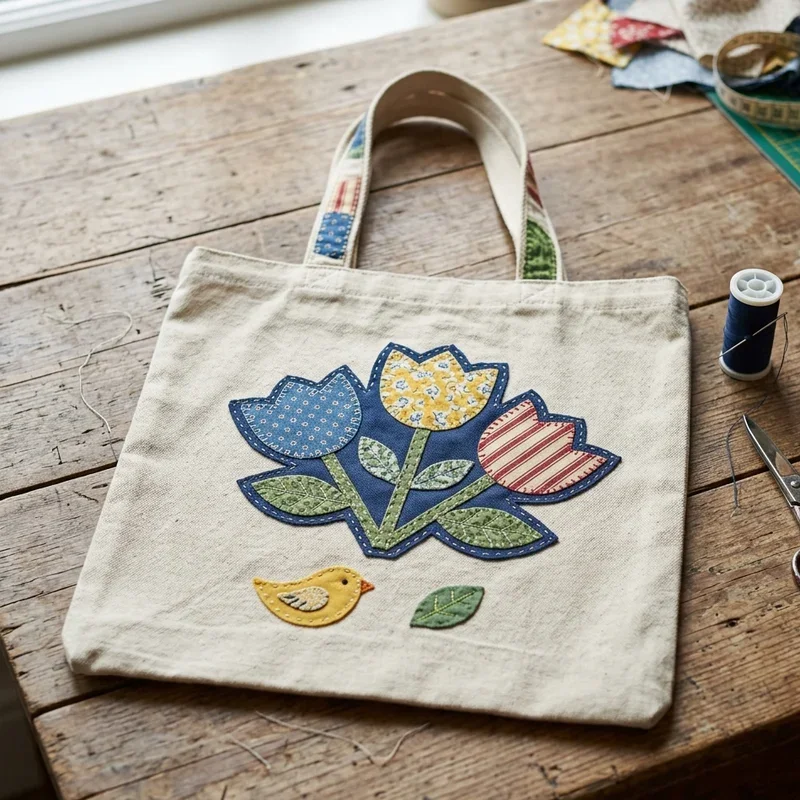
2. Fabric Appliqué Patterns
Add dimensional interest by sewing fabric shapes onto tote surfaces, creating layered designs that stand apart from flat printed alternatives visually. Cut shapes from patterned or solid fabrics that complement your base tote color while introducing textures and visual interest throughout compositions. Hearts, stars, geometric shapes, and silhouettes all work beautifully depending on the aesthetic direction your creative vision follows. Secure shapes using fabric adhesive initially, then machine or hand-stitch edges for permanent attachment that withstands regular use demands. The fabric variety available at craft stores means unlimited pattern combinations that make every appliquéd tote genuinely unique. Consider upcycling fabric scraps from other projects, transforming waste into decorative elements that reduce environmental impact while creating beauty. Your appliqué tote showcases layering skills while producing bags that feel more substantial than simple printed alternatives.
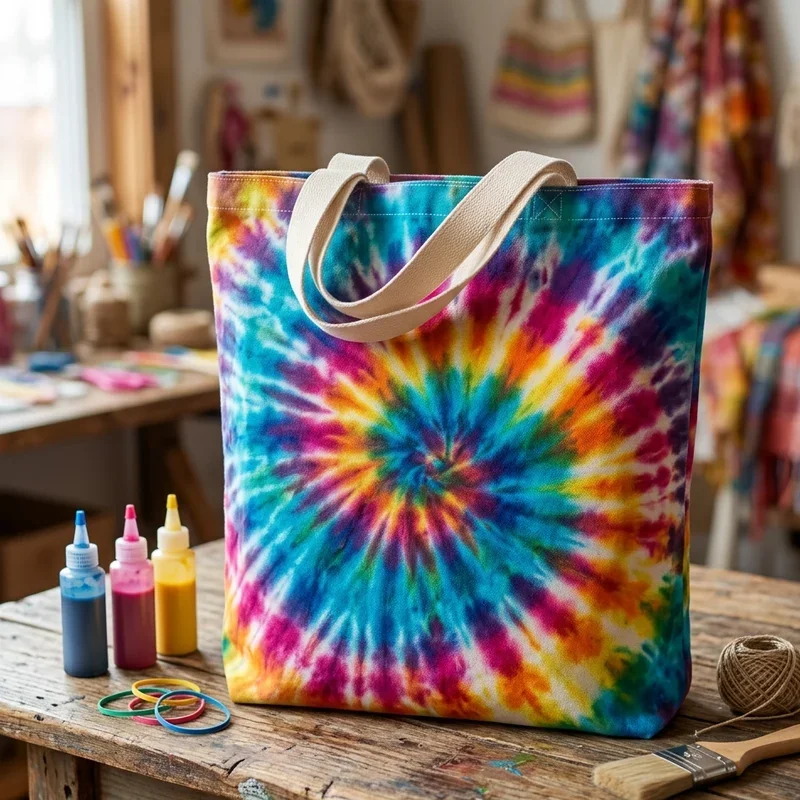
3. Tie-Dye Color Burst
Embrace retro vibes by tie-dyeing canvas totes into kaleidoscopic accessories that channel festival fashion throughout everyday errands and adventures. The unpredictable nature of tie-dye ensures every bag becomes one-of-a-kind despite using identical techniques and color combinations. Fold, twist, and bind totes using rubber bands that create resist patterns preventing dye penetration in bound areas. Choose color combinations that complement your wardrobe: classic rainbow spirals, subtle ombre gradients, or bold two-tone contrasts all work wonderfully. Follow dye instructions carefully, allowing proper saturation and setting times that produce vibrant, long-lasting results worth the patience required. The rinse and reveal moment brings childlike excitement as patterns emerge from beneath folds that concealed developing designs throughout dyeing processes. Your tie-dye tote brings psychedelic personality to mundane tasks like grocery shopping or gym commuting daily.
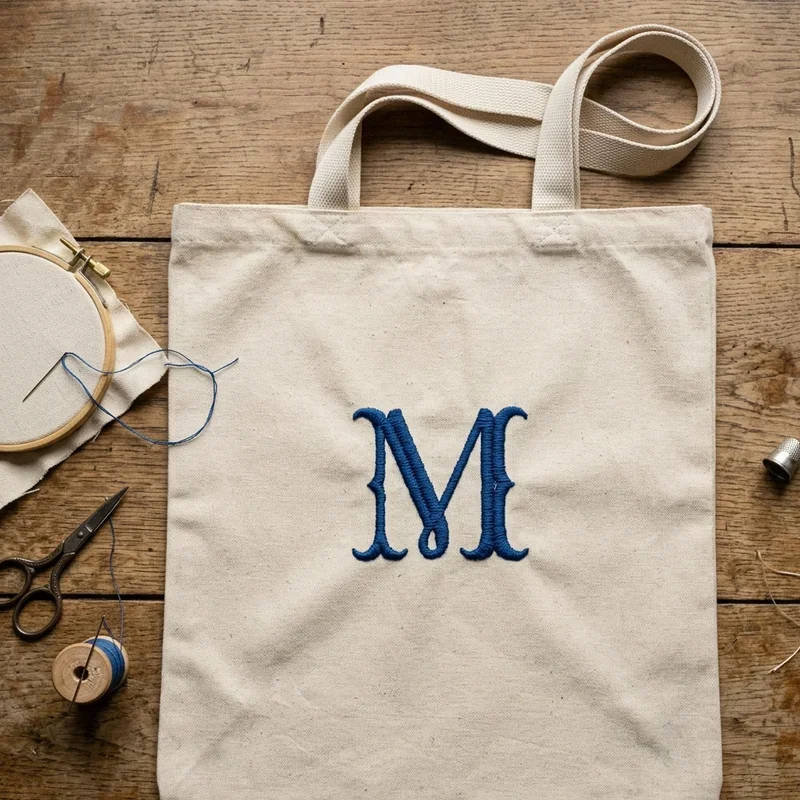
4. Embroidered Monogram Style
Personalize totes through embroidered monograms that add sophisticated touches while declaring ownership through decorative letterwork across bag surfaces. Choose font styles matching your aesthetic: flowing scripts suggest elegance while bold block letters communicate confident simplicity effectively. Position monograms centrally for classic presentations, or place them asymmetrically for modern interpretations of traditional personalization approaches. Hand embroidery suits beginners since letter shapes guide stitch placement naturally without complex pattern following that some embroidery designs require. Machine embroidery delivers professional results for those possessing equipment and programming skills that automated stitching demands from operators. Thread color choices create different effects: matching tones for subtle sophistication, contrasting colors for bold statements that command attention immediately. Your monogrammed tote announces personal ownership while demonstrating handcraft skills worth admiring.
5. Iron-On Transfer Art
Apply professional-looking designs effortlessly using iron-on transfers that bring complex artwork to tote surfaces without painting or sewing skills required. Print designs onto transfer paper using inkjet printers, then heat-apply images following paper manufacturer instructions for proper adhesion. The technique suits photographs, digital art, typography, and graphic designs that other application methods cannot reproduce with comparable precision. Mirror images before printing since transfer reverses designs during application, flipping text and directional elements unexpectedly if overlooked. Allow proper cooling time before peeling backing papers that rushing might compromise, potentially ruining designs that patience would have preserved perfectly. Layer transfers for complex compositions, building designs through sequential applications that create depth single transfers cannot achieve. Your transfer tote displays professional-quality imagery through accessible techniques that beginners accomplish successfully on first attempts.
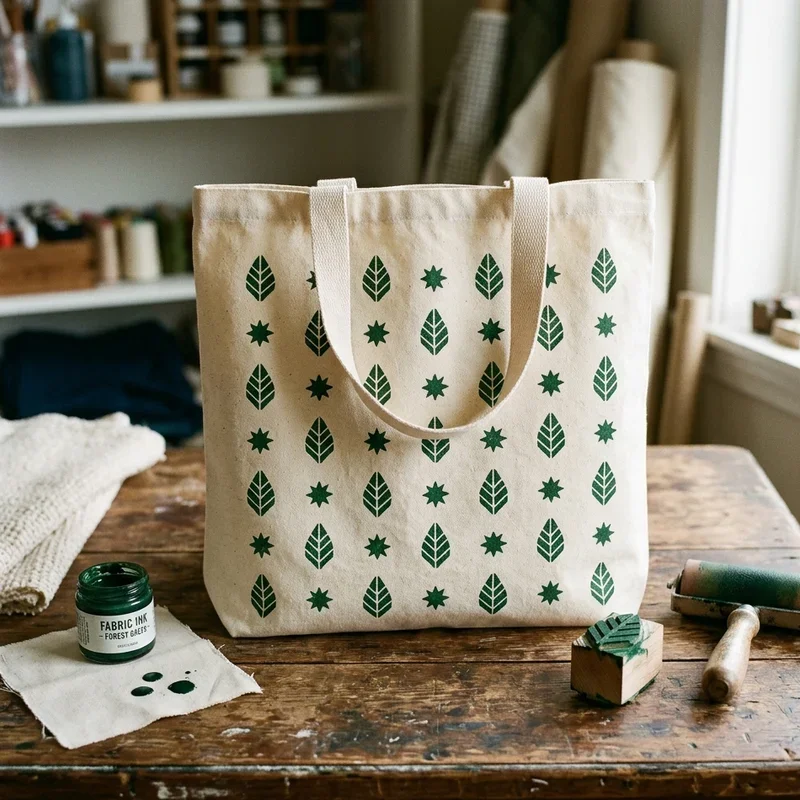
6. Block Print Stamping
Create repeating patterns by carving stamps from erasers, linoleum, or foam blocks that print identical designs across tote surfaces rhythmically. Carve simple shapes initially while developing skills that eventually enable intricate designs worthy of textile factory production quality. The handmade variation between prints adds artisanal character that perfectly uniform machine printing lacks intentionally. Apply fabric ink evenly across stamp surfaces using brayers or foam brushes that distribute color without oversaturation causing bleeding. Plan pattern layouts before stamping, marking positions lightly with pencil that printed designs will cover during application. Heat-set completed prints according to ink manufacturer instructions, ensuring wash-fastness that preserves your artistic investment through regular laundering. Your block-printed tote showcases pattern design skills while creating repeatable motifs applicable to future fabric projects beyond bags.
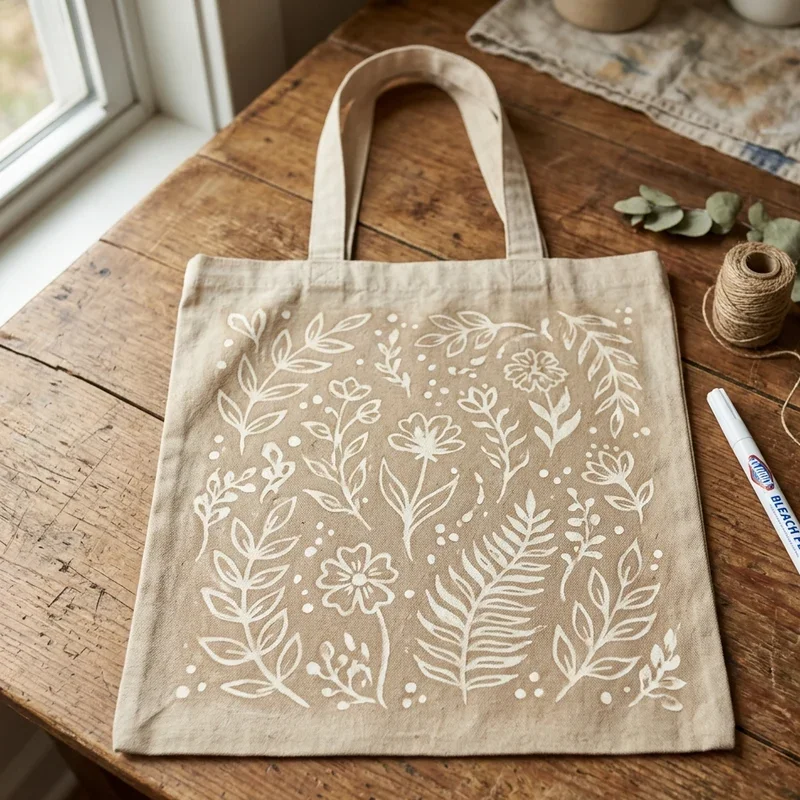
7. Bleach Pen Designs
Draw designs that emerge through color removal rather than addition, using bleach pens that lighten fabric for reverse-image artwork effects. The technique works best on dark-colored canvas where bleach creates dramatic contrast that lighter fabrics cannot provide effectively. Sketch designs directly using gel bleach pens that allow precise line work impossible with liquid bleach application methods. Allow bleach to process until desired lightness develops, then neutralize with water rinse that stops color removal at intended levels. The unpredictable nature of bleaching creates organic variations that add character beyond what controlled techniques produce typically. Outline designs with fabric paint or markers if sharper definition appeals more than bleach's naturally soft edges. Your bleach pen tote demonstrates reverse-dyeing techniques that subtractive color manipulation enables uniquely.
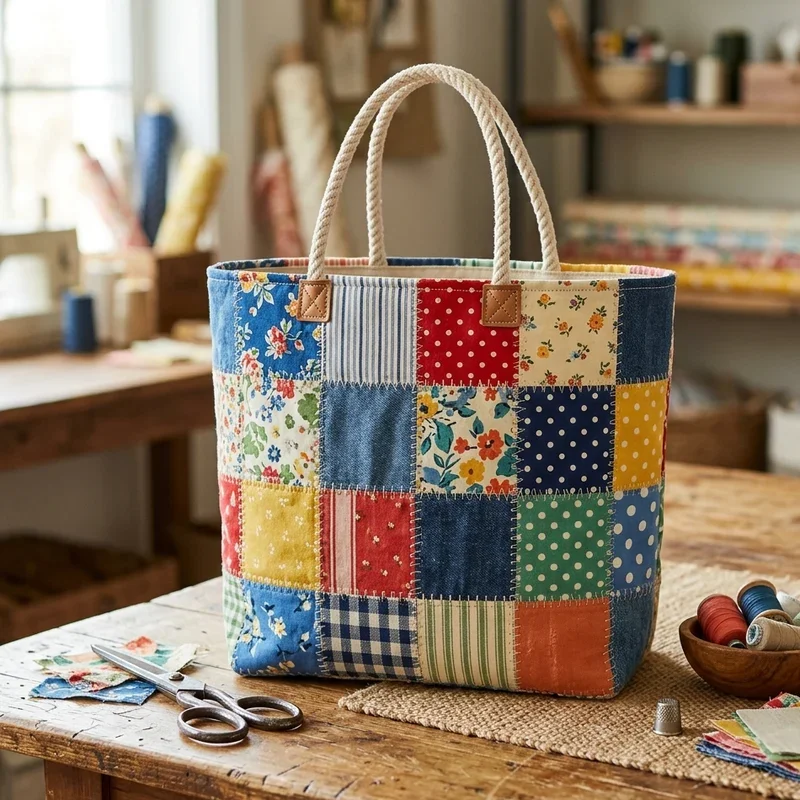
8. Patchwork Fabric Tote
Piece together fabric scraps into patchwork panels that form complete tote bags from combined materials rather than single continuous pieces. The technique suits quilters who possess fabric scrap collections awaiting projects that justify their storage space consumption. Plan patchwork layouts considering color placement, pattern mixing, and seam positioning that create cohesive compositions from disparate materials. Sew patches together using quarter-inch seams that traditional quilting employs, pressing seams flat for smooth panel surfaces. Line completed patchwork with solid fabric that hides seam allowances while providing structural support that lightweight patching might otherwise lack. Add interior pockets during construction that finished totes often lack despite their obvious utility for organization purposes. Your patchwork tote transforms fabric scraps into cohesive accessories that celebrate textile diversity through unified design.
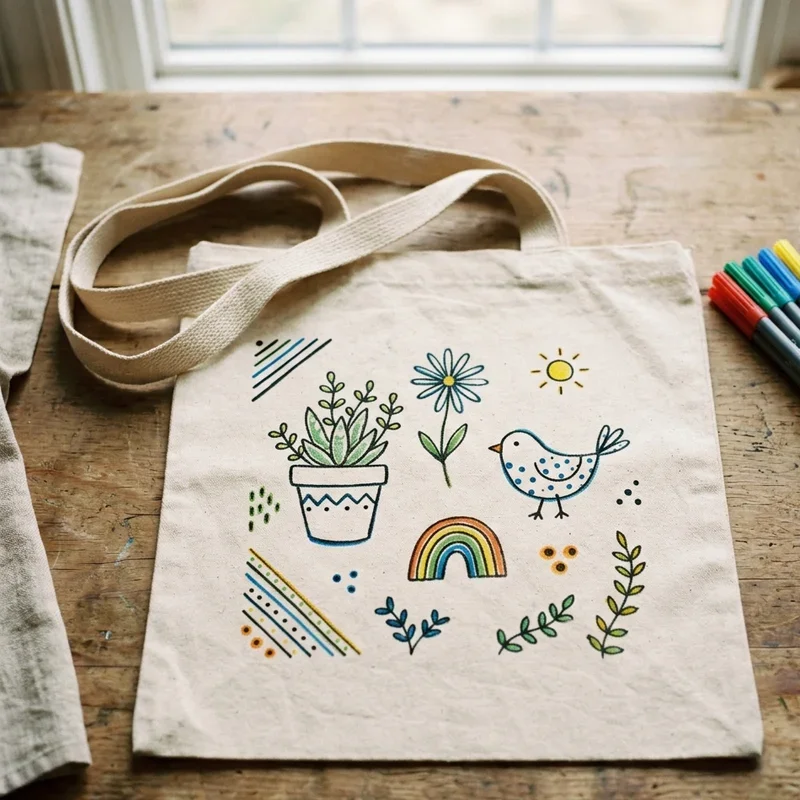
9. Fabric Marker Illustrations
Draw directly onto canvas using fabric markers that allow freehand artistry without the messiness that paint application sometimes creates for crafters. The pen format feels familiar to anyone comfortable with drawing, eliminating learning curves that brush techniques often require before producing satisfactory results. Sketch designs lightly with regular pencil first, then trace with fabric markers that cover guidelines permanently through vibrant color application. Fine-tip markers enable detailed work while broad tips fill larger areas quickly for compositions combining line work with color blocking. Heat-set completed designs using iron or dryer heat that bonds marker ink permanently to fabric fibers throughout. The portability of markers makes tote decorating possible anywhere: coffee shops, parks, or wherever inspiration strikes during creative moments. Your marker-illustrated tote showcases drawing skills through wearable art that travels wherever you carry it daily.
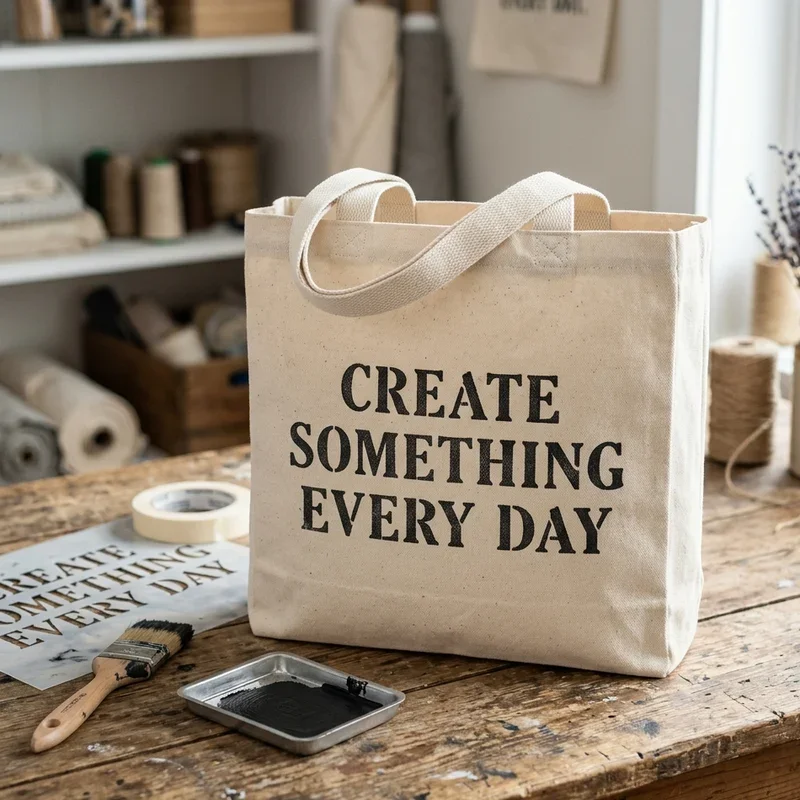
10. Stenciled Quote Bag
Apply meaningful words using stencils that produce crisp typography without freehand lettering skills that few crafters possess professionally. Choose quotes, song lyrics, or personal mantras that resonate with your values and communicate messages worth sharing publicly through accessories. Purchase pre-made alphabet stencils, or cut custom letter shapes from freezer paper that irons temporarily onto fabric for paint application. Position words carefully, measuring spacing that prevents cramped endings where planning failed to anticipate complete phrase requirements. Apply paint through stencils using stippling motions that prevent bleeding beneath stencil edges that brushing strokes might cause problematically. Remove stencils before paint dries completely to prevent peeling that dried paint bridging stencil edges sometimes creates frustratingly. Your stenciled quote tote carries messages that spark conversations while declaring values worth sharing throughout daily interactions.
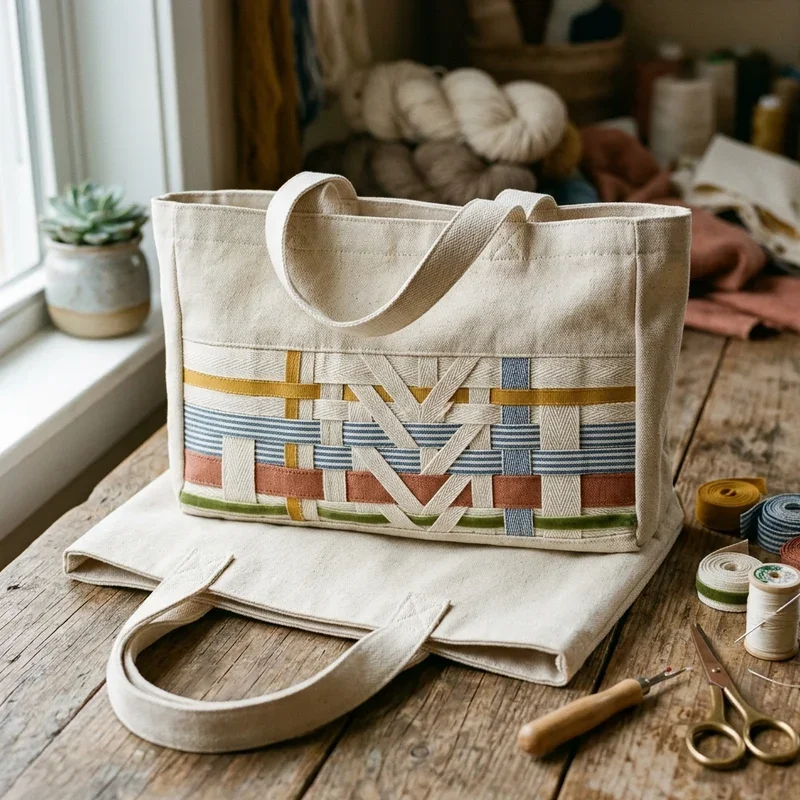
11. Woven Ribbon Accents
Add texture through ribbon weaving that creates dimensional patterns across tote surfaces or transforms plain straps into decorative elements worth admiring. Cut slits in canvas that ribbon weaves through, creating checkerboard or custom patterns that alternate between visible ribbon and canvas surfaces. Secure ribbon ends inside tote bodies using stitching or fabric glue that prevents unraveling during regular use and handling. Vary ribbon widths and textures for visual interest that single ribbon types cannot provide regardless of weaving pattern complexity. Consider replacing existing straps entirely with braided or woven ribbon handles that become primary design features rather than secondary accents. The tactile dimension that ribbon adds encourages touching that flat surfaces don't invite, creating sensory experiences beyond purely visual appreciation. Your woven ribbon tote introduces textile dimension that simple printing techniques cannot achieve regardless of artistic skill levels.
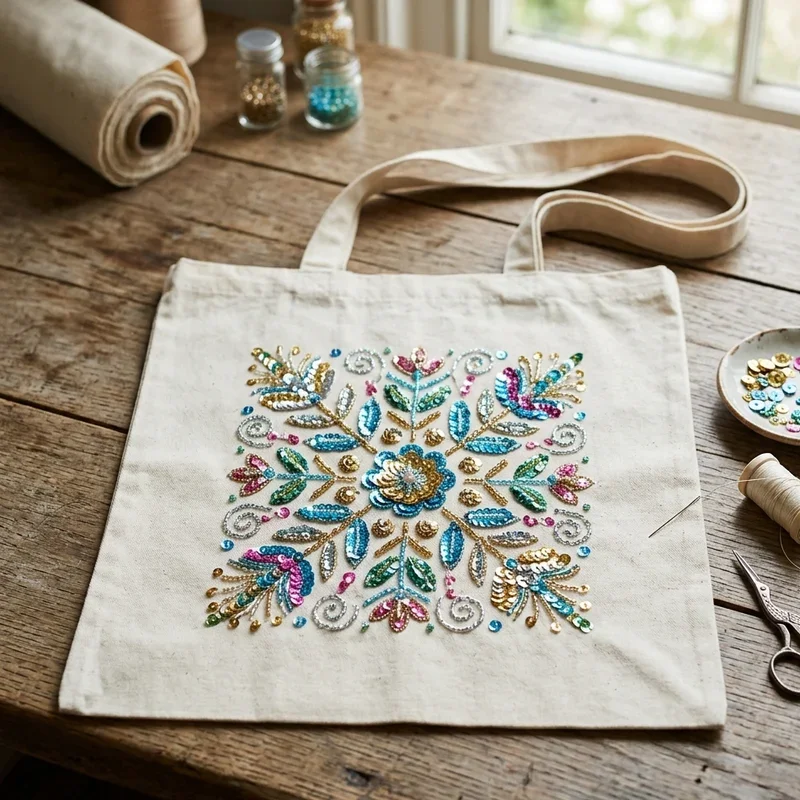
12. Sequin and Bead Embellishment
Glamorize casual canvas through sequin and bead applications that catch light while adding luxury textures to everyday bag surfaces. Hand-sew individual sequins for complete design control, or use sequin trim that attaches in continuous strands along desired paths. Beading adds weight that influences how bags hang, so distribute embellishments evenly to prevent awkward pulling toward heavier areas. Consider concentrating decoration in specific zones rather than covering entire surfaces that might overwhelm designs or become impractically heavy. The shine that sequins provide suits evening variations of daytime totes, transforming practical bags into party-ready accessories through sparkle addition. Secure all embellishments thoroughly since lost sequins or beads become disappointments that careful initial attachment prevents entirely. Your embellished tote elevates casual canvas into glamorous accessory territory that catches light and attention simultaneously.
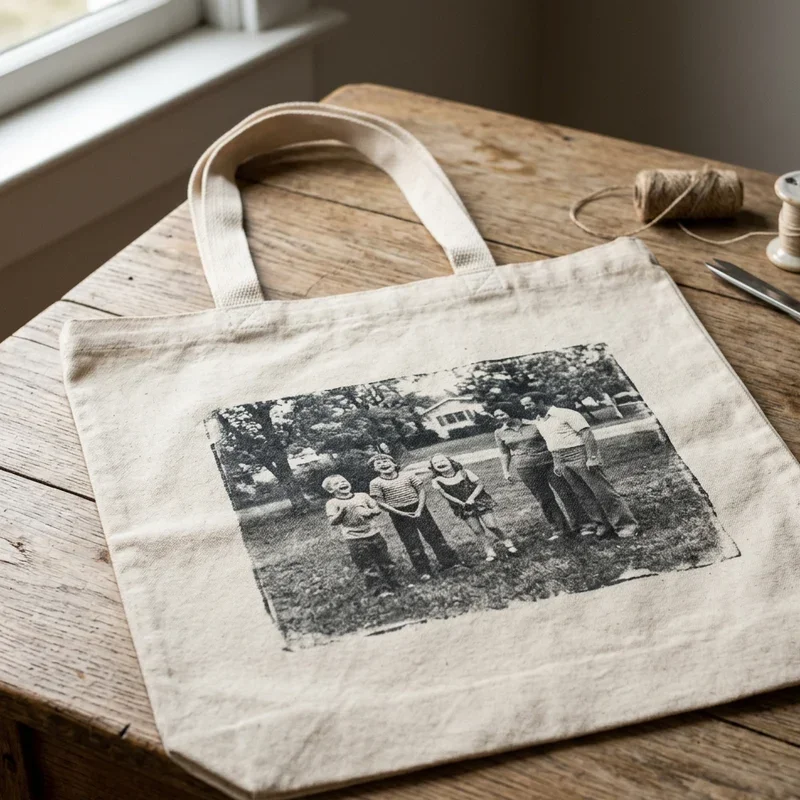
13. Photo Transfer Memory Tote
Personalize totes with transferred photographs that carry meaningful images wherever your daily adventures transport you throughout busy schedules. Print photos onto transfer paper or use gel medium transfer techniques that apply images directly from laser printouts. Family portraits, pet pictures, vacation memories, or artistic photography all work beautifully depending on the personal connection driving design decisions. The nostalgic quality of carried photographs creates conversation opportunities when others notice meaningful images displayed across bag surfaces. Consider collaging multiple images for complex compositions that single photographs cannot achieve despite their individual significance and impact. Seal transferred images with fabric protectant that guards against wear and fading that regular use might otherwise cause progressively. Your photo tote carries memories physically while transforming personal images into wearable displays worth sharing publicly.
14. Leather Strap Upgrade
Replace basic canvas straps with leather handles that instantly elevate tote sophistication while improving durability beyond what fabric straps provide. Purchase leather straps from craft suppliers, or cut custom handles from leather remnants available at fabric stores affordably. Attach leather straps using rivets that provide secure connections while adding hardware aesthetic details that enhance overall design presentations. The contrast between rugged leather and soft canvas creates material tension that visually interesting accessories often employ deliberately. Consider adding leather accent patches at stress points where wear concentrates, both strengthening and decorating simultaneously through strategic placement. The patina that leather develops over time adds character that improves rather than degrades appearance throughout years of regular use. Your leather-strapped tote bridges casual canvas and refined leather aesthetics through thoughtful material combination choices.
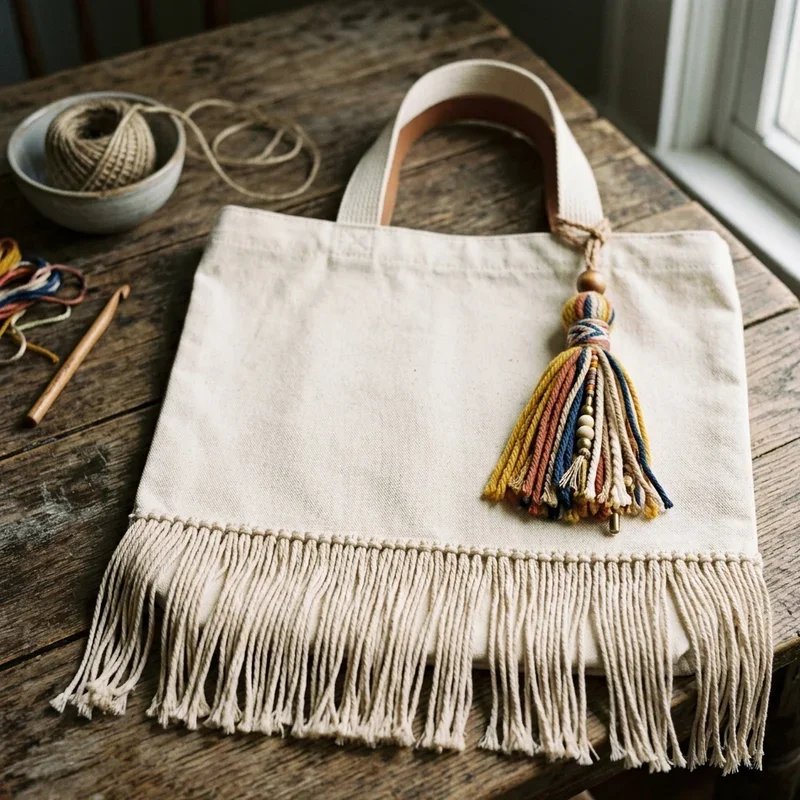
15. Fringe and Tassel Addition
Bohemian vibes emerge through fringe and tassel additions that introduce movement and playful texture to otherwise static tote designs. Cut fringe from fabric strips, leather scraps, or yarn that attaches along tote bottoms creating swaying movement during walking. Tassels hang from corners, zipper pulls, or strap attachment points where they swing freely without interfering with bag function. The crafting process of making tassels satisfies through repetitive wrapping and cutting that produces immediate visual rewards quickly. Consider combining fringe materials that mix textures: leather alongside fabric, yarn beside ribbon, creating eclectic combinations that single materials cannot provide. The playful movement that fringe and tassels introduce adds personality dimensions that stationary embellishments lack despite their visual appeal. Your fringed tote channels bohemian fashion through handcrafted accessories that move and sway with your every step.
Conclusion
DIY tote bags offer perfect canvases for creative expression that transforms practical accessories into personal style statements worth carrying proudly everywhere. These fifteen ideas demonstrate remarkable technique variety, from simple marker illustrations to complex patchwork construction that challenges experienced crafters meaningfully. The accessibility of blank canvas totes makes experimentation affordable, allowing risk-free creativity that expensive materials might otherwise discourage completely. Start with techniques matching your current skill level, then progress toward more complex projects as confidence develops through successful completions. The satisfaction of carrying something your own hands created adds meaning that purchased bags cannot provide regardless of their price tags. Your DIY tote becomes wearable art that announces creative capability while serving practical daily functions simultaneously.
Read next: 15 Cool Craft Ideas for Teens to Try Today
Frequently Asked Questions
Q1: What type of canvas tote works best for DIY decoration projects?
A: Medium-weight natural cotton canvas accepts paints, dyes, and stitching best for most decoration techniques.
Q2: How do I prepare canvas totes before decorating them?
A: Wash and dry totes to remove sizing, then iron smooth surfaces before applying any decorations.
Q3: Will DIY decorations survive washing machine laundering cycles?
A: Heat-set paints and quality materials withstand washing when following cold water, gentle cycle guidelines.
Q4: What basic supplies should beginners gather for tote decorating?
A: Start with fabric markers, paint, brushes, stencils, and iron-on transfers for versatile project options.
Q5: How can I fix mistakes made during tote decoration projects?
A: Cover errors with patches, additional design elements, or embrace imperfections as handmade character authentically.
Stay up to date with our latest ideas!