15 DIY Vanity Ideas for Creative Home Makeovers
Create your dream vanity with these 15 DIY ideas. From floating shelves to vintage makeovers, transform your beauty routine space today!
Ever found yourself doing your makeup on the bathroom counter, squinting in bad lighting while juggling products precariously balanced on the toilet tank? We've all been there! Creating a dedicated vanity space isn't just about having somewhere pretty to get ready; it's about crafting a personal sanctuary where your morning routine becomes a ritual of self-care rather than a rushed necessity. Whether you're working with a sprawling master bedroom or squeezing magic into a studio apartment, the perfect DIY vanity can transform both your space and your daily routine. Think of it as creating your own personal backstage area where you're both the star and the makeup artist! From repurposing forgotten furniture to building floating masterpieces that seem to defy gravity, these 15 DIY vanity ideas prove you don't need a Hollywood budget to feel like a movie star. Ready to create a beauty station that's as unique as your signature look? Let's dive into these creative solutions that'll make getting ready the best part of your day!
1. Floating Shelf Vanity with Hidden Storage
Transform any wall into a sleek beauty station with floating shelves that combine minimalist aesthetics with maximum functionality. This space-saving wonder makes small rooms feel larger! Install a main floating shelf at comfortable sitting height, adding smaller shelves above for display and storage. The magic happens underneath: attach magnetic strips for bobby pins, small containers for hair ties, and hidden hooks for tools. Choose thick wooden shelves for durability or sleek white ones for a modern look. LED strip lights underneath create perfect task lighting while adding ambiance. Paint the wall behind in an accent color to define your vanity zone without physical boundaries. Include a wall-mounted mirror that appears to float alongside your shelves. Your vanity becomes an artistic wall installation that happens to be incredibly practical.

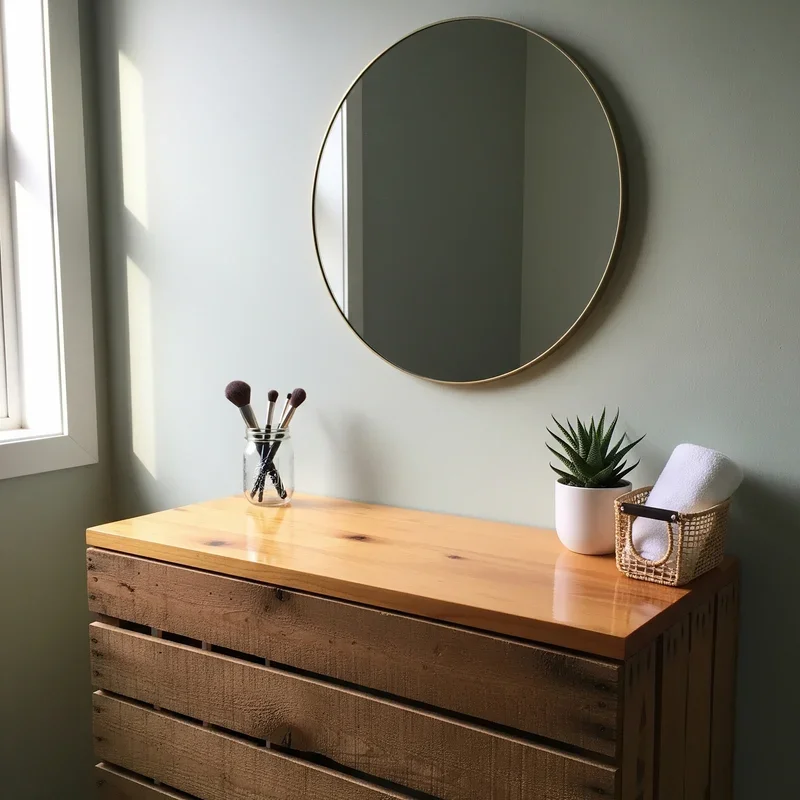
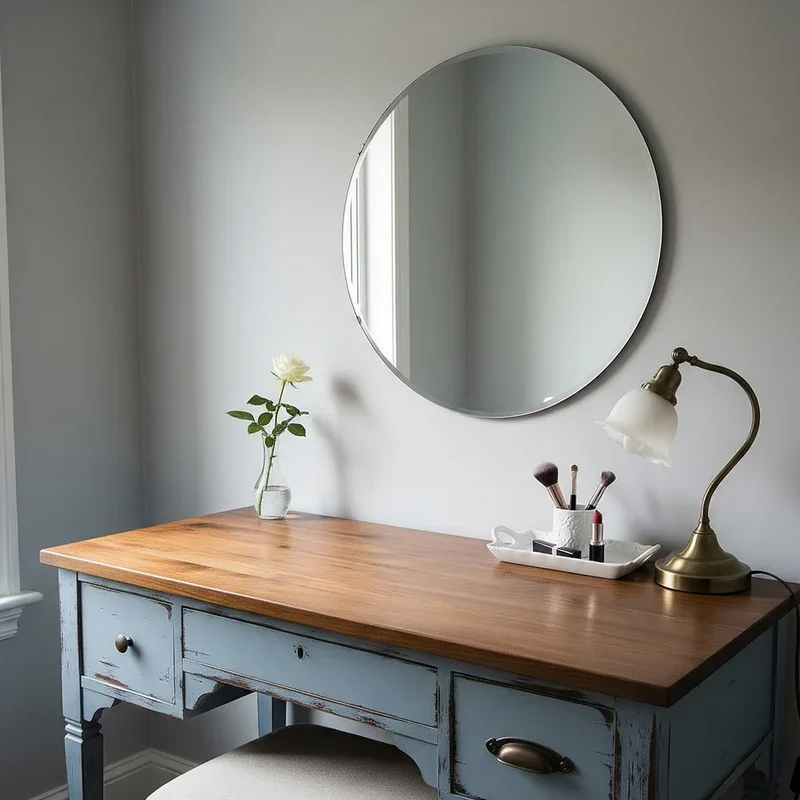
2. Repurposed Vintage Desk Transformation
Give that dusty antique desk a glamorous second life as a vanity that tells a story while serving beauty needs. Thrift stores and estate sales hide these treasures! Start by cleaning and stabilizing any wobbly parts, then decide whether to preserve the original finish or paint it fresh. Add a glass top to protect wood surfaces from spills and stains while maintaining vintage charm. Replace old hardware with crystal knobs or rose gold pulls for instant elegance upgrades. The existing drawers provide perfect storage for makeup, skincare, and tools without additional organization needed. Position a beautiful mirror on top or mount one above for the complete vanity effect. Line drawers with decorative paper that makes you smile every time you open them. Your vintage vanity becomes a conversation piece that adds character while being thoroughly functional.
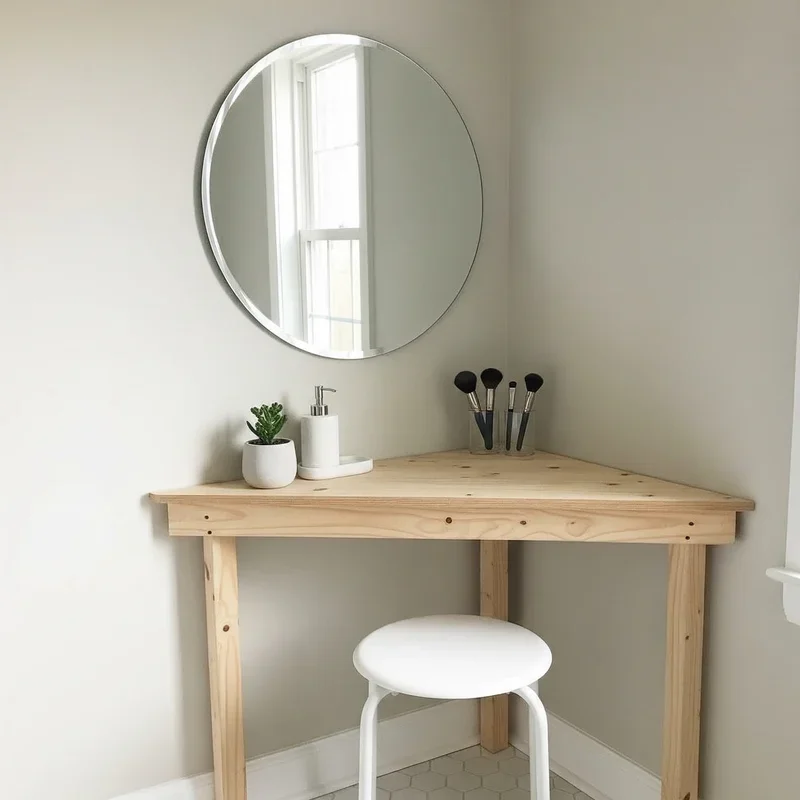
3. Corner Vanity for Small Spaces
Maximize that awkward corner space by creating a custom vanity that fits perfectly where nothing else would. Corners are goldmines for small space dwellers! Build a triangular shelf system or purchase a corner desk to establish your foundation. The angled design naturally creates zones for different beauty categories without feeling cluttered. Mount corner shelves above for vertical storage that doesn't encroach on precious floor space. A corner-mounted mirror bounces light around, making the space feel larger and brighter. Add a compact stool that tucks completely under when not in use. Install battery-operated LED lights if electrical outlets are scarce in your corner. Use clear acrylic organizers to maintain visual lightness while keeping everything accessible. Your corner vanity proves that every inch of your home can be both beautiful and functional.
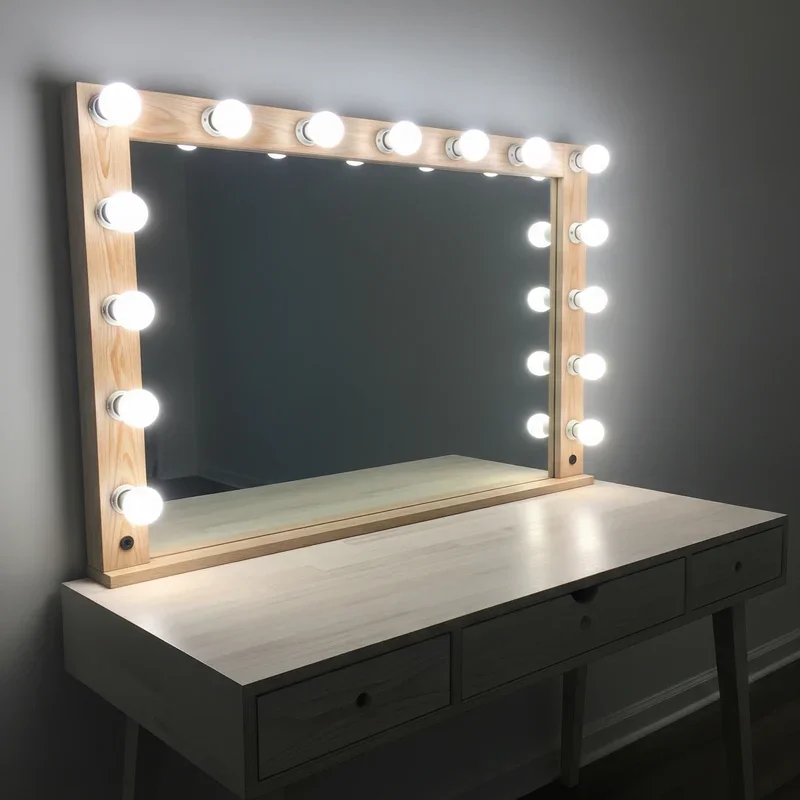
4. Hollywood Mirror Light Installation
Create that classic Hollywood glamour by installing bulb lights around your existing mirror for professional-quality lighting. This is where DIY meets movie star dreams! Purchase a strand of large globe bulbs and create a frame using simple wood strips or directly attach to mirror edges. Space bulbs evenly for balanced lighting that eliminates shadows on your face completely. Choose warm white bulbs for flattering light that mimics golden hour any time. Add a dimmer switch to adjust brightness for different times and makeup looks. The dramatic lighting instantly elevates even the simplest vanity setup to luxury status. Paint the bulb bases to match your decor or leave them classic black for authenticity. Your Hollywood mirror becomes the centerpiece that makes every makeup application feel like preparing for the red carpet.
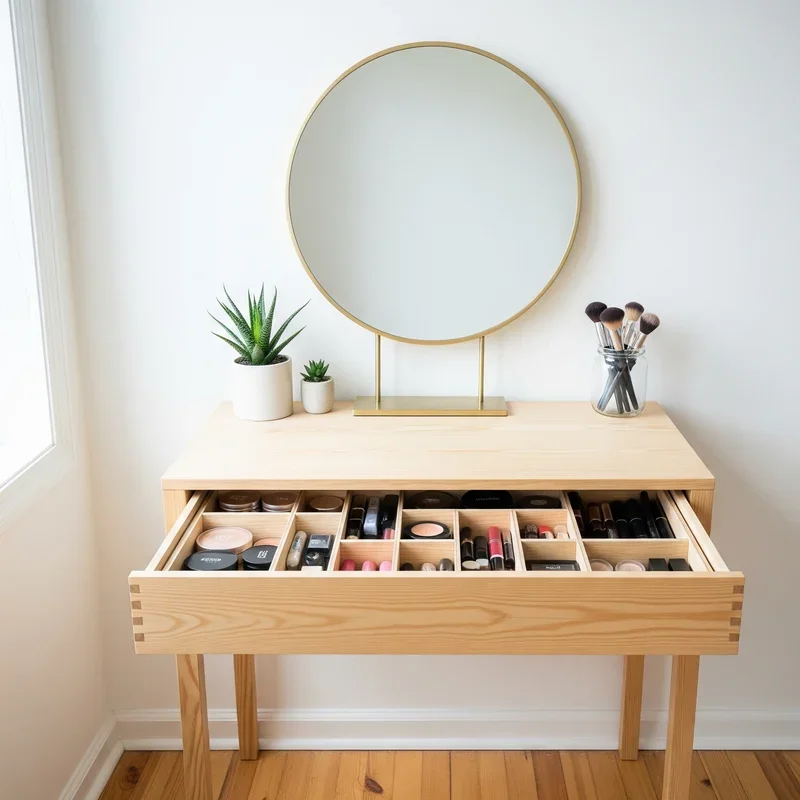
5. Drawer Organizer System Creation
Design custom drawer organizers that turn chaos into perfectly categorized beauty bliss using affordable materials from craft stores. Organization is the secret to stress-free mornings! Measure drawer dimensions precisely, then create compartments using foam board, small boxes, or even cut cardboard. Cover everything in decorative paper or fabric that coordinates with your vanity's aesthetic. Design sections based on your actual collection: long slots for brushes, square sections for palettes, tiny compartments for lipsticks. Velvet fabric lining adds luxury while protecting delicate items from scratches and damage. Create adjustable dividers using tension rods for flexibility as your collection grows. Label sections subtly for quick access during rushed mornings when time matters most. Your drawer system becomes a personalized beauty vault where everything has its perfect place.
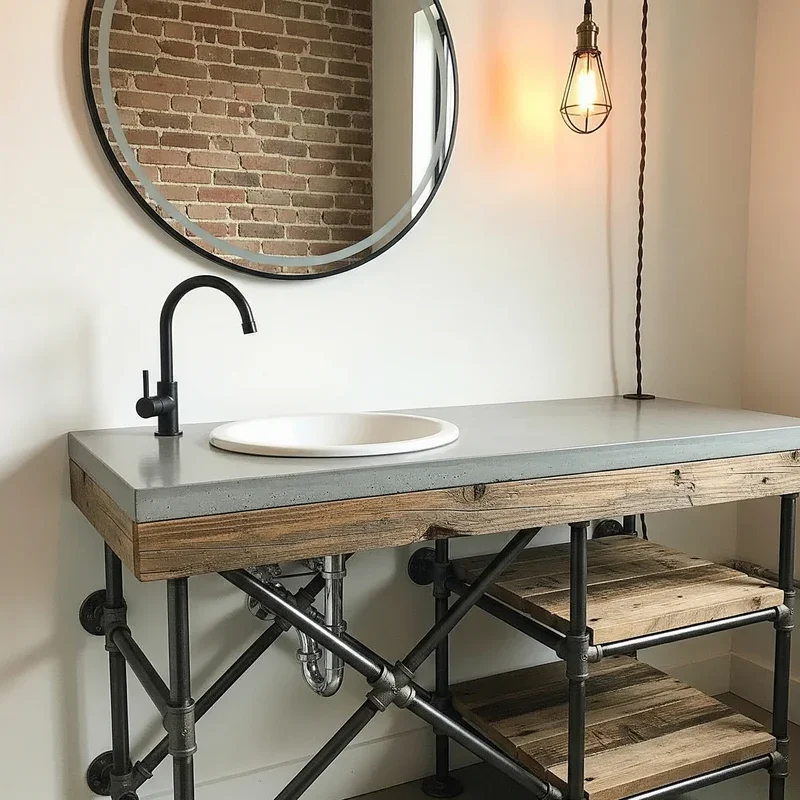
6. Pipe and Wood Industrial Vanity
Build a trendy industrial vanity using plumbing pipes and reclaimed wood that brings urban loft vibes to any room. This style is both sturdy and stunning! Source galvanized or black iron pipes from hardware stores to create the frame structure. Choose a thick wood slab or butcher block for the top surface that can handle daily use. The pipe framework provides built-in towel bars and places to hang accessories naturally. Add edison bulb lighting to enhance the industrial aesthetic while providing excellent task lighting. Include a mesh basket suspended from pipes for frequently used items within reach. The open design keeps small spaces feeling airy while providing substantial storage options. Customize pipe configuration based on your specific space and storage needs. Your industrial vanity becomes a statement piece that proves functional furniture can be incredibly stylish.
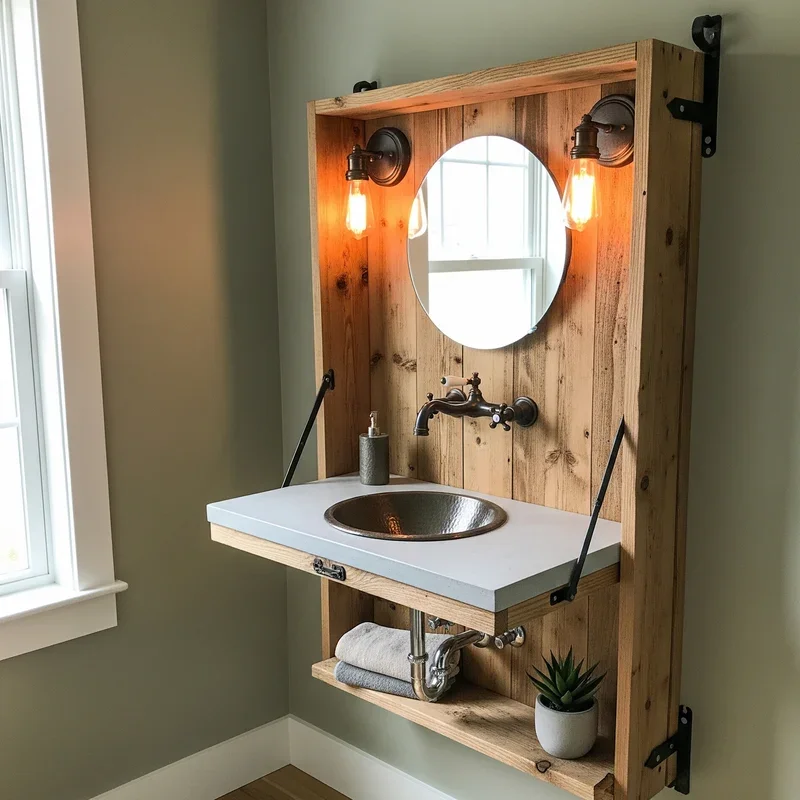
7. Fold-Down Wall-Mounted Vanity
Create a disappearing vanity that folds flat against the wall when not in use, perfect for studio apartments. This transformer furniture maximizes every square foot! Build a hinged table that mounts to wall studs for security and stability. Include a mirror on the underside that reveals itself when the table folds down. Add small shelves or magnetic strips on the wall portion for items used daily. The table surface should be deep enough for comfort but not so large it's cumbersome. Install soft-close hinges to prevent slamming and protect walls from damage over time. Paint it to match your walls for seamless integration when closed and stored. Your fold-down vanity provides full functionality when needed, then virtually disappears to maintain spaciousness.
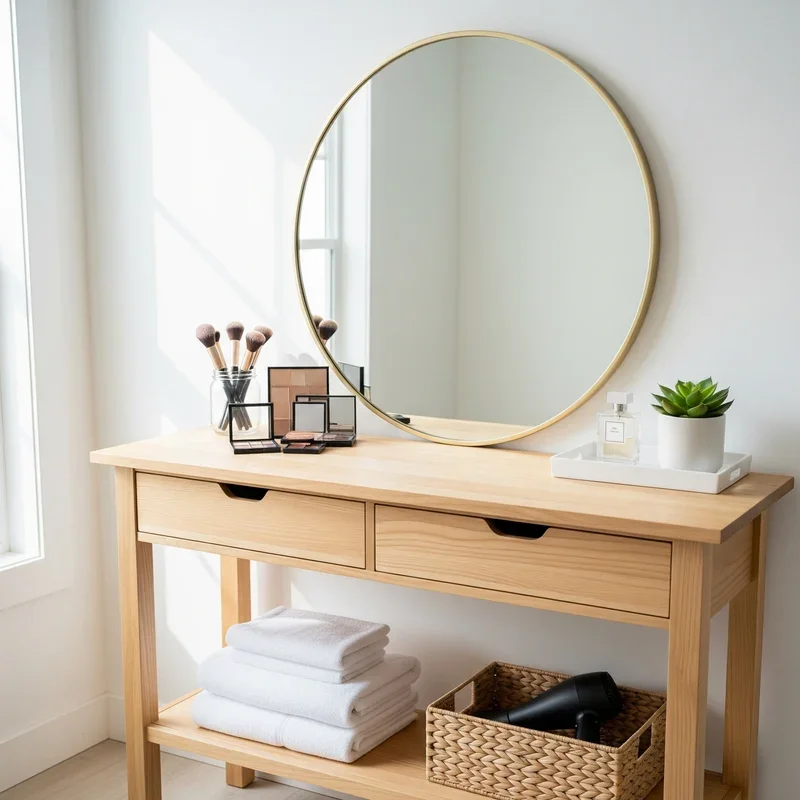
8. Converted Console Table Vanity
Transform an ordinary console table into an elegant vanity that can transition between rooms as needed. Console tables offer perfect proportions for vanity conversion! Choose one with drawers or a lower shelf for built-in storage solutions immediately. The narrow depth works well against walls without protruding too far into rooms. Add a decorative mirror above or a tabletop version depending on your style preference. Install adhesive LED lights under the table edge for subtle, effective task lighting. Use beautiful trays and containers on top to corral products while maintaining aesthetic appeal. The legs provide space underneath for a ottoman or storage baskets that slide out easily. Your console vanity maintains sophistication while serving practical beauty needs perfectly.
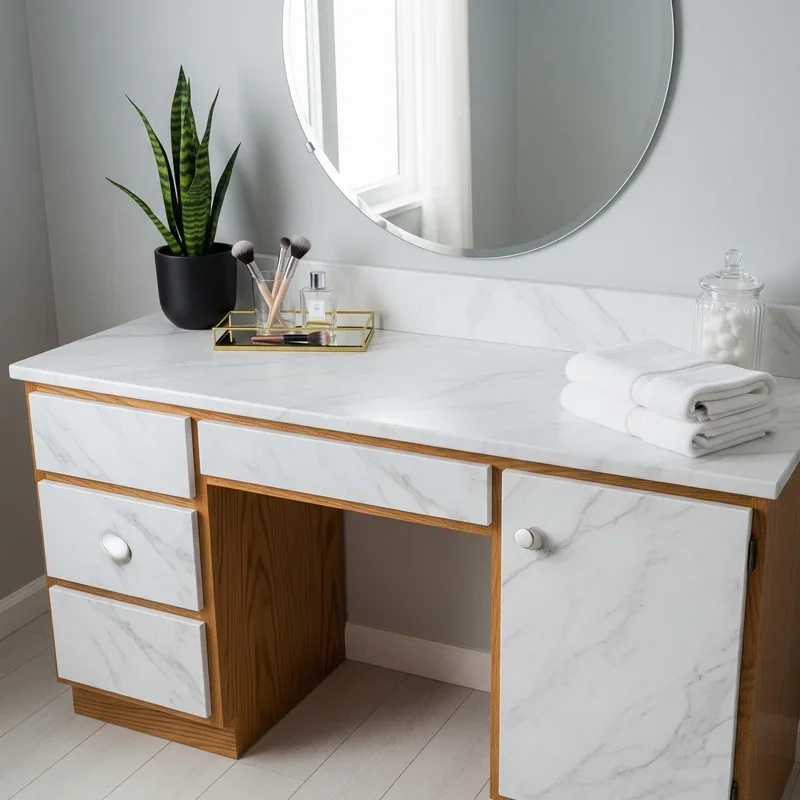
9. DIY Marble Contact Paper Makeover
Give any basic vanity an expensive makeover using marble contact paper that looks surprisingly realistic. This budget hack creates luxury looks! Clean and lightly sand your vanity surface for optimal adhesion before starting application. Measure carefully and cut pieces slightly larger than needed for adjustment room during installation. Apply slowly, using a credit card to smooth bubbles as you work across surfaces. Create seamless corners by carefully overlapping and trimming excess with sharp blades. Seal edges with clear caulk for water resistance and professional-looking finish quality. The transformation works on tabletops, drawer fronts, and even mirror frames for cohesion. Add gold or brass hardware to enhance the luxurious marble effect even further. Your marble makeover achieves high-end aesthetics without breaking your renovation budget.
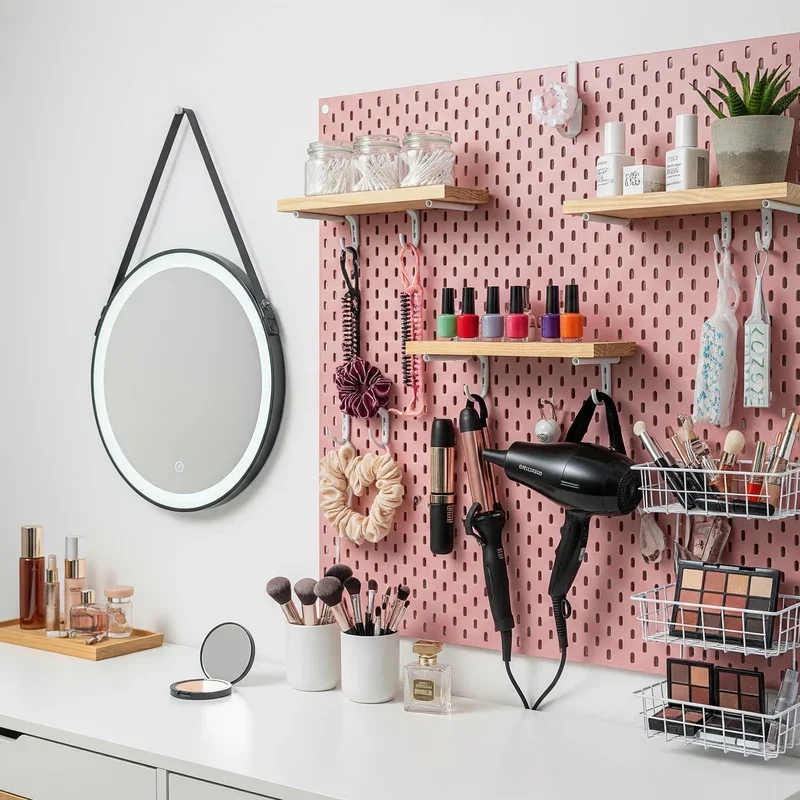
10. Pegboard Beauty Organization Wall
Install a pegboard system that turns your vanity wall into a customizable organization wonderland. Pegboard is the ultimate flexible storage solution! Paint the pegboard in a color that complements your room or creates an accent wall. Arrange hooks, baskets, and shelves that can be reconfigured whenever your needs change. Hang frequently used tools like hairdryers and straighteners for easy access and cooling. Small containers attached to pegboard hold brushes upright and visible for quick selection. Create a inspiration board section with photos, quotes, or color swatches for creativity. The vertical storage keeps vanity surfaces clear while displaying products beautifully like artwork. Your pegboard system grows and adapts with your changing beauty routine and collection.
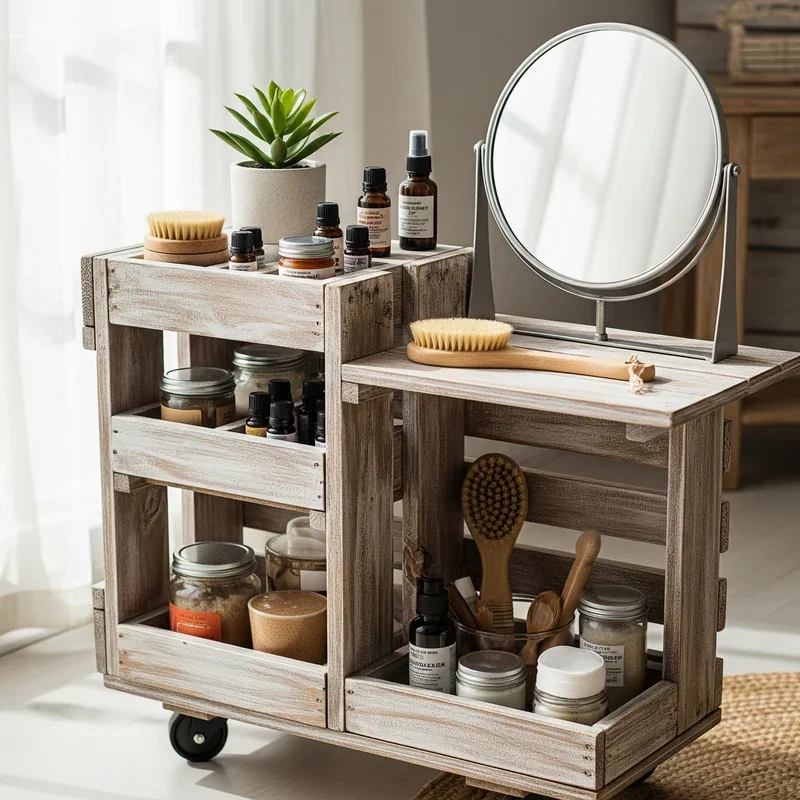
11. Vanity Cart on Wheels
Build a mobile vanity cart that rolls wherever you need it, from bedroom to bathroom effortlessly. Mobility means maximum flexibility! Start with a bar cart or utility cart as your foundation for instant structure. Add organizer trays on each level to prevent items from rolling around during movement. The top tier holds daily essentials while lower levels store backup products and tools. Attach a battery-powered mirror with lights to the cart for complete portability. Include cord management solutions for hot tools that need nearby outlet access. The wheels lock in place when you've found your perfect getting-ready spot. Your rolling vanity adapts to different lighting conditions and room availability as needed.
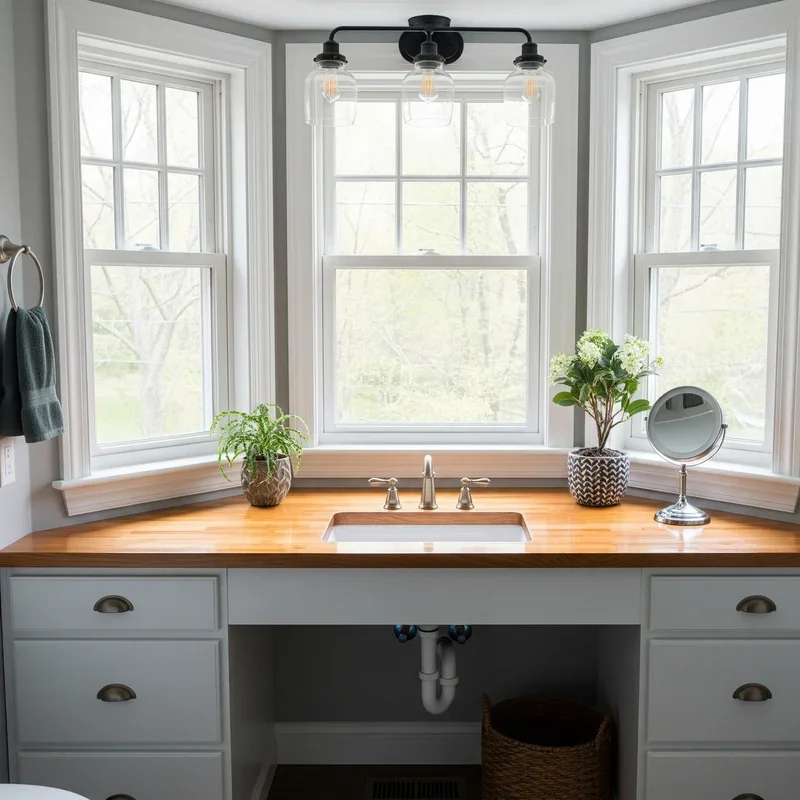
12. Window Nook Vanity Design
Transform that sunny window nook into a naturally lit vanity space that makes you glow. Natural light is makeup's best friend! Build or place a small table that fits perfectly in your window alcove space. The natural light eliminates color-matching disasters and provides the most accurate makeup application. Add sheer curtains for privacy while maintaining that beautiful, diffused lighting quality throughout. Position mirrors to maximize light reflection without creating unflattering shadows on your face. Include plants on the windowsill for a fresh, spa-like atmosphere during your routine. Built-in window seats can double as storage benches for beauty supplies below. Your window vanity becomes a bright spot that makes morning routines genuinely enjoyable.
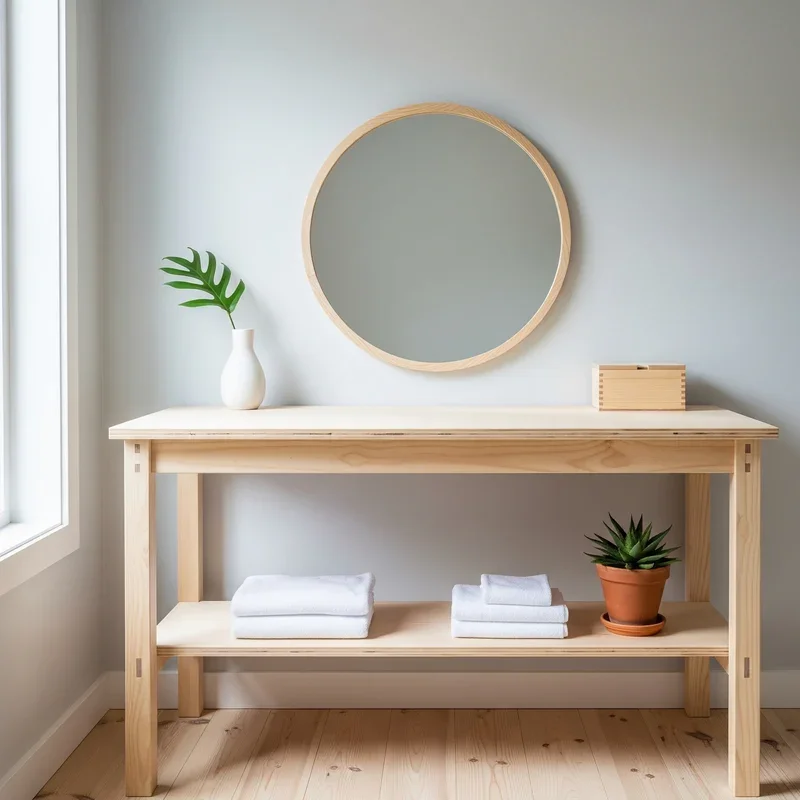
13. Minimalist Scandinavian Style Vanity
Create a serene Scandinavian-inspired vanity that embraces simplicity while maintaining complete functionality. Less really can be more! Choose light wood or white painted furniture for that signature Nordic aesthetic appeal. Keep surfaces mostly clear with just a few carefully selected items on display. Use drawer organizers and hidden storage to maintain the clean, uncluttered look consistently. Add a single plant and perhaps one piece of simple artwork for personality. The mirror should be frameless or have a thin, simple frame for minimalist elegance. Include soft textiles like a sheepskin rug or linen cushion for hygge comfort. Your Scandinavian vanity becomes a calming space that reduces morning stress through simplicity.
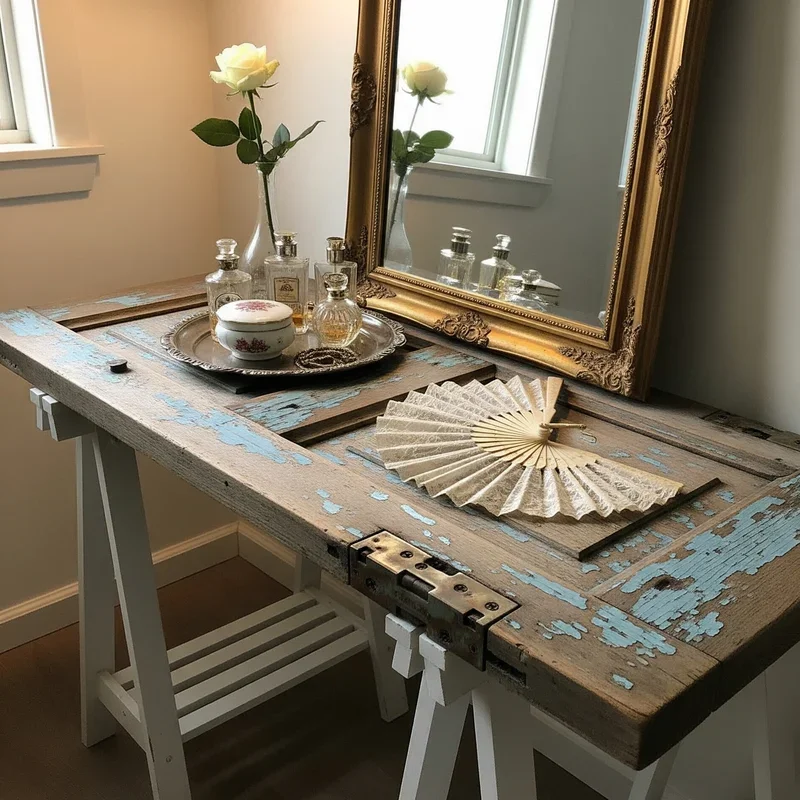
14. Upcycled Door Vanity Table
Transform an old door into a unique vanity table that's both eco-friendly and absolutely unique. One person's trash becomes your treasure! Sand and paint or stain the door to match your desired aesthetic perfectly. Add hairpin legs or repurposed table legs for the right height and stability. The door's panels create natural sections for organizing different beauty categories effectively. Glass cut to fit protects the surface while maintaining the door's character underneath. Door knobs can become towel holders or jewelry hangers for added functionality. The length provides ample surface area for spreading out your entire beauty collection. Your door vanity becomes a sustainable statement piece that sparks conversations.
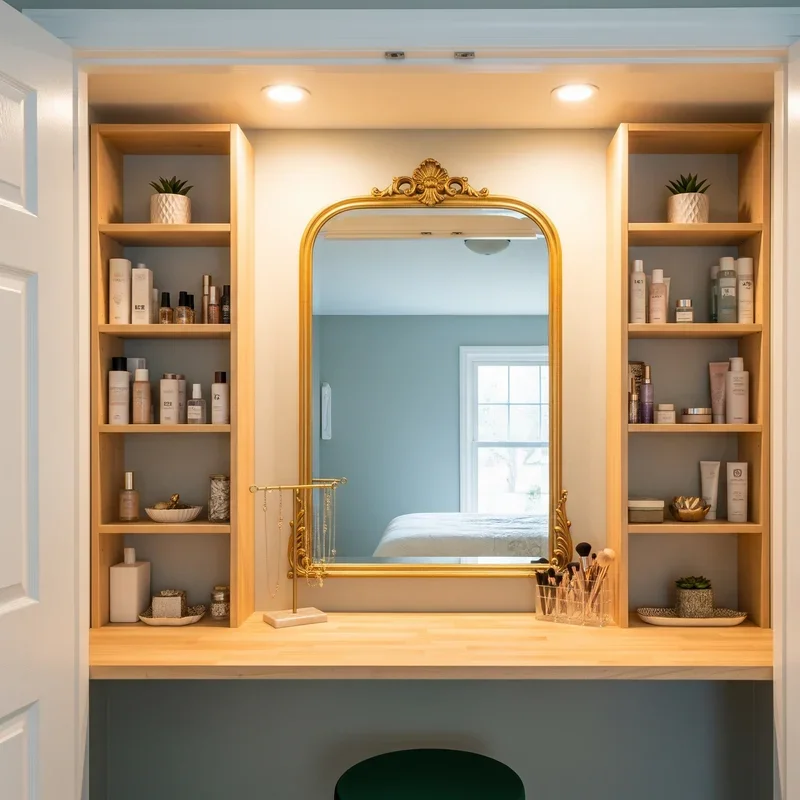
15. Built-In Closet Vanity Conversion
Convert part of your closet into a hidden vanity that maximizes space efficiency brilliantly. Your closet holds secret potential! Remove one section of hanging clothes to create your vanity nook area. Install a counter at sitting height with drawers or shelves underneath for storage. Add battery-operated or plug-in lighting since closets often lack adequate illumination naturally. Mount a mirror on the back wall to create depth and functionality simultaneously. Use the remaining closet rod above for hanging robes or frequently worn items. Include a small stool that slides under the counter when not in use. Your closet vanity provides privacy and organization while keeping bedrooms clutter-free and serene.
Conclusion
Creating your perfect DIY vanity isn't just about following trends; it's about designing a space that makes you feel confident and organized every single day. Whether you choose a floating minimalist design or a vintage transformation, the key is making it uniquely yours. Start with one idea that speaks to your style and space, then customize it to fit your specific beauty routine. Your dream vanity is just a weekend project away!
Read next: 15 DIY Wreath Ideas to Decorate Your Door in Style
Frequently Asked Questions
Q1: What's the ideal height for a DIY vanity?
A: Standard height is 29-32 inches, but customize based on your chair and comfort level.
Q2: How much does a DIY vanity typically cost?
A: Basic DIY vanities start around $50-100; elaborate designs can reach $300-500 with materials.
Q3: What lighting is best for makeup application?
A: Natural daylight or LED bulbs between 4000-5000K provide the most accurate color representation.
Q4: Can I build a vanity without woodworking skills?
A: Absolutely! Many ideas use existing furniture, adhesive products, and no-drill installation methods.
Q5: How do I protect wood vanity tops from water damage?
A: Apply polyurethane sealant or use glass tops to protect wood from cosmetics and spills.
Stay up to date with our latest ideas!