How to Make DIY Candles for Creative Projects
Discover how to make DIY candles for creative projects with step-by-step guides, pro tips, and unique ideas. Start crafting today!
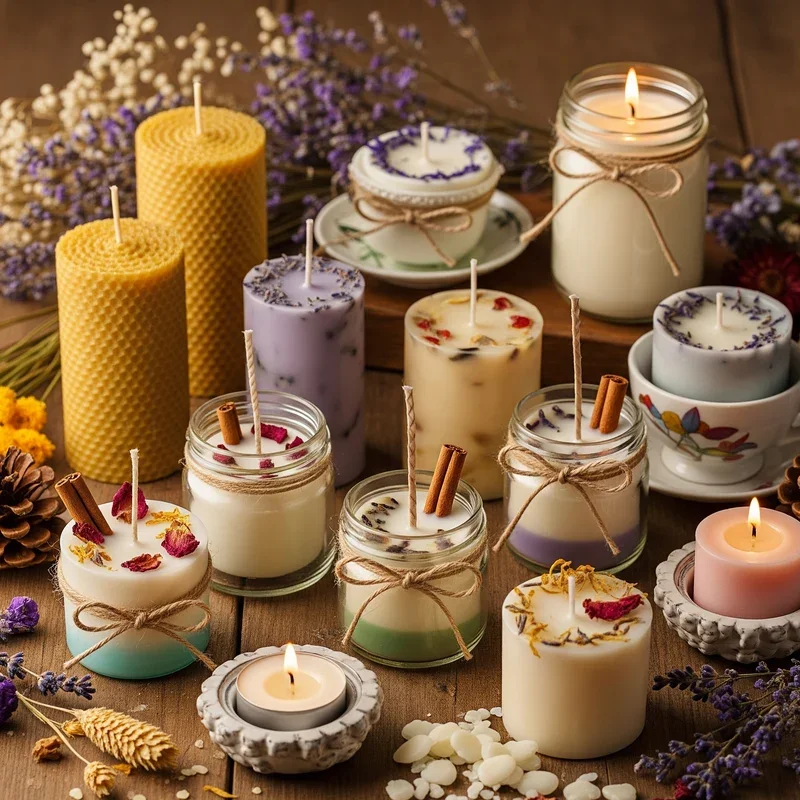
So, you've caught the candle-making bug? Welcome to the club! There's something absolutely magical about creating your own candles from scratch, watching that plain wax transform into something that'll light up a room both literally and figuratively. If you're wondering how to make DIY candles for creative projects, buckle up because you're in for quite the adventure!
Making candles at home isn't just about saving a few bucks at those fancy boutique stores (though that's definitely a perk). It's about unleashing your inner artist, creating personalized gifts that'll make your friends go "wow," and filling your space with exactly the scents and styles you love. Plus, let's be honest, there's nothing quite like the bragging rights that come with saying, "Oh, this candle? Yeah, I made it myself!"
Whether you're a complete newbie who's never touched a wick or someone looking to level up their candle game, this guide's got you covered. We'll walk through everything from basic supplies to advanced techniques that'll have you crafting like a pro in no time.
Getting Started: The Essential Supplies You'll Actually Need
Before diving headfirst into the wonderful world of wax, let's talk supplies. Now, don't go crazy buying everything under the sun just yet! Starting simple is the name of the game here.
The Non-Negotiable Basics
First things first, you'll need wax, and boy, do you have options! Here's what's cooking in the wax world:
Soy wax: The eco-friendly superstar that burns clean
Beeswax: Nature's gift that smells like honey heaven
Paraffin wax: The budget-friendly classic
Coconut wax: The new kid on the block with amazing scent throw
Wax blends: Because sometimes mixing it up is the way to go
Then there's the wick situation. Cotton wicks are your best bet starting out, but sizing them right is crucial. Too small and you'll get tunneling, too large and you'll have a smoky mess on your hands. Most suppliers have handy charts that'll save you from playing the guessing game.
Tools That'll Make Your Life Easier
Walking into a craft store, you might think you need every gadget on the shelf. Spoiler alert: you don't! Here's what'll actually earn its keep:
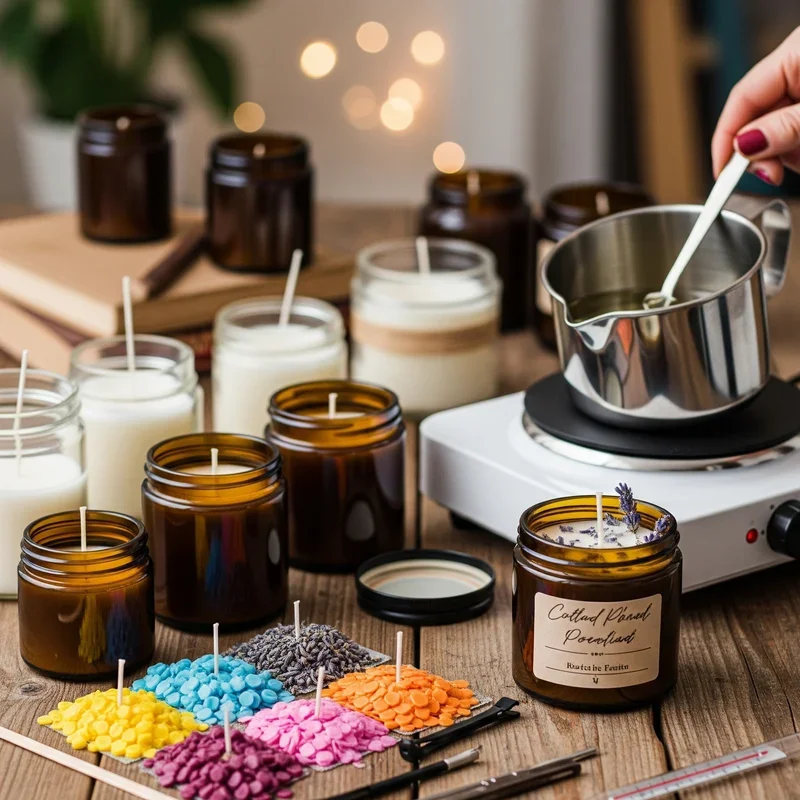
A double boiler or melting pot (a makeshift one works fine)
A thermometer (candy thermometers work great)
Wooden sticks or pencils for centering wicks
Containers or molds (mason jars are perfect for beginners)
A scale for measuring wax
Paper towels (trust me, you'll need lots)

How to Make DIY Candles for Creative Projects: The Basic Process
Alright, sleeves rolled up? Let's get this show on the road! Making your first candle is easier than assembling furniture from that Swedish store we all know and love.
Step-by-Step: Your First Candle
Ready to work some magic? Here's how it goes down:
Prep your container: Clean it thoroughly and warm it slightly in the oven (this prevents those pesky sinkholes)
Secure the wick: Use a dab of hot glue or a wick sticker to anchor it dead center
Melt the wax: Keep it between 170-185°F for most waxes (check your specific type)
Add fragrance: At around 185°F, stir in your fragrance oils gently but thoroughly
Pour carefully: Leave about half an inch from the top
Center that wick: Use pencils or wick holders to keep it straight
Practice patience: Let it cure for at least 24 hours before lighting
See? Not rocket science! Though watching that liquid wax transform into a solid candle never gets old, no matter how many you make.
Temperature Matters More Than You Think
Here's where lots of folks mess up: temperature control. Pouring too hot causes sinkholes and poor scent throw. Too cold? You'll get those ugly jump lines and poor adhesion. Think of it like Goldilocks and her porridge, you need it just right!
Most soy waxes like being poured around 135°F, while paraffin can handle higher temps. When in doubt, cooler is usually better than hotter. Your candles will thank you for it!
Creative Techniques That'll Blow Your Mind
Now that you've got the basics down, let's jazz things up a bit! This is where how to make DIY candles for creative projects really gets exciting.
Layered Candles: The Show-Stoppers
Creating layers isn't just about pouring different colors on top of each other (though that's part of it). The trick is letting each layer cool to the perfect tackiness before adding the next. Too soon and they'll blend into a muddy mess. Too late and they won't stick together properly.
Pro tip: Pour each layer at a slightly lower temperature than the last. This prevents the heat from melting the previous layer and keeps those lines crisp and clean.
Embedded Objects: Because Why Not?
Throwing dried flowers, coffee beans, or small shells into your candles? Awesome idea! But placement is everything. Here's the insider scoop:
Place items against the container walls for visibility
Use a bit of melted wax as "glue" to hold them in place
Pour your main wax slowly to avoid displacing decorations
Keep flammable items away from where the wick will burn
Marbled and Swirled Effects
Want candles that look like they belong in an art gallery? Marbling's your ticket! Drop different colored wax into your main pour and gently swirl with a skewer. The key word here is "gently", folks. Over-mixing turns your masterpiece into brown sludge faster than you can say "Pinterest fail."
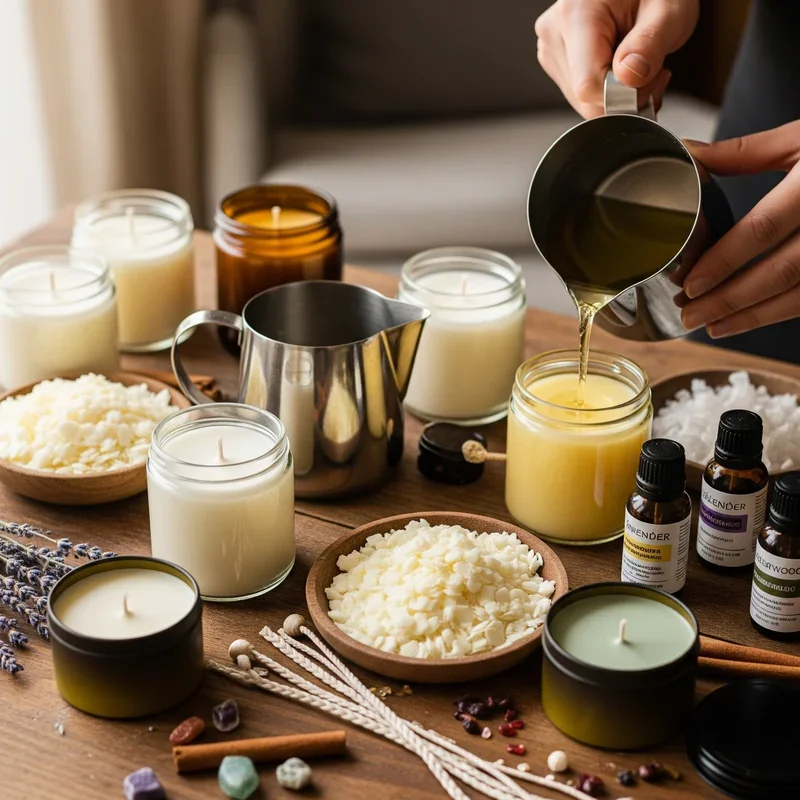
Scent Blending: Creating Your Signature Fragrance
Let's talk about what really makes a candle special: the scent! Sure, unscented candles have their place, but adding fragrance is where you can really let your personality shine.
Understanding Fragrance Notes
Just like perfume, candle scents have top, middle, and base notes. Combining them thoughtfully creates complexity that'll have people asking, "Where did you buy this?"
Top notes: Light and fresh (citrus, herbs)
Middle notes: The heart of your blend (florals, fruits)
Base notes: Deep and lasting (woods, musks, vanilla)
Start with simple two-scent combos before going wild. Lavender and vanilla? Classic! Orange and cinnamon? Hello, holidays! The world's your oyster here.
How Much Is Too Much?
More fragrance equals stronger scent, right? Well, yes and no. Each wax has a maximum fragrance load it can handle, usually between 6-12%. Go over that and you'll get seeping, poor burn quality, and a whole host of problems. When it comes to scent, sometimes less really is more!
Troubleshooting Common Candle Catastrophes
Even experienced makers have those "what went wrong?" moments. Here's how to fix the most common oopsies:
Sinkholes and Craters
Finding a crater in your beautiful candle is heartbreaking! Usually, it's because the wax cooled too quickly or was poured too hot. The fix? Pour a thin layer of melted wax over the top once it's fully cooled. Nobody will ever know!
Wet Spots and Adhesion Issues
Those cloudy spots where wax pulls away from glass? Temperature strikes again! Warming your containers and pouring at the right temp usually solves this. Already happened? A heat gun can sometimes fix minor spots.
Tunneling Troubles
When your candle burns straight down leaving walls of wax, your wick's probably too small. For future candles, size up. For existing ones, carefully remove some wax from the edges or wrap the top in foil while burning to help it catch up.
Advanced Projects for the Ambitious Crafter
Feeling confident? Let's tackle some projects that'll really showcase your skills!
Shaped and Molded Candles
Silicone molds open up a whole universe of possibilities. Geometric shapes, flowers, even tiny succulents, if you can imagine it, there's probably a mold for it. The trick with molds is:
Spray with mold release first
Pour at a lower temperature to preserve details
Let them cool completely before unmolding
Be patient (seriously, rushing ruins everything)
Wooden Wick Wonders
Wooden wicks create that cozy crackling sound that screams autumn evening by the fireplace. They're trickier than cotton but so worth it! They need to be sized properly for your container and sometimes require a second pour to secure them properly. The payoff? Candles that look and sound absolutely professional.
Safety First: Keeping Your Craft Space Fire-Free
Look, I know safety talks are about as exciting as watching paint dry, but this stuff's important!
The Golden Rules of Candle Making
Never leave melting wax unattended (it can ignite)
Keep a fire extinguisher nearby
Work in a well-ventilated area
Use heat-resistant surfaces
Keep water away from hot wax (it splatters)
Test burn every new candle design
Testing Your Creations
Before gifting or selling candles, always do a full burn test. Watch for mushrooming wicks, excessive soot, or containers getting too hot. Better to find issues in your kitchen than in someone else's living room!
Making Money from Your Candle Obsession
So you've mastered how to make DIY candles for creative projects and folks are begging to buy them? Time to talk business!
Pricing Your Handmade Treasures
Don't undersell yourself! Factor in:
Material costs
Time invested
Overhead expenses
Desired profit margin
A good rule of thumb? Materials x 3 for wholesale, x 6 for retail. Your time and skill have value, so price accordingly!
Building Your Brand
Starting small at local craft fairs or online marketplaces lets you test the waters. Create a cohesive look with consistent labeling, develop a signature style, and always prioritize quality over quantity. Rome wasn't built in a day, and neither are successful candle businesses!
Conclusion
There you have it, everything you need to start your candle-making journey! From basic containers to advanced techniques, you're now equipped to create stunning candles that'll impress everyone. Remember, perfection comes with practice, so don't get discouraged by early mishaps. Every wonky candle teaches you something new. Now grab that wax, light up your creativity, and start making some magic!
Read next: 15 DIY Creative Things to Do When Bored at Home
Frequently Asked Questions
Q1: What's the best wax for beginner candle makers?
A: Soy wax is most forgiving and easiest to work with for beginners.
Q2: How long should I cure my candles before burning?
A: Wait at least 24-48 hours, though a week gives best results.
Q3: Can I use essential oils instead of fragrance oils?
A: Yes, but they're pricier and some don't survive the heat well.
Q4: Why does my candle have white spots on top?
A: That's frosting, common with soy wax and purely cosmetic, not harmful.
Q5: How do I prevent my wick from moving while pouring?
A: Use wick holders or crossed pencils to keep wicks perfectly centered.
Stay up to date with our latest ideas!