15 DIY Phone Case Ideas for a Fun Custom Look
Discover 15 unique DIY phone case ideas to create stunning custom designs. From pressed flowers to glitter art, transform your plain case into a personalized masterpiece today!
Ever stared at your plain phone case and wished it had more personality? You're definitely not alone in this creative dilemma! Your phone case travels everywhere with you, making it the perfect canvas for self-expression. Whether you're crafting-challenged or a DIY enthusiast, transforming a basic case into something extraordinary is surprisingly simple. From nature-inspired pressed flowers to eye-catching glitter designs, these creative ideas won't drain your wallet. Each project offers a unique way to showcase your style while protecting your device. Ready to turn that boring case into a conversation starter? Let's explore 15 amazing DIY phone case ideas that'll have everyone asking where you bought such a cool accessory!
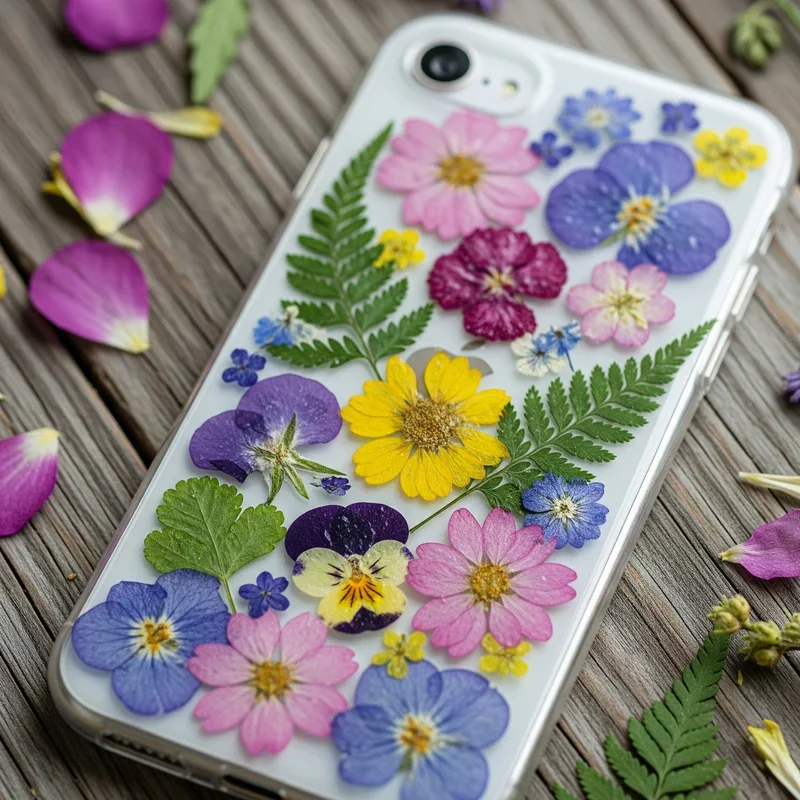
1. Pressed Flower Phone Case
Transform your phone into a portable garden with this delicate DIY project. Start by collecting small flowers and leaves from your garden or local park. Press them between heavy books for approximately one week until completely dried and flattened. Arrange these botanical treasures on a clear phone case using tweezers for precise placement. Once you're satisfied with your design, carefully seal everything with mod podge or clear resin, smoothing out any air bubbles with a craft stick. The finished product looks like it belongs in an upscale boutique! This timeless technique works beautifully with wildflowers, ferns, or colorful autumn leaves, creating an elegant accessory that brings nature's beauty wherever you go.
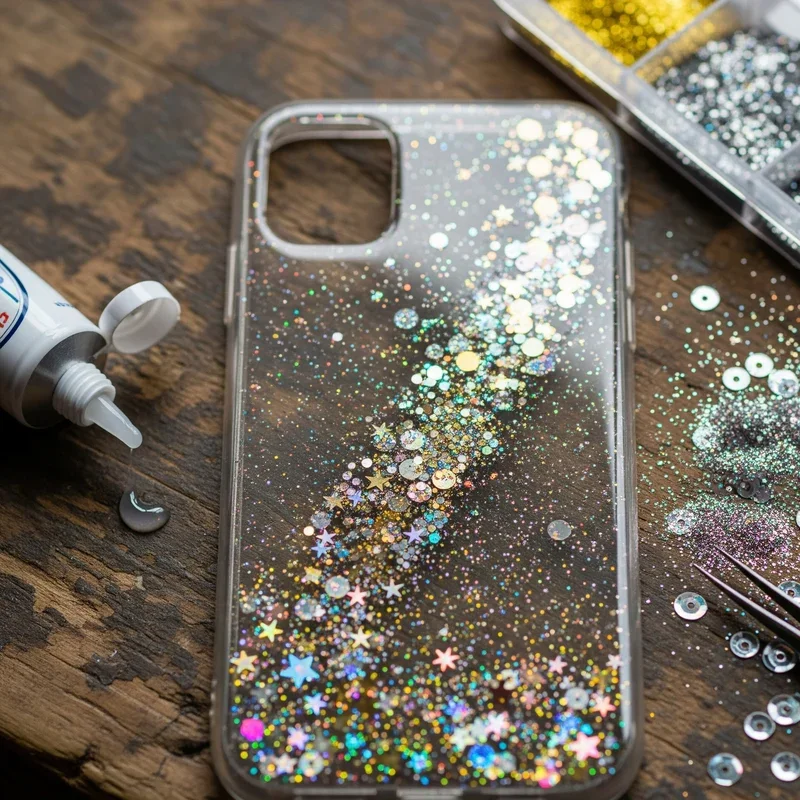
2. Glitter Bomb Phone Case
Ready to make your phone sparkle like a disco ball? This dazzling DIY project transforms any basic case into a glamorous showpiece. Begin with either a clear or solid-colored case as your foundation. Apply a thin, even layer of mod podge or clear-drying craft glue across the surface. While the adhesive is still wet, generously sprinkle your chosen glitter over the entire case, tapping off any excess. For added dimension, try layering different glitter sizes or creating an ombre effect with multiple colors. Seal your masterpiece with several coats of clear sealant to prevent glitter from shedding everywhere. Your phone will literally shine bright like a diamond, catching light from every angle!
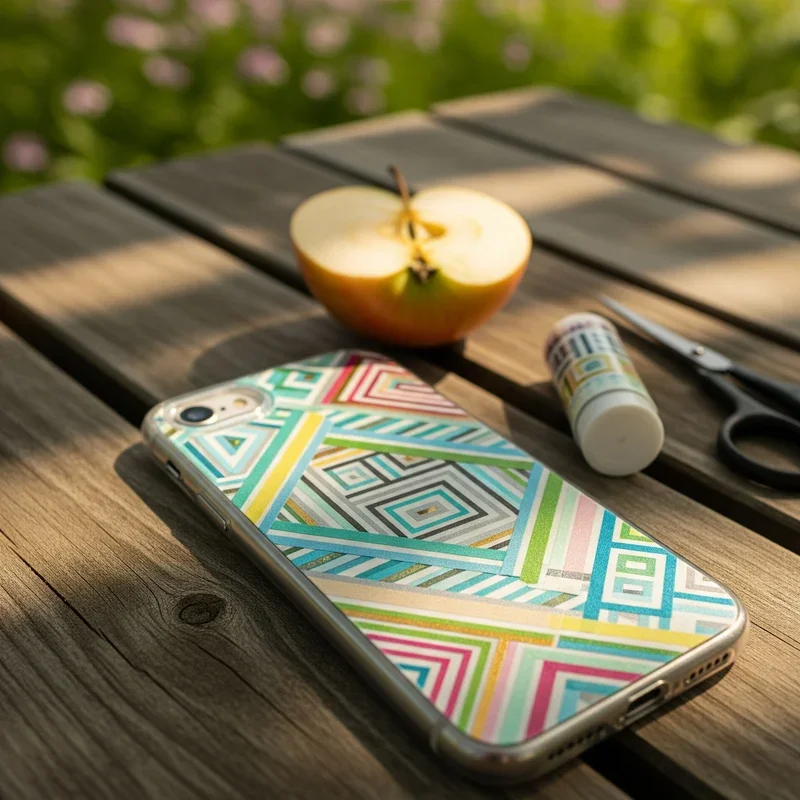
3. Washi Tape Geometric Patterns
Discover the magic of washi tape for creating stunning geometric designs on your phone case! This versatile Japanese decorative tape offers endless pattern possibilities without permanent commitment. Start by cleaning your case thoroughly, then sketch your desired pattern on paper first. Cut washi tape strips into various lengths and apply them to create triangles, diamonds, stripes, or abstract shapes. Mix different colors and patterns for a bold statement, or stick to a monochromatic scheme for sophisticated elegance. The tape's repositionable nature means you can adjust your design until it's perfect. Best of all, when you're ready for a change, simply peel off the tape and start fresh with a completely new look!
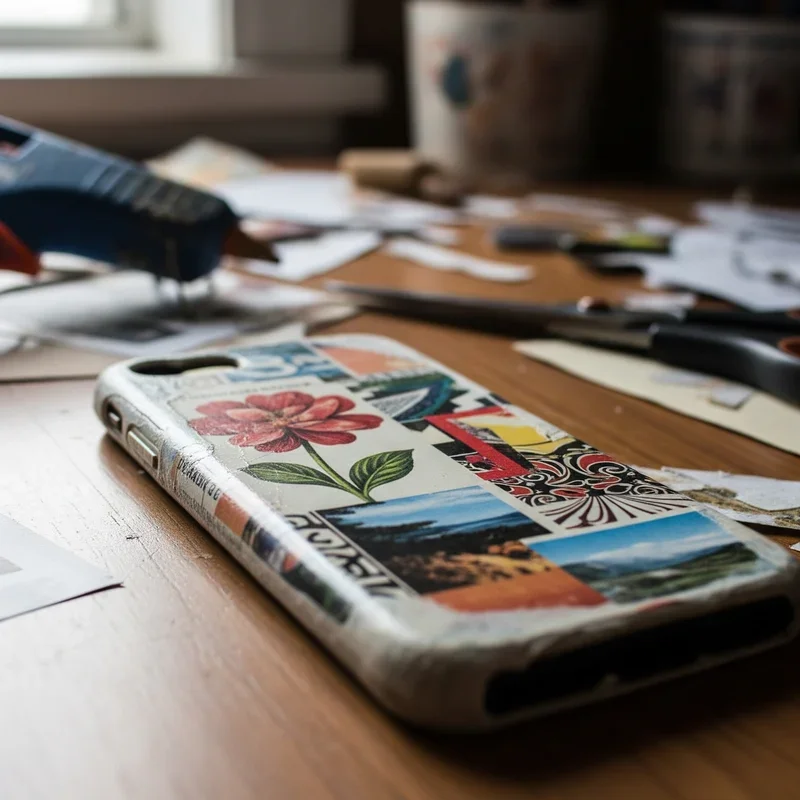
4. Photo Collage Memory Case
Turn your phone case into a cherished photo album that travels everywhere with you! This sentimental DIY project lets you showcase favorite memories in a creative way. Print your chosen photos on regular or photo paper, sizing them small enough to fit your case. Cut images carefully with scissors or a craft knife, then arrange them in an overlapping collage pattern. Mix portraits with landscapes for visual variety, and consider adding small mementos like concert tickets or meaningful quotes. Once you've perfected your layout, secure everything with mod podge, applying thin, even coats to avoid wrinkles or bubbles. This personalized design makes an incredibly thoughtful gift or a daily reminder of life's special moments.

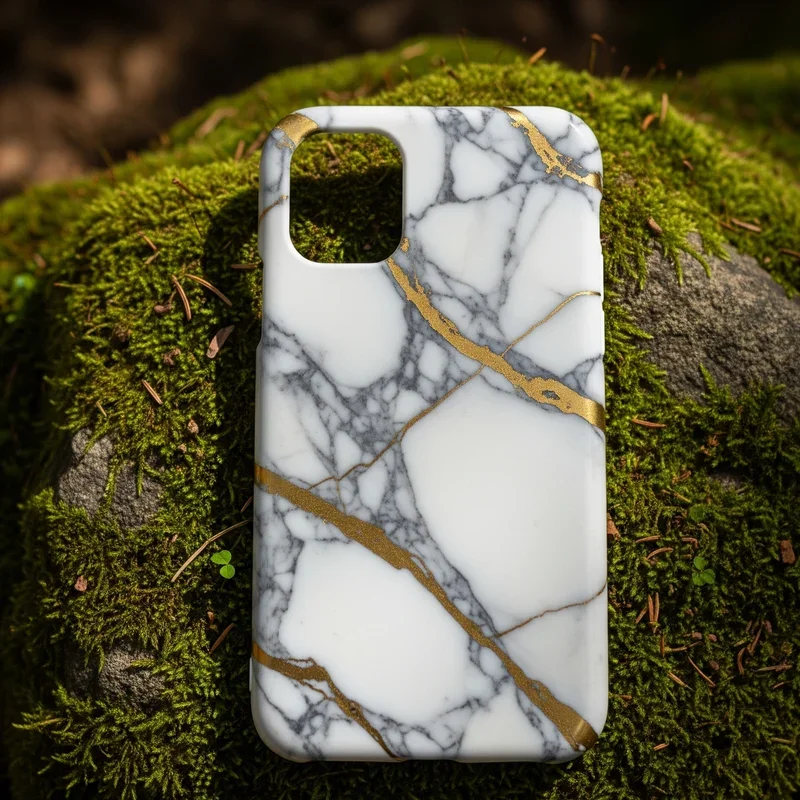
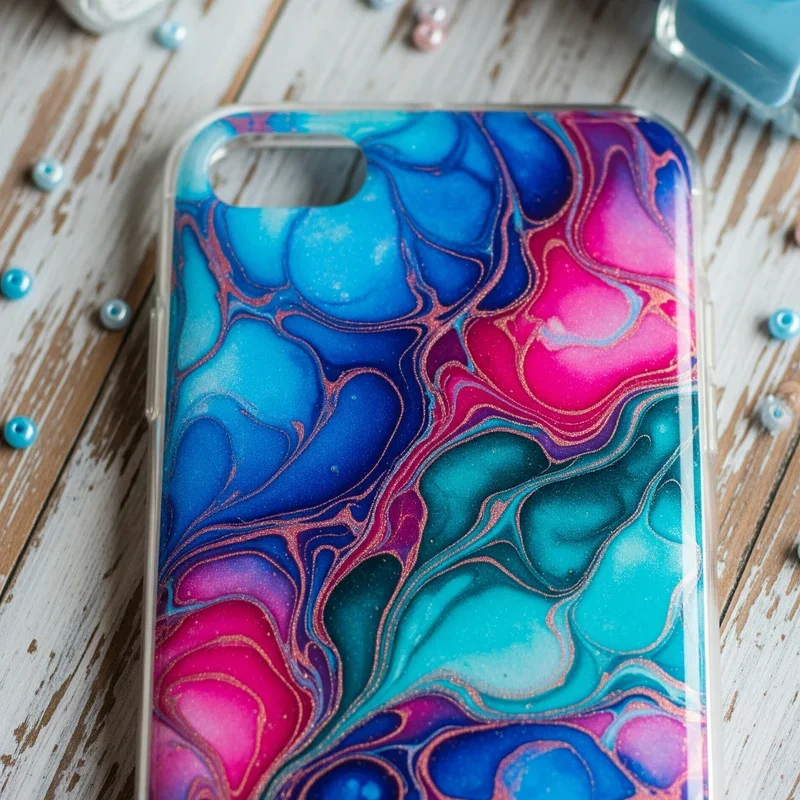
5. Marble Effect Phone Case
Achieve luxurious marble aesthetics without the premium price tag using simple nail polish! Fill a disposable container with room-temperature water and carefully drop different nail polish colors onto the surface. Use a toothpick to gently swirl the colors together, creating organic marble-like veins and patterns. Holding your phone case at an angle, slowly dip it into the water, allowing the polish design to transfer onto the surface. Work in a well-ventilated area and protect your workspace from potential spills. Each dip creates completely unique patterns, just like genuine marble stone. Once thoroughly dry, apply a clear topcoat for added durability and shine. This technique delivers high-end results for just a few dollars!
6. Embroidered Phone Case
Combine traditional needlework with modern technology for a uniquely textured phone case! Begin with a fabric-covered case or create one by carefully gluing fabric onto a plain case. Mark your chosen design using washable fabric markers as guides. Select embroidery floss in complementary colors and stitch your pattern using basic techniques like backstitch, French knots, or chain stitch. Simple motifs like flowers, geometric shapes, or monogram initials work wonderfully for beginners. For extra dimension, incorporate small beads or sequins into your embroidery. This tactile design adds a cozy, handcrafted element that stands out in our digital world. The finished product showcases your needlework skills while protecting your device in style.

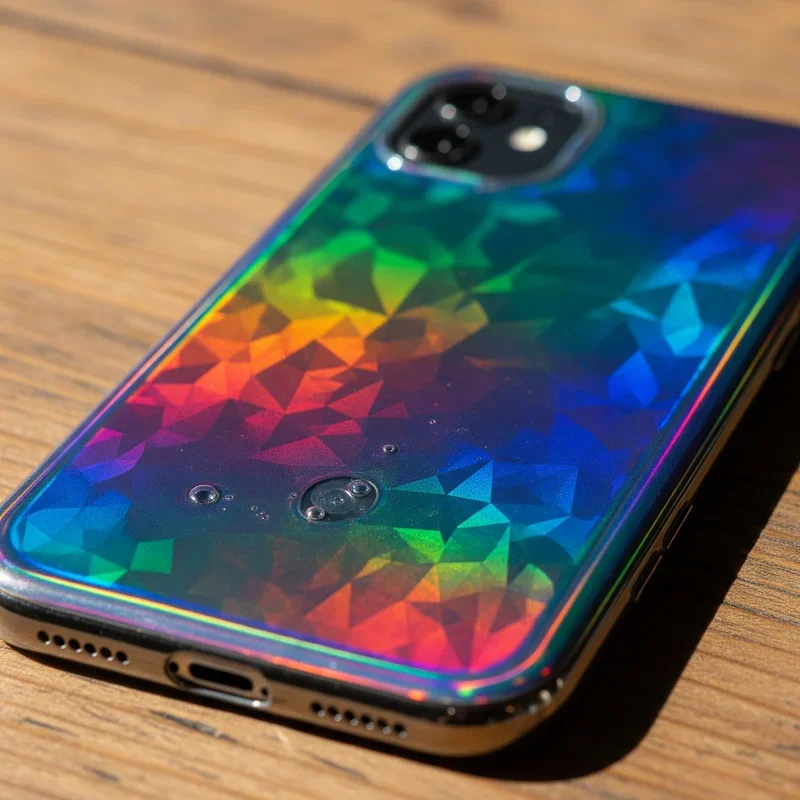
7. Holographic Vinyl Case
Step into the future with an iridescent phone case that shifts colors like a magical rainbow! Purchase holographic vinyl sheets from craft stores or online retailers, choosing from patterns like shattered glass, mermaid scales, or solid chrome finishes. Measure your case carefully and cut the vinyl slightly larger than needed. Starting from one edge, slowly apply the vinyl while using a credit card to smooth out air bubbles. Work methodically to ensure proper adhesion without wrinkles. Trim excess material with a precision craft knife for clean, professional edges. The mesmerizing holographic effect changes with every viewing angle, creating an eye-catching accessory that looks expensive but costs mere dollars. Your phone will radiate futuristic vibes wherever you go!
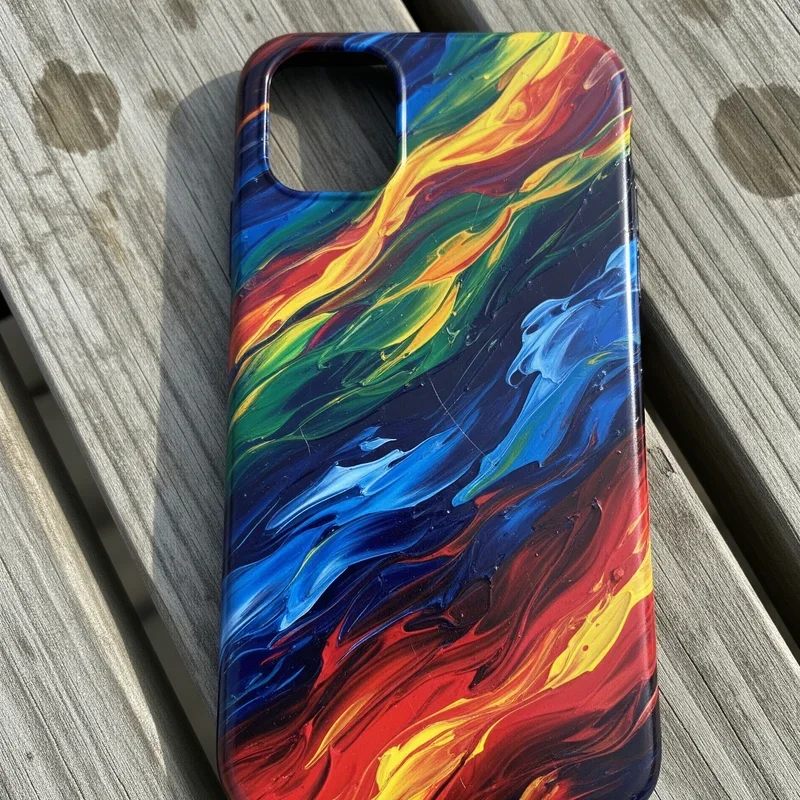
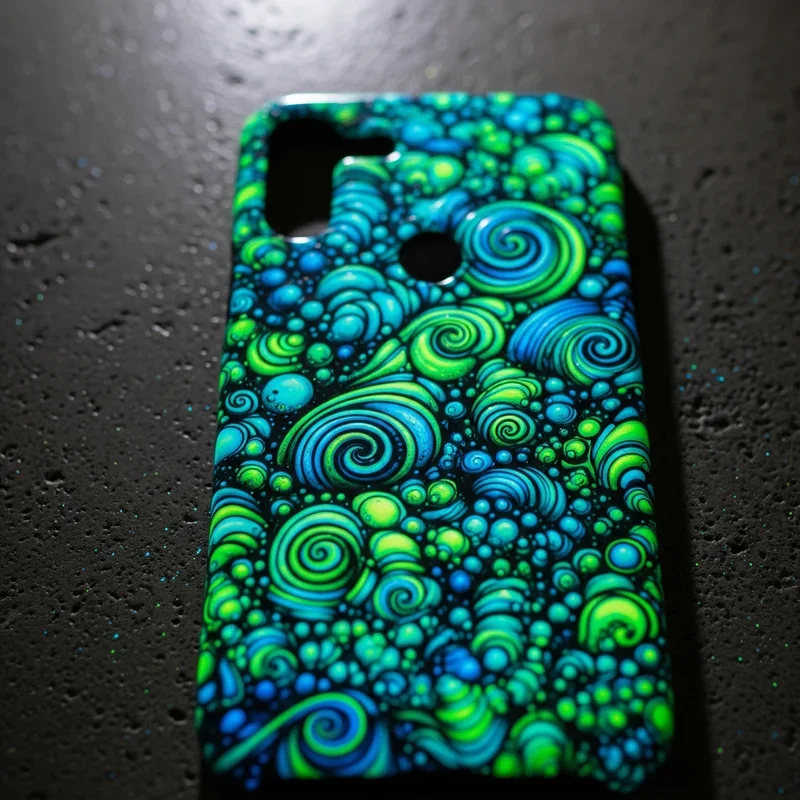
8. Painted Abstract Art Case
Unleash your inner artist by transforming your phone case into a miniature canvas! Acrylic paints work best on plastic or silicone cases, providing vibrant colors with excellent adhesion. Choose a white or light-colored base case for optimal color visibility. Let creativity guide you through abstract techniques like color blocking, paint splattering, or fluid art pouring. Try dry brushing for interesting textures or blend colors for dreamy gradients. Don't stress about perfection; abstract art celebrates spontaneity and personal expression! Allow your masterpiece to dry completely between layers, then protect it with multiple coats of clear acrylic sealer. This wearable art piece becomes a unique conversation starter that showcases your creative talents.
9. Decoupage Magazine Cutouts
Give old magazines new life while creating a personalized phone case through decoupage! This eco-friendly technique transforms printed media into wearable art. Browse through magazines to collect images, patterns, typography, or colors that resonate with your style. Carefully cut out your selections and arrange them on the case, experimenting with different layouts before committing. Apply mod podge to both the case surface and image backs, pressing firmly to eliminate air bubbles. Build layers for visual depth, mixing various textures and themes. Finish with several smooth coats of mod podge over everything, creating a glossy, professional finish. Your unique collage tells a visual story while protecting your phone in style.
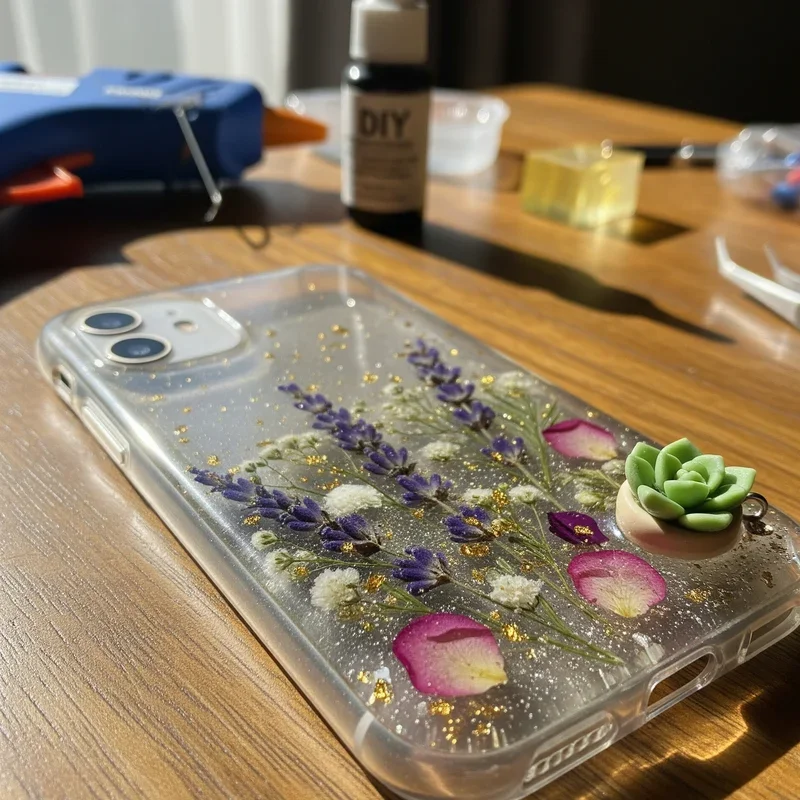
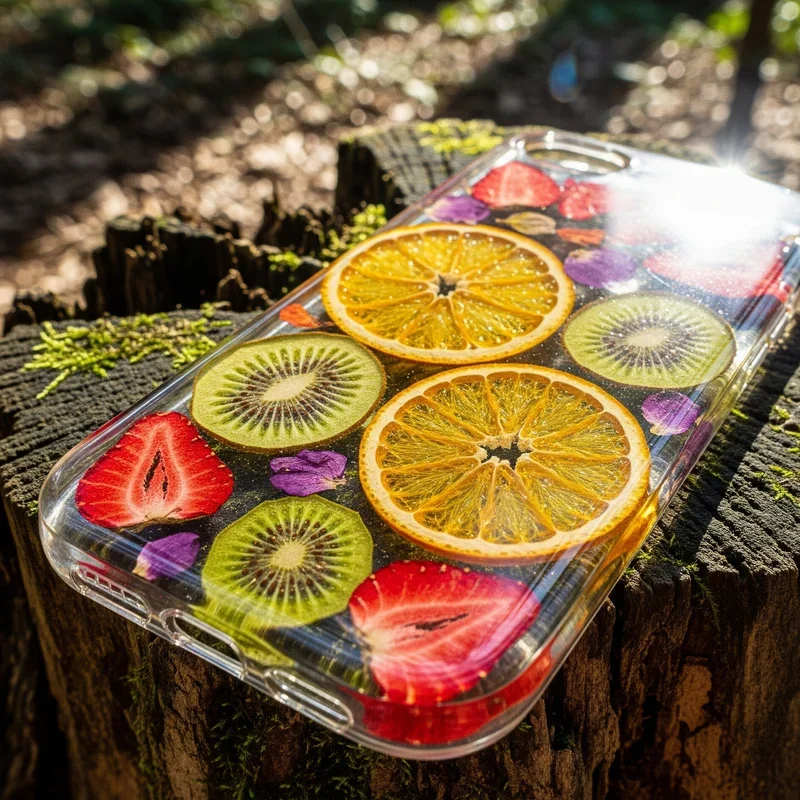
10. Resin and Dried Fruit Case
Create a stunning botanical specimen by preserving dried fruit slices in crystal-clear resin! Begin by dehydrating thin slices of citrus fruits, kiwis, or star fruit using a food dehydrator or low-temperature oven. Arrange these translucent pieces in a silicone phone case mold, considering color combinations and placement. Mix epoxy resin according to package directions, then carefully pour thin layers over the fruit. Work slowly to minimize air bubbles and ensure even coverage. The clear resin magnifies the fruit's natural beauty, creating an artistic preservation effect. This advanced technique requires proper ventilation and patience but delivers professional results. Your finished case becomes a unique conversation piece that showcases nature's vibrant colors.
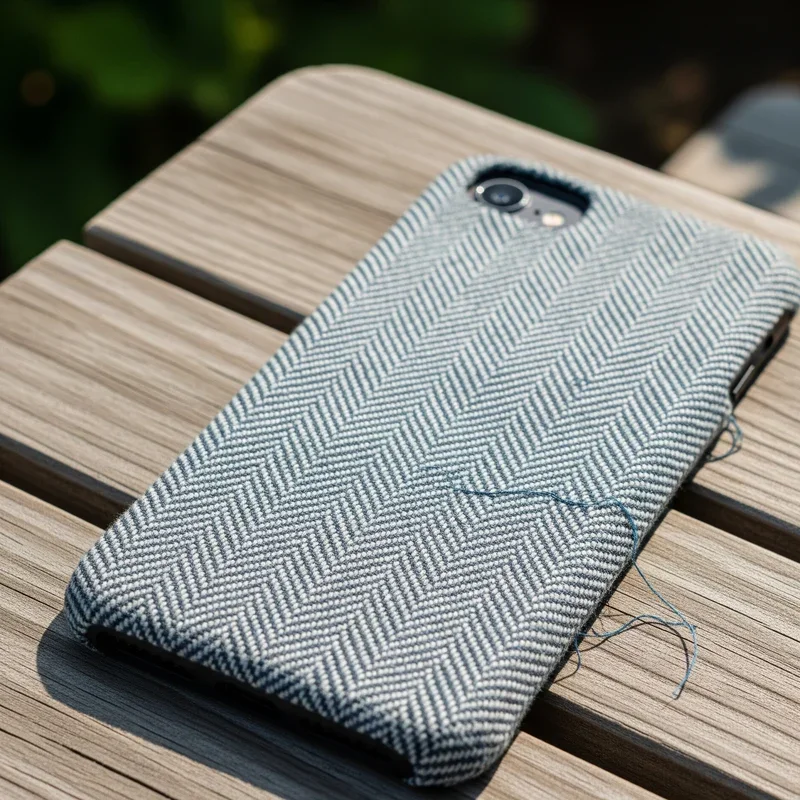
11. Fabric-Covered Phone Case
Add cozy textile charm to your tech with a custom fabric-covered phone case! Select fabric that matches your personal style: vintage florals, modern geometrics, or classic patterns. Cut fabric slightly larger than your case dimensions to allow for edge wrapping. Apply fabric glue evenly across the case surface, then carefully position and smooth your fabric, eliminating wrinkles or bubbles. Neatly fold and secure edges with additional glue for a polished finish. For added durability, spray with fabric protector or apply a thin mod podge coating. This technique opens unlimited pattern possibilities while creating a soft, tactile experience. Your phone gains a fashionable makeover that feels as wonderful as it looks!
12. Nail Polish Watercolor Case
Create dreamy watercolor effects using everyday nail polish and food coloring! This budget-friendly technique produces stunning abstract designs rivaling expensive resin art. Mix drops of food coloring into clear nail polish to create custom translucent shades. Drop the tinted polish onto a white or clear case, allowing colors to flow and blend naturally. Tilt your case to encourage organic patterns, or use a toothpick for deliberate swirls. The polish's glossy finish mimics professional glass art at a fraction of the cost. Layer different hues for depth, or keep it minimal with a two-tone gradient. Each creation becomes completely unique, as the colors interact unpredictably. Your phone case transforms into wearable abstract art!
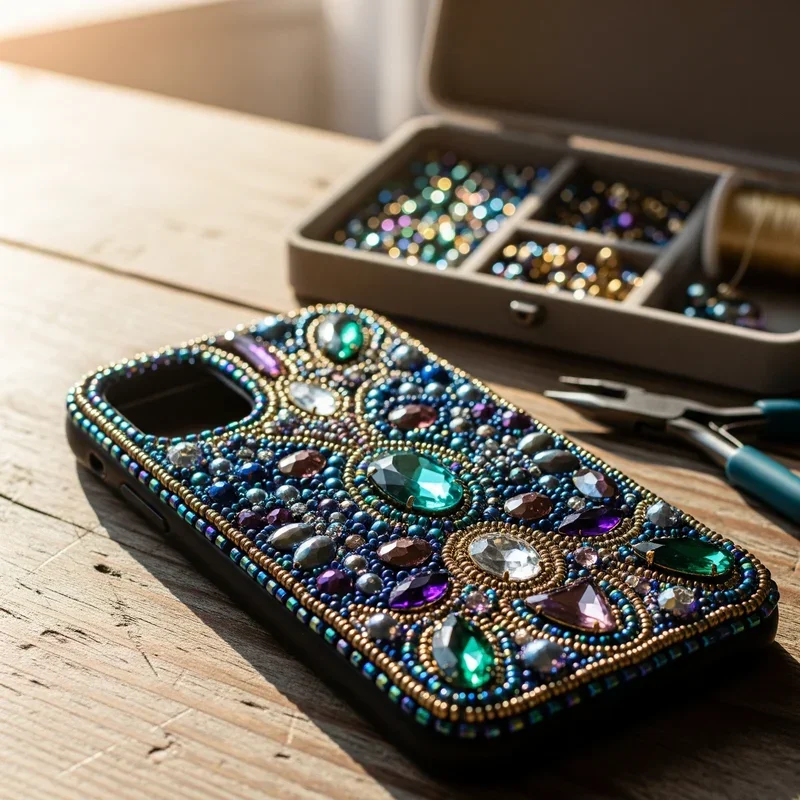
13. Beaded and Jeweled Case
Transform your phone into a dazzling accessory with strategically placed gems and beads! Begin with a sturdy case foundation, then plan your design by arranging decorations before permanent attachment. Use strong jewelry adhesive or E6000 glue for secure placement that withstands daily use. Create elegant patterns with rhinestones, mix sizes for visual interest, or spell words with alphabet beads. Pearls add sophistication while colorful gems bring playful energy. Work in small sections, allowing each area to dry completely before proceeding. This technique perfectly suits special occasions or when you want maximum glamour. The finished product catches light beautifully, turning your phone into a sparkling fashion statement that rivals designer accessories!
14. Glow-in-the-Dark Paint Case
Combine functionality with creativity using glow-in-the-dark paint for a phone case that's both practical and artistic! Apply a white base coat first to enhance the glowing effect. Once dry, create your design using various glow paint colors. Try painting constellations for astronomy lovers, moon phases for mystical vibes, or abstract patterns for modern appeal. Apply multiple thin coats rather than one thick layer for the strongest luminosity. During daylight, your case displays an interesting artistic design; in darkness, it transforms into a glowing beacon. This clever DIY proves especially useful for finding your phone in dark rooms, movie theaters, or during camping adventures. Science meets art in this illuminating project!
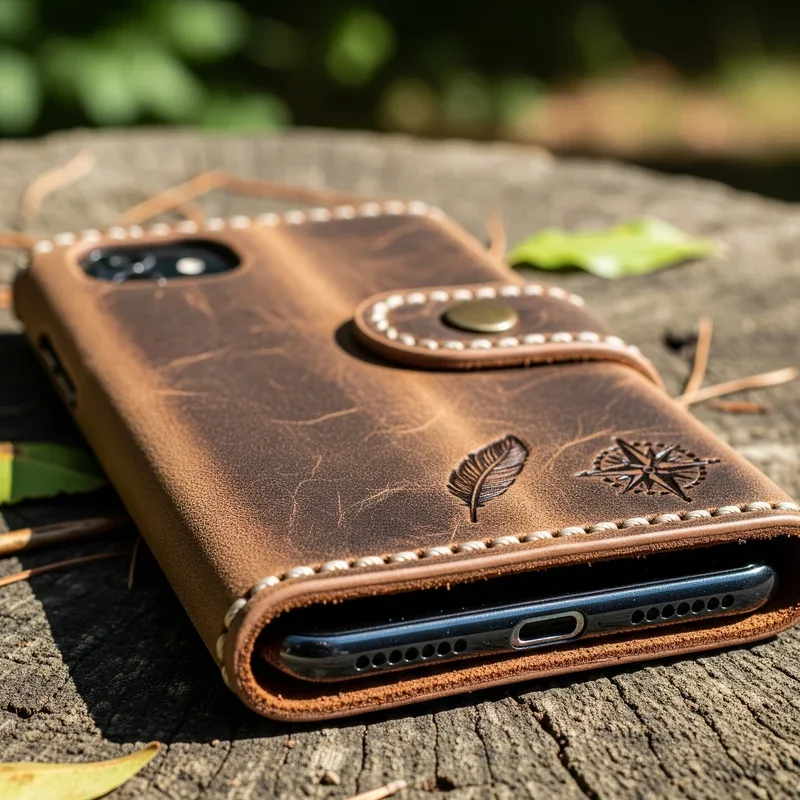
15. Leather or Faux Leather Wrap
Elevate your phone's style with a sophisticated leather or faux leather wrap that improves with age! Cut leather to size, allowing slight overlap for complete coverage. For genuine leather, condition it first to ensure flexibility and prevent cracking. Apply leather adhesive or strong craft glue to both surfaces, then carefully wrap the material around your case. Use a bone folder or credit card edge to create crisp lines and eliminate air bubbles. Personalize with stamped initials, painted designs, or metal studs for unique character. This durable option develops a beautiful patina over time, making each case more special with use. Your phone gains timeless elegance that complements any style!
Conclusion
These 15 DIY phone case ideas prove that personalizing your tech doesn't require artistic genius or expensive materials. From delicate pressed flowers to bold glitter designs, each project offers unique ways to express your creativity while protecting your device. The beauty of DIY lies in its flexibility—change your case design whenever inspiration strikes! So gather your crafting supplies, pick your favorite technique, and give your phone the custom makeover it deserves. Your one-of-a-kind creation will have everyone asking for your secret!
Read next: 15 Easy Craft Ideas for Beginners to Try
Frequently Asked Questions
Q1: How long do DIY phone cases typically last?
A1: With proper sealing, most designs last 6-12 months.
Q2: Can I wash my DIY phone case?
A2: Gently wipe with damp cloth; avoid soaking.
Q3: What's the easiest design for beginners?
A3: Washi tape patterns require minimal skills or tools.
Q4: Will DIY decorations affect wireless charging?
A4: Thin decorations usually won't interfere with charging.
Q5: Can I remove DIY decorations later?
A5: Depends on method; washi tape removes easily.
Stay up to date with our latest ideas!