15 Stunning Resin Craft Ideas You’ll Love
Dive into the mesmerizing world of resin crafts with these 15 stunning project ideas! From sparkling jewelry to glossy home décor, learn how to transform clear resin into dazzling works of art.

If you’ve ever stared at a piece of crystal-clear resin artwork and wondered how such magic is made, you’re not alone. There’s something hypnotic about the shine and depth that resin brings to a craft, almost like capturing a droplet of morning dew and turning it into a masterpiece. Whether you want to decorate your home with unique accents or create meaningful gifts for friends and family, resin crafts let you unlock a world of possibilities. Picture the thrill of embedding dried flowers into a translucent pendant or the sheer delight of swirling colorful pigments into a glossy tray. In this article, we’ll explore 15 stunning resin craft ideas that will spark your creativity and guide you through the basics. So grab your stirring sticks, put on your gloves, and let’s dive into the enchanting realm of resin artistry!
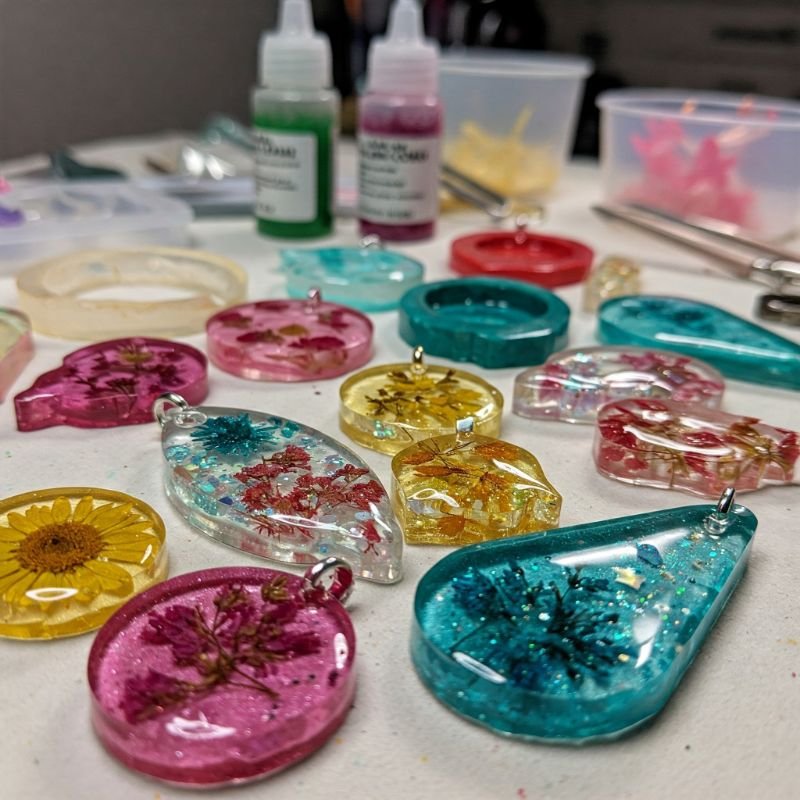
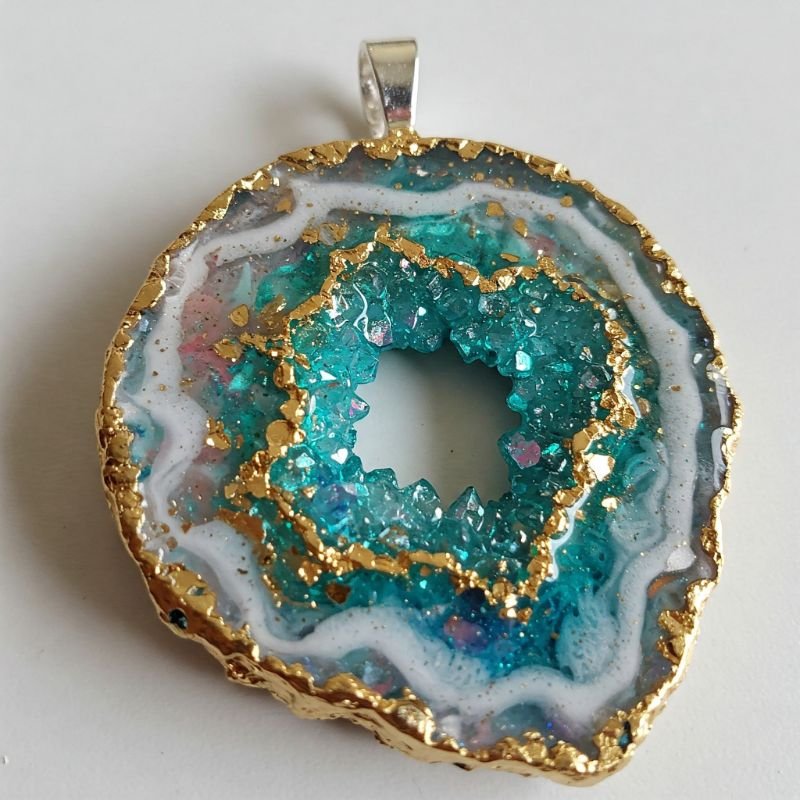
1. DIY Resin Jewelry Pendants
Resin jewelry pendants are like tiny worlds captured in a drop of crystal. They’re an excellent choice for beginners eager to experiment with colorful dyes, glitters, and even embedded objects. Start by selecting a mold—silicone molds are ideal for easy removal. Mix your resin according to the instructions on the packaging, ensuring you stir slowly to minimize bubbles. Then comes the fun part: customize the pendant by adding miniature charms, pressed flowers, or swirling mica powders for a dreamy effect. Once poured, let the resin cure on a flat surface, undisturbed for at least 24 hours. As you peel away the mold, you’ll reveal a jewel-like creation that can be attached to a chain or cord. The result? A conversation-starting accessory that shimmers with personal flair.
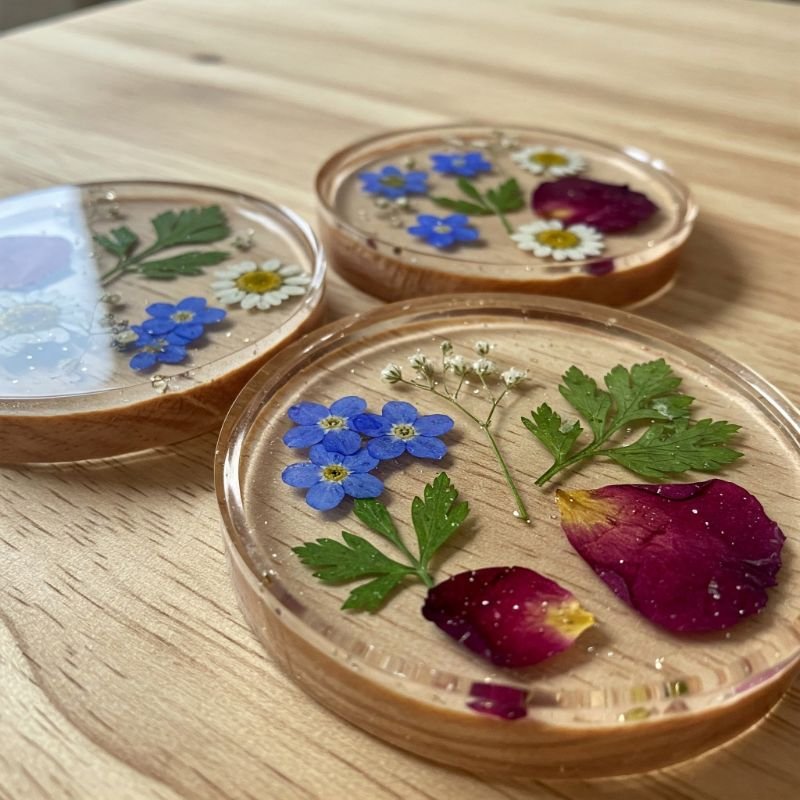
2. Resin Coasters with Embedded Florals
Elevate your beverage game by crafting resin coasters infused with delicate dried flowers. Whether you opt for bold blooms or subtle greenery, the result is akin to pressing nature’s beauty between layers of glass. Begin by arranging your pressed flowers in coaster molds, ensuring you’ve chosen specimens that lie relatively flat. Mix your resin, then carefully pour a thin layer to act as the base. Gently place your florals on top, followed by another layer of resin to seal them in. If needed, use a toothpick to maneuver tiny petals into just the right spot. Allow ample curing time—impatience can lead to cloudy finishes or trapped bubbles. Once hardened, these coasters protect your tabletops while adding a dose of botanical charm to every cup of coffee or tea you serve.
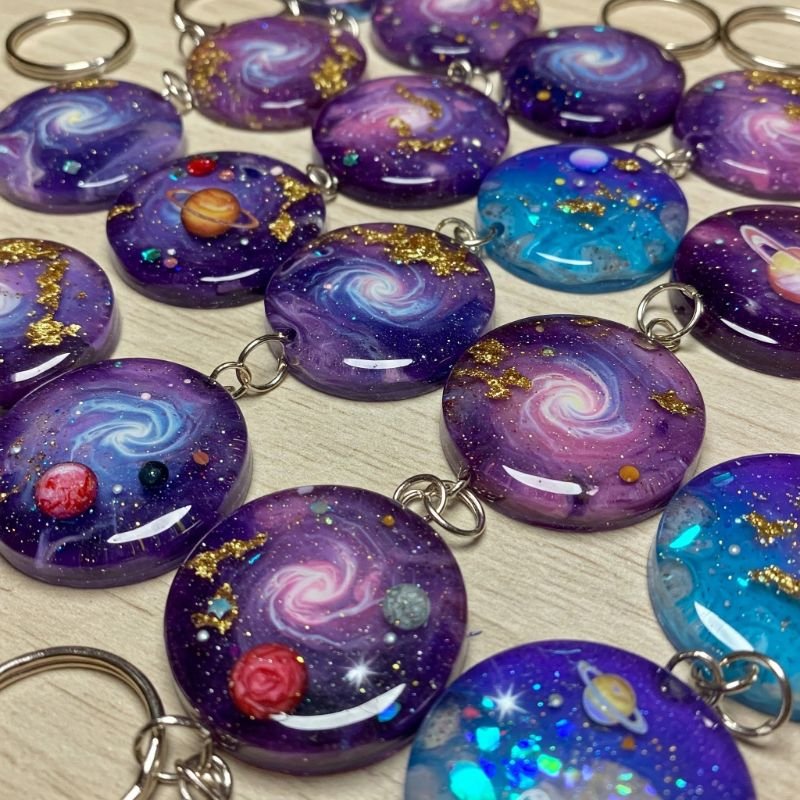
3. Galaxy-Inspired Resin Keychains
For a touch of cosmic glam, try galaxy-themed resin keychains that capture the swirling mysteries of the universe. You’ll need glitter, shimmer pigments, or even glow-in-the-dark powders to achieve that interstellar vibe. Start by mixing your resin, then separate it into small cups for each color—think navy blues, deep purples, and teal greens. Layer these hues into the mold, letting them bleed together just slightly for a nebula-like effect. Add a dash of metallic pigment or holographic flakes to evoke stardust. After pouring, you can swirl the resin gently with a toothpick to mimic cosmic whorls. Once cured, attach keychain hardware to transform your mini galaxy into a functional accessory. These keychains not only help you keep track of your keys, but also make a stellar first impression.
4. Oceanic Resin Trays
Imagine serving drinks on a tray that looks like a slice of the ocean, complete with gentle waves and sun-kissed foam. Oceanic resin trays are visually stunning, evoking seaside bliss right in your home. To get started, select a sturdy wooden or metal tray as your base—just ensure it can hold liquid without leaking. Layer tinted blue resin for the water portion, beginning with darker hues and moving toward lighter shades near the “shore.” Swirl white resin along the transition zone to create the illusion of crashing waves. Tapping or blowing through a straw can lend a foamy texture. Once cured, your tray becomes an art piece that doubles as practical serveware. Place it on a coffee table or use it to serve appetizers at a backyard gathering; it’s sure to spark conversation.

5. Faux Geode Art Pieces
Faux geode art pieces let you tap into geology without needing a pickaxe. These creations mimic the shimmering crystal formations you might find in a rock’s hollow cavity. Start by crafting a base shape using materials like foam board or silicone molds. Mix tinted resin in multiple shades that evoke the gemstone you have in mind—amethyst purples, rose quartz pinks, or agate blues. Pour the resin in layers, adding crushed glass or chunky glitter to mimic the faceted sparkle of natural crystals. Edges can be enhanced with metallic paint pens—gold or silver lines replicate the mineral veins that define real geodes. The final piece not only glistens but also adds a touch of geological wonder to any room, all while requiring no mining gear whatsoever.
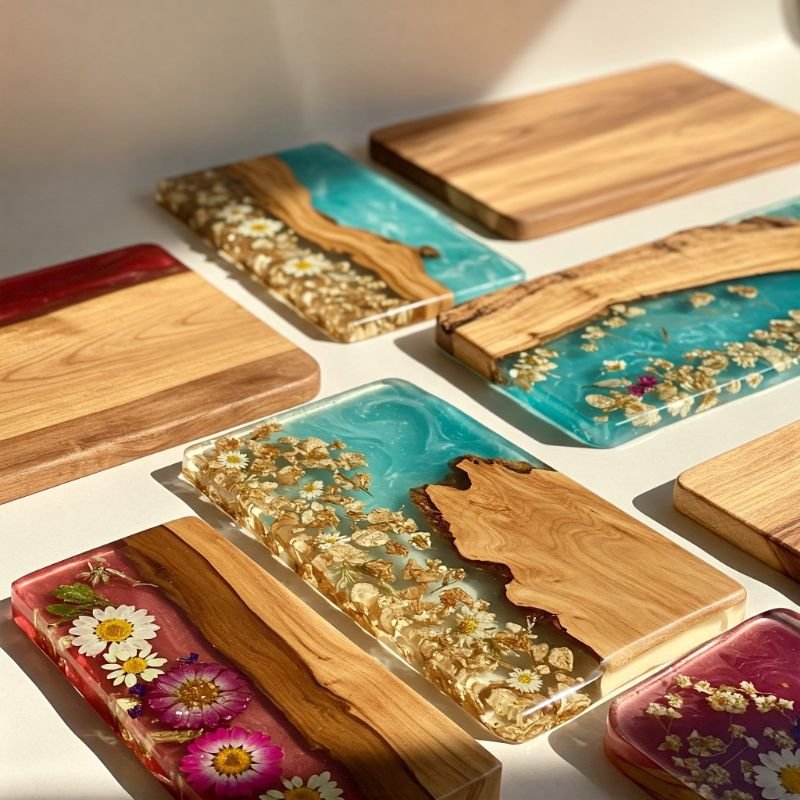
6. Resin and Wood Serving Boards
Resin and wood serving boards combine rustic charm with sleek modernity. Imagine a wooden plank marbled with translucent resin that appears to flow through the grain like a hidden river. To create this effect, start with a wooden cutting board or a slab of reclaimed wood. Use painters’ tape to seal off areas you’d like to fill with resin, ensuring a leak-free seal. Mix pigmented resin in your chosen colors—coastal blues for a beachy theme, or smoky grays for an industrial vibe—and pour it into the taped sections. Let it cure thoroughly before sanding the edges smooth. The result? A statement piece that can be used for cheese, fruit, or simply as a decorative accent in your kitchen. Every time you host a gathering, watch your guests gravitate toward this functional art.
7. Pressed Flower Resin Bookmarks
For bookworms who value both utility and beauty, pressed flower resin bookmarks are a dream come true. Start by collecting small, flat blooms—think daisies, pansies, or even delicate petals from larger flowers. Once pressed and dried, arrange them in a slim silicone mold sized for bookmarks. Mix your resin carefully, pouring enough to form a thin layer over the flowers. Use a toothpick to nudge any petals that move out of place. After curing, you’ll have a crystal-clear bookmark showcasing natural floral elegance. These bookmarks aren’t just placeholders; they elevate the entire reading experience, turning each chapter into a mini voyage through a botanical wonderland. Personalize them further with ribbons or tassels, making every page flip feel like a gentle stroll through a garden path.

8. Resin-Infused Home Décor Letters
Customized home décor letters offer a fantastic way to celebrate names, inspirational words, or even an inside joke. Typically found in craft stores as wooden or cardboard letters, these pieces serve as the perfect substrate for your resin transformations. Coat the letter’s front surface with a thin layer of clear resin or add pigments to match your color scheme. You can embed glitters, dried flowers, or even tiny seashells to capture a theme or memory. Because each letter is small enough to handle easily, experimenting with multiple colors and designs becomes less intimidating. When cured, these resin-infused letters can be displayed on shelves, hung on walls, or arranged to spell out a meaningful phrase. Their glossy finish not only catches the eye but also invites a closer look into your personalized flair.

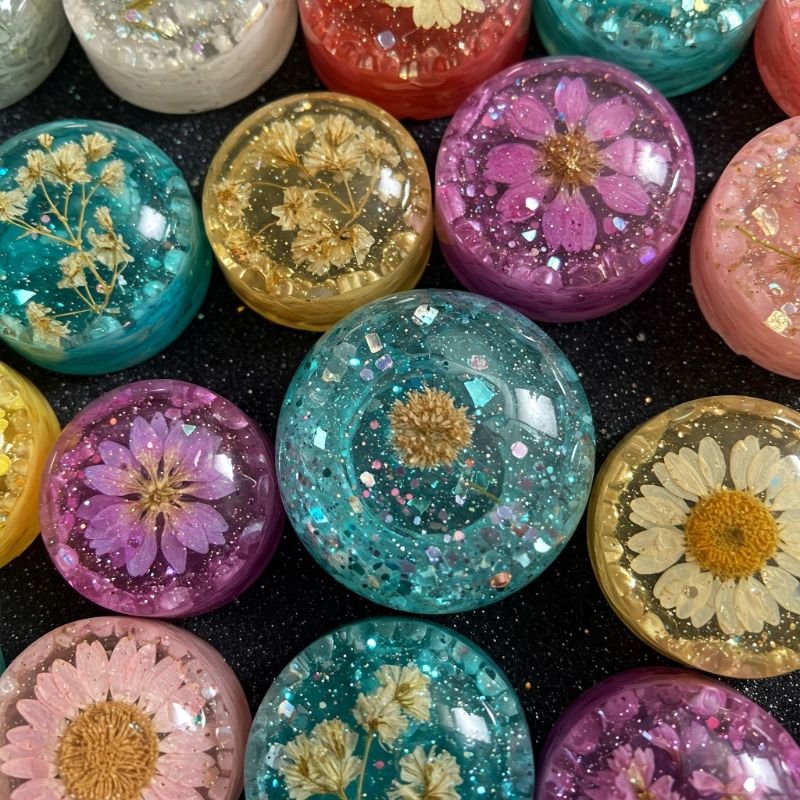
9. Colorful Resin Paperweights
Few desk accessories spark joy like a vibrant resin paperweight. Think of them as tiny art sculptures that also keep your paperwork in place. Start with a mold in a shape you love—rectangles, spheres, or abstract geometric forms. Mix your resin in separate cups, each tinted with a different hue. Carefully pour them in layers, creating gradients or swirling patterns for a mesmerizing effect. If you’re feeling adventurous, drop in metallic flakes or shimmering mica for extra depth. The end result is a substantial, glossy piece that glints in the sunlight streaming through a window. Not only does it tidy up your workspace, but it also becomes a mini conversation starter whenever colleagues or friends catch a glimpse. After all, who said office essentials have to be boring?
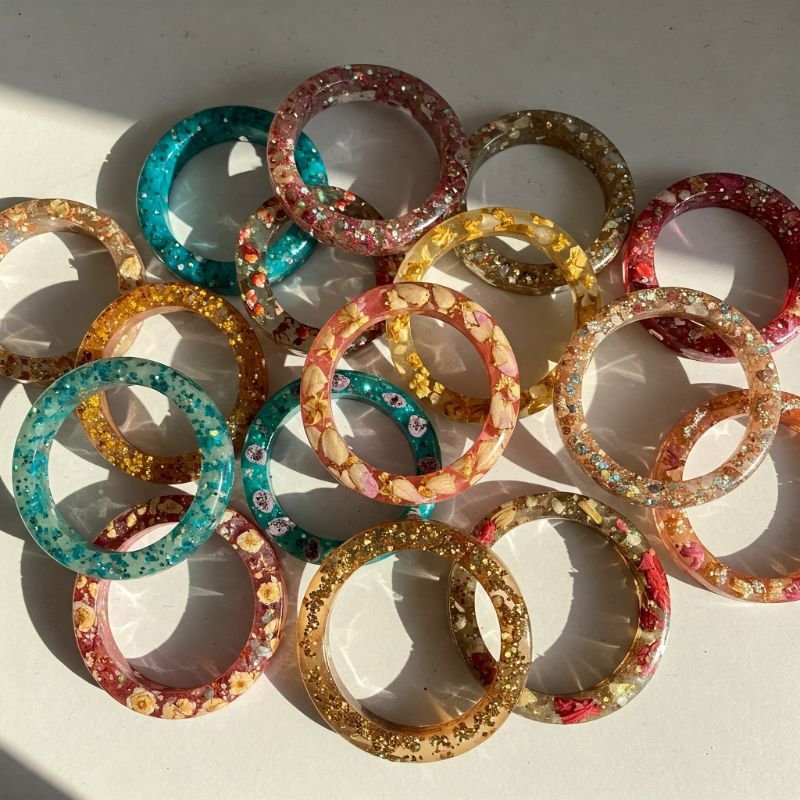
10. Retro Resin Bangles
Step back into the funky flair of the ‘70s and ‘80s with retro-inspired resin bangles. These chunky accessories scream confidence and fun, making them perfect for a night out or a day in the sunshine. To begin, choose a circular silicone mold sized for wrist jewelry. Mix your resin, adding dyes in neon pink, electric blue, or glittery gold if you’re feeling extra bold. You could even swirl multiple colors to imitate a tie-dye effect. Carefully pour the mixture, rotating the mold to distribute color patterns evenly. After curing, pop the bangle out and give it a quick buff if needed. Throw it on with a simple outfit, and watch your wrist become the focal point—like wearing a little piece of disco-era sparkle wherever you go.
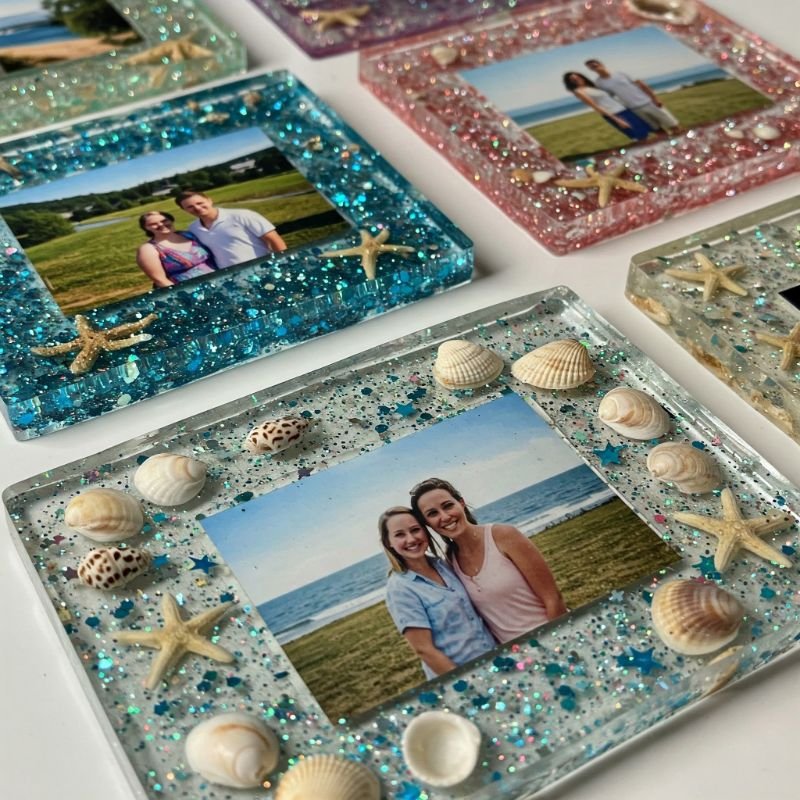
11. Resin Photo Displays
Why keep cherished photographs tucked away in albums when you can transform them into high-gloss resin displays? Imagine a precious family snapshot encased in crystal, ready to stand upright on a mantle. Start by choosing a sturdy backing—wood, canvas board, or even a ceramic tile can work. Secure the printed photo in place, then pour a layer of resin over it. Spread carefully to ensure even coverage, using a small torch or heat gun to banish pesky bubbles. Once cured, you’ll have a protective, glass-like layer that intensifies colors and preserves memories for years to come. These photo displays add a modern twist to old-school framing, inviting compliments from anyone who sees them. Plus, the process itself feels like enshrining a memory in time—literal layers of reflection and nostalgia.
12. Marbled Resin Phone Cases
Give your phone a runway-worthy makeover by crafting a marbled resin case. Start with a clear phone case, ensuring it fits your device snugly. Lay it on a flat surface and apply a thin layer of resin mixed with your favorite color pigments—white, black, or metallic tones often pair nicely for a chic marbled look. Use a toothpick or a small brush to swirl different shades, mimicking the organic veining you see in marble. For an extra flourish, add gold leaf flakes along the “veins.” Allow the resin to cure thoroughly, then test the case for fit. Once done, your phone becomes a stylish statement piece that merges art and practicality. The best part? Each swirl is one-of-a-kind, so your phone’s design stays uniquely yours.

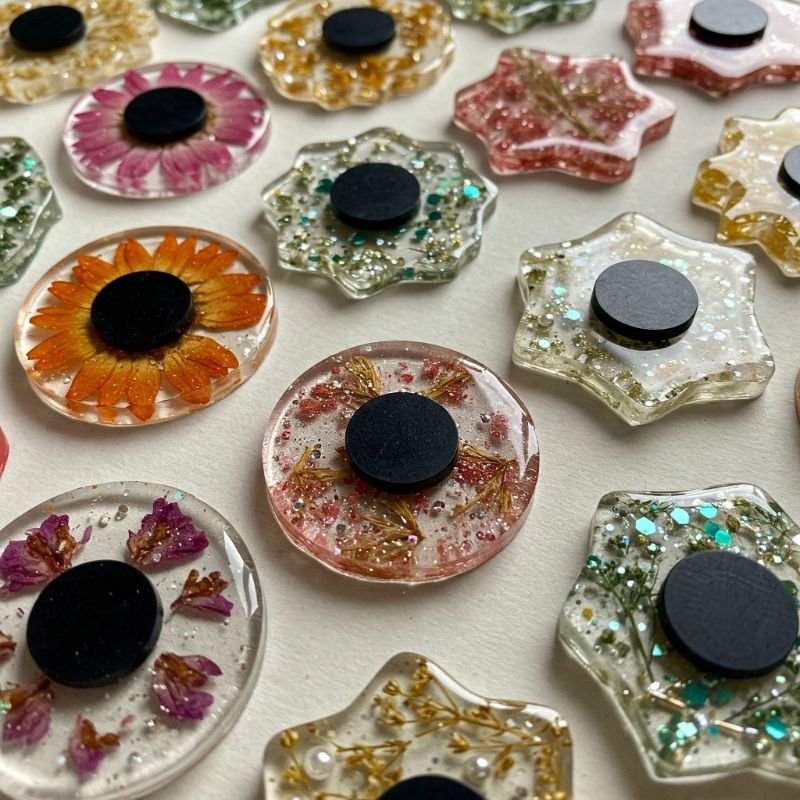
13. Resin Magnets with Tiny Accents
Every time you open the fridge, greet yourself with a delightful resin magnet that houses a tiny accent—like a miniature seashell, a piece of candy, or a teeny dried flower. All you need is a small mold—think circular or fun-shaped silicone trays. Mix your resin in a small batch and decide on an accent piece that sparks joy. Place the accent at the base of the mold, pour resin carefully on top, and let it cure. Once fully hardened, attach a small, strong magnet to the back. Arrange several of these on your refrigerator or a magnetic board, and watch how they add whimsy to your daily routine. They also make adorable gifts for friends who appreciate a pop of color in everyday objects.
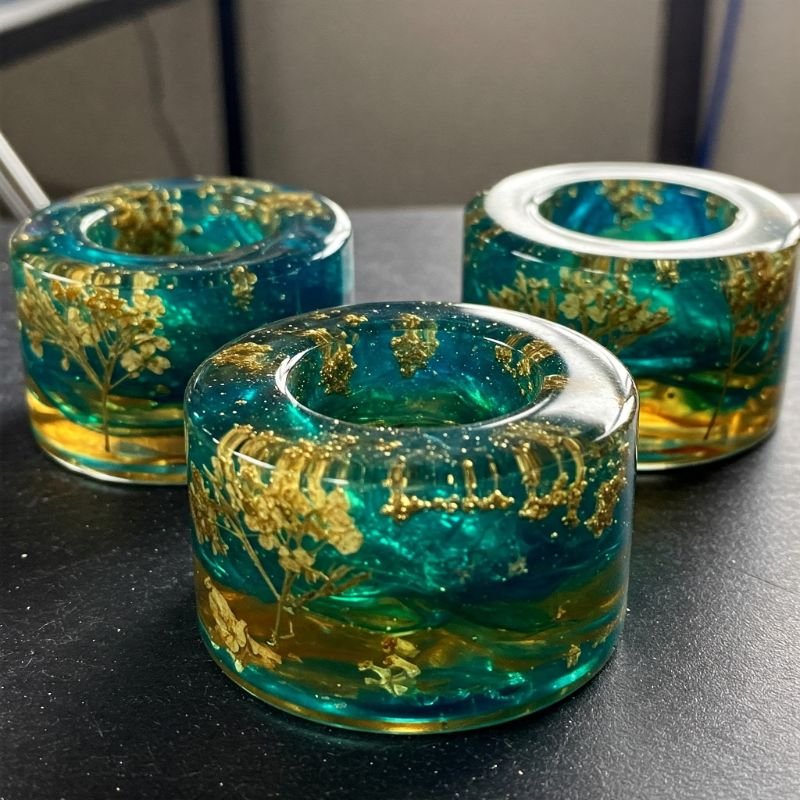
14. Resin Candle Holders
Candlelight sets a cozy mood, and resin candle holders elevate that ambiance to the next level. You can use silicone molds shaped like cylinders or geometric prisms—just ensure the diameter matches a standard votive or tealight. Mix your resin with translucent dyes or embed decorative elements like dried petals, glitter, or small crystals. Consider layering: pour a bit of resin, let it partially set, then add another color or accent. This approach can create a captivating, layered effect once the candlelight shines through. After the final cure, you’ll have a sturdy holder that refracts and glows when a candle is lit inside. Place it on your dining table or in a dim corner of your living room, and watch flickers of light dance across the glossy surface.
15. Layered Resin Art for Wall Hangings
Layered resin art for wall hangings turns a blank canvas into a multi-dimensional feast for the eyes. Start by selecting a sturdy base—wood panels are a popular choice for their strength. Sketch a design or simply wing it with abstract patterns. Pour resin in thin layers, adding color pigments or swirling powders between each coat. Allow each layer to cure before adding the next, creating visible depth that pulls the viewer into your artwork. Embellish with metallic leaf, microbeads, or crushed glass for textural flair. The final piece can appear to shift and change depending on how the light hits it, almost as if it’s alive. Hang it in a well-lit area where the glossy layers can shimmer and reveal themselves, ensuring your guests do a double-take every time they pass by.

Conclusion
Resin isn’t just another craft medium—it’s an invitation to unleash your creativity, capture cherished moments, and experiment with colors, textures, and embedded accents. From whimsical jewelry to sophisticated home décor, the possibilities are as vast as your imagination. The glossy, glass-like finish that resin imparts is nothing short of captivating, making each creation feel like a miniature work of art. Sure, it can be tricky to master the perfect pour without bubbles, but that’s half the adventure. Each new project is a chance to refine your technique and discover fresh ideas. So roll up your sleeves, gather your supplies, and give these 15 resin craft ideas a shot. Who knows? You might stumble upon your next lifelong artistic passion.
Frequently Asked Questions
Q1: How do I avoid bubbles in my resin projects?
Stir the mixture slowly and use a heat source—like a torch or heat gun—over the surface to pop bubbles after pouring. Also, working in a warm environment helps.
Q2: Can I use any type of resin for these crafts?
Generally, epoxy resin is ideal for most projects, but UV resin can work for smaller items. Always follow product guidelines for best results.
Q3: Is resin safe to use at home?
Yes, if you take precautions. Work in a well-ventilated area, wear gloves, and use a protective mask if recommended by the manufacturer.
Q4: How long does resin take to cure completely?
Most epoxy resins need at least 24 hours. Some may require up to 72 hours for a full cure, so check specific product instructions.
Q5: Can I add photos or paper cutouts in my resin art?
Absolutely! Just make sure the paper is sealed or laminated to prevent soaking, and then embed it carefully for a clear, long-lasting finish.
Stay up to date with our latest ideas!